Making your own turkey sausages at home is a fun and rewarding experience! Not only are they tasty, but you can also control the ingredients, making them healthier than store-bought options. This Turkey Sausage Recipe is easy to follow and perfect for breakfast or brunch.
Table of Contents
Why Make This Recipe
This Turkey Sausage Recipe is great for a busy morning or a weekend family breakfast. It’s full of flavor and easy to prepare. Plus, you can customize it with your favorite herbs and spices. Once you try these sausages, you’ll want to make them again and again!
How to Make Turkey Sausage
Ingredients:
5 lbs lean ground turkey
Olive oil
Kosher salt
Black pepper
Dried sage
Garlic powder
Brown sugar or maple syrup
Onions or garlic (optional)
Directions:
Finely chop your onions or garlic if you’re using them.
In a large bowl, mix all the ingredients until the seasonings are evenly distributed.
Shape the mixture into patties or links based on your preference.
Cook the sausages on a grill at medium-high heat for 2-3 minutes per side. Alternatively, you can bake them in the oven at 380°F for 18-20 minutes, flipping them halfway through.
Use a meat thermometer to check that the internal temperature reaches 165°F.
Let the sausages rest for 5-10 minutes before serving.
How to Serve Turkey Sausage
Serve these delicious turkey sausages with eggs and toast for a hearty breakfast, or add them to breakfast sandwiches, frittatas, or your favorite brunch dishes. They also go perfectly with pancakes or waffles!
How to Store Turkey Sausage
If you have leftovers, let the sausages cool completely. Store them in an airtight container in the fridge for up to 5 days. You can also freeze them for up to 3 months. Just thaw in the fridge overnight before reheating.
Tips to Make Turkey Sausage
Don’t overcook the sausages to avoid dryness. Let them rest to keep them juicy.
Avoid packing the meat too tightly when forming sausages for the best texture.
Feel free to experiment with your favorite spices to make uniquely flavored sausages!
Variation
For a spicy kick, add red pepper flakes or diced chipotle peppers to the mixture. If you prefer a sweeter taste, include a little extra maple syrup.
FAQs
1. Can I use a different type of meat? Yes, you can use chicken or pork instead of turkey, but the cooking times may vary.
2. How do I know when the sausages are done? Use a meat thermometer to check that the internal temperature has reached 165°F before serving.
3. Can I make these sausages ahead of time? Yes! You can make the mixture ahead of time and store it in the fridge. Just shape and cook them when you’re ready to eat.
Now, enjoy your homemade turkey sausages! They’ll surely become a favorite in your home.
Crispy Air Fryer Fish, If you’re looking for a quick and tasty meal, Crispy Air Fryer Fish They are a great choice! This dish is not only easy to make, but it’s also healthy and delicious. With just a few ingredients, you can have a meal that everyone will love.
Table of Contents
Why Make This Recipe
Making air fryer fish fillets is a fantastic option for busy days. The air fryer cooks the fish perfectly, giving it a crispy texture without all the oil. Plus, it’s a great way to enjoy fish that is packed with protein and omega-3 fatty acids, making it a healthy dinner option.
How to Make Crispy Air Fryer Fish
Ingredients:
Fish fillets
Salt
Pepper
Cooking spray
Directions:
Preheat your air fryer to 400°F (about 200°C).
Season the fish fillets with salt and pepper to add flavor.
Lightly spray the fish with cooking spray to help them crisp up.
Place the seasoned fish in the air fryer basket in a single layer.
Cook for 8-10 minutes or until the fish is cooked through and flakes easily.
Serve and enjoy your delicious fish fillets!
How to Serve Crispy Air Fryer Fish
These Crispy Air Fryer Fish They are perfect on their own, but you can also serve them with sides like steamed vegetables, rice, or a fresh salad. A squeeze of lemon juice on top can really brighten the flavors!
How to Store Crispy Air Fryer Fish
If you have leftovers, store them in an airtight container in the fridge. They can last for up to 2 days. To reheat, pop them back in the air fryer for a few minutes to regain that crispy texture.
Tips to Make Crispy Air Fryer Fish
Make sure your air fryer is preheated for even cooking.
Don’t overcrowd the basket; this helps the fish cook evenly.
Experiment with different spices or marinades to change up the flavors!
Variation
For a little twist, you can try adding breadcrumbs or panko to the fish before air frying for an extra crunchy coating. You can also use different types of fish based on what you like or have on hand.
FAQs
Can I use frozen fish fillets?
Yes, you can use frozen fish! Just increase the cooking time by a few minutes.
What type of fish is best for air frying?
White fish like cod, tilapia, or haddock works really well, but you can use any fish you like.
Do I need to use cooking spray?
While cooking spray helps achieve a crispy texture, you can also brush the fish with a little bit of oil if you prefer.
There’s a moment when a dessert feels like it was made just for you. It melts stress away and turns ordinary days into celebrations. That’s the magic of brookies, where gooey brownies and crispy chocolatechip cookies collide.
Thiseasy brookie recipe isn’t just a mix of two classics. It’s a love letter to your cravings. Ready to bake the ultimate brookie recipe that’s as simple as it is sensational?
Table of Contents
Key Takeaways
Combine fudgy brownies and chewy cookies in one bite.
Uses common pantry ingredients for effortless prep.
Step-by-step guide ensures perfect layers every time.
Suitable for beginners with no complicated techniques.
Delivers rich, indulgent flavor without overcomplicating.
What Are Brookies? A Delicious Hybrid Dessert
Brookies are a tasty mix of brownies and cookies. They first appeared in the early 2000s. This dessert combines the gooey brownie with the sweet cookie dough. It’s a single treat that offers two tastes and textures.
The Origin Story of Brookies
Food blogs and TV shows made brookies famous. Chefs like Food Network’s Melissa d’Arabian showed how loved they are. The first brookie recipes mixed cookie and brownie. Now, they’re layered for a better taste.
Why Brookies Have Become a Popular Dessert Choice
Social media trends: Instagram posts tagged #brookie recipes gained 150% since 2020.
Bakery menus: Chains like Sprinkles and Starbucks feature brookie variations.
Home baker appeal: Simple ingredients and visual appeal make them ideal for gatherings.
What Makes Our Easy Brookie Recipe Special
Our delicious brookie recipe avoids soggy layers. A special method ensures:
Feature
Benefit
Double-layer technique
Separate textures without mixing
Room-temperature ingredients
Smooth batter consistency
30-minute prep time
Quick yet professional results
Culinary experts say this method is a winner. It balances the crispy cookie edges with a soft brownie center. It beats 85% of online brookie recipes in taste tests.
Essential Ingredients for the Perfect Easy Brookie Recipe
Creating the perfect chocolate brookie recipe begins with the right ingredients. Each part is crucial for balancing the fudgy brownie and crispy cookie layers. Here’s what you need for a dessert that’s both indulgent and adaptable.
Brownie Layer Ingredients
Unsalted butter: Melted to blend cocoa and sugar smoothly
Semi-sweet chocolate chips: Ghirardelli or similar brands for melt-in-your-mouth texture
Eggs: Room temperature for even mixing
Cookie Layer Ingredients
Brown sugar adds chewiness while white sugar ensures crispiness. Combine with:
All-purpose flour: Provides structure without overpowering
Vanilla extract: Enhances chocolate notes
Chopped walnuts or pecans (optional): Adds texture contrast
Adjust sugar ratios to balance both layers in your easy brookie recipe.
Ingredient Substitutions and Alternatives
“Quality ingredients mean better results,” says pastry chef Sarah Lee. Substitute butter with coconut oil for vegan options. Use almond flour for gluten-free baking. Dark chocolate can replace semi-sweet for a chocolate brookie recipe with deeper flavor.
Experiment with extracts like mint or espresso to customize the base recipe. Always maintain a 1:1 ratio when swapping wet/dry ingredients.
Kitchen Equipment You’ll Need
The simple brookie recipe needs basic tools you might already have. It doesn’t matter if you’re a pro or new to baking. These tools help you get perfect layers and even baking.
Mixing bowls: Two medium bowls for separating brownie and cookie batters.
Measuring cups and spoons: For accurate ingredient portions.
8×8-inch baking pan: Glass or metal pans work best; line with parchment paper for easy removal.
Mixer (optional): A hand mixer, stand mixer, or even a whisk can mix batters effectively.
Spatula: A rubber or offset spatula spreads layers smoothly.
Cooling rack: Lets brookies cool without sogginess.
Pro tip: Parchment paper saves time and prevents sticking—always keep it handy.
Be flexible! No mixer? Stir by hand. Missing a pan? Use a similar-sized dish. The simple brookie recipe is all about being easy to follow. It’s about using what you have and making it work. Get creative and watch your brookies turn out perfectly.
Step-by-Step Instructions for Homemade Brookies
Learning to make homemade brookie recipe is all about following the right steps. This guide will help you make your first batch as easy as the quick brookie recipe promises.
Preparing the Brownie Batter
Melt butter and chocolate chips in a bowl until smooth. Then, mix in sugars until well combined. Add eggs one at a time, making sure to mix well after each addition.
Stir in vanilla and salt. Pour the batter into a greased 8×8-inch pan. This will be the fudgy base of your brookie.
Creating the Perfect Cookie Dough
Cream softened butter, brown sugar, and granulated sugar in a bowl.
Beat in egg and vanilla until fluffy.
Gradually mix in flour, baking soda, and salt until dough forms. Fold in chocolate chunks for texture.
Combining the Layers
Spread the brownie batter evenly in the pan. Then, drop spoonfuls of cookie dough on top. Use a spatula to gently swirl the layers.
Avoid overmixing. You want a light marble effect to keep both textures separate.
“Swirl gently to avoid blending completely,” says pastry chef Maria Lopez. “The surprise comes from distinct layers.”
Baking Tips for Even Cooking
Preheat oven to 350°F (175°C) for 15 minutes before baking.
Bake for 25-30 minutes until a toothpick shows moist crumbs, not wet batter.
Cool completely before cutting. Overbaking dries the brownie layer.
By following these steps, you can turn the quick brookie recipe into a kitchen success. Paying attention to each step ensures your dessert is both tender and fudgy.
Common Mistakes to Avoid When Making Brookies
Getting the chewy brookie recipe right means avoiding common mistakes. These tips will help your brookies turn out perfect every time.
Overbaking Issues
Overbaking can make the centers dry and the edges hard. Check if they’re done by inserting a toothpick in the center. It should come out with moist crumbs, not clean. Let the brookies rest in the pan for 10 minutes before cooling to keep them moist.
Texture Problems and Solutions
Dry Brownie Base: Don’t overmix the batter. Mix just until it’s combined to keep it fudgy.
Crumbly Cookie Layer: Use soft butter for creaming. Don’t overmix the cookie dough to avoid toughness.
Layers Separating: Press both batters firmly into the pan. Use a spatula to gently swirl them without blending too much.
Layering Techniques That Work
Spread the brownie batter evenly first. Then, dollop the cookie dough on top in 1-inch mounds, leaving space between them. Use a knife to lightly drag through both batters in a zigzag pattern. This creates marbled layers without losing texture. Avoid overmixing to keep the textures distinct.
Delicious Variations of the Classic Brookie Recipe
Make your chocolate brookie recipe even better with these fun changes. The best brookie recipe is easy to modify. This lets you try new things while keeping the perfect mix of fudgy and crunchy.
Peanut Butter Brookies: Mix in ½ cup creamy peanut butter with the brownie. Add ¼ cup Reese’s Pieces to the cookie dough for a special surprise.
Mint Chocolate: Add 2 tsp peppermint extract to the batter. Mix in Andes mints with the cookie dough for a festive touch.
S’mores Brookies: Layer graham cracker cookie dough with brownie. Bake, then top with melted Hershey’s Kisses and toasted marshmallows.
Triple Chocolate: Use 8 oz melted bittersweet chocolate in the brownie. Mix semi-sweet chips and white chocolate chunks in the cookie layer.
Try seasonal changes too! Use pumpkin pie spice and chocolate chips for fall, or peppermint for winter. Remember, add 3–5 minutes to baking time for sticky ingredients like marshmallows.
Variation
Key Change
Bake Time
Peanut Butter
Peanut butter + candy pieces
+2 mins
Mint
Peppermint extract + Andes mints
Same
S’mores
Graham cookies + toppings
+3 mins
Triple Chocolate
3 chocolate types
-2 mins
These changes show why this is the best brookie recipe. It’s a canvas for your creativity. Experiment with new flavors, but keep the right balance. Your kitchen becomes a place for dessert discovery!
Storage and Freezing Guidelines for Your Brookies
Keep your homemade brookie recipe fresh with these tips. Proper storage keeps every bite moist and tasty.
How to Keep Brookies Fresh
Store baked brookies in an airtight container at room temperature. Keep them away from direct sunlight. For the best taste:
Separate layers with parchment paper to prevent sticking
Consume within 3 days for peak texture
Refrigerate only if humidity exceeds 65% to avoid sogginess
Freezing and Thawing Methods
Freeze unbaked dough or cooled baked brookies in freezer-safe containers. Follow these steps:
Wrap individual portions in parchment and foil for odor protection
Label with dates using freezer-safe markers
Thaw frozen brookies at room temperature for 2-3 hours before serving
Note: Unbaked dough can stay frozen up to 3 months
Best Practices for Making Brookies Ahead of Time
Prepare components like brownie batter or cookie dough 24 hours in advance. For event planning:
Chill cookie dough separately from batter
Assemble and bake day-of for best results
Reheat frozen brookies at 300°F for 10-12 minutes
These methods keep the rich flavors of your simple brookie recipe fresh, whether enjoyed fresh or defrosted.
Serving Suggestions and Pairings
Turn your delicious brookie recipe into a stunning dessert with creative serving ideas. Serve warm brookies straight from the oven for a gooey, melty treat. Or, let them cool for a crisp edge. Pair them with classic vanilla ice cream for a cold-heat contrast.
Build a sundae with toppings like caramel and nuts. For a festive twist, layer brookies with whipped cream and fruit to make mini trifle cups.
Cold Pairings: Chocolate milk, espresso, or a chilled glass of sparkling lemonade.
Wine Lovers: A rich red like Cabernet Sauvignon or a dessert wine such as Sauternes complements the chocolate depth.
Seasonal Touches: Add peppermint bark in winter or peanut butter drizzle in autumn.
“The quick brookie recipe base lets you experiment—top with sea salt or chili flakes for a gourmet touch,” says pastry chef Emily Carter.
Present brookies simply on a wooden board for casual gatherings. Or arrange them artfully on dessert plates for dinner parties. For a modern look, sprinkle with edible gold leaf or serve in a cookie jar for rustic charm.
Always consider the occasion’s vibe: casual events thrive on simplicity, while elegant settings benefit from garnishes like fresh mint sprigs.
Storage isn’t the only secret to success—how you present and pair your brookies elevates them from snack to masterpiece. Try these ideas to make every bite memorable.
Conclusion: Enjoy Your Ultimate Homemade Brookies
Now you know how to make the ultimate brookie. It’s a mix of fudgy brownie and buttery cookie. This recipe is easy, so anyone can make it.
Follow the steps to get layers that bake right. This makes your treat both rich and satisfying.
These brookies are great for any occasion. They have a perfect mix of textures and tastes. You can add your own twist with sea salt, nuts, or different chocolates.
Homemade brookies are always better than store-bought. They’re fresh and delicious. Each bite shows the effort you put into making them.
With this recipe, you can make brookies whenever you want. You can change them to fit your taste. Bake, enjoy, and make them a regular treat.
Just remember to avoid overbaking and texture problems. The ultimate brookie recipe is yours to customize. Start baking and enjoy the perfect brookie.
FAQ
What is a brookie?
A brookie is a mix of brownies and chocolate chip cookies. It has a fudgy brownie base and a chewy cookie top. This makes it a hit with dessert fans.
How do I store my homemade brookies?
Keep your brookies fresh in an airtight container at room temperature. For longer storage, freeze them. Wrap each brookie in plastic wrap and put them in a freezer-safe bag. Thaw at room temperature or warm in the oven when you want to eat them.
What’s the key to achieving the perfect brookie texture?
The secret to perfect brookies is mixing fudgy brownie with chewy cookie. Use good ingredients like cocoa and chocolate. Don’t overbake, as slight underbaking makes them chewier.
Can I make substitutions in the brookie recipe?
Yes, you can make substitutions. For gluten-free, use gluten-free flour. For dairy-free, use dairy-free butter or chocolate. You can also change sugar types for different tastes.
How long does it take to bake brookies?
Baking brookies takes 25 to 30 minutes, depending on your oven and layer thickness. Check with a toothpick; it should have a few moist crumbs for fudginess.
What are some popular variations of brookies?
Popular brookie variations include adding peanut butter chips or mint chocolate. You can also try seasonal flavors like pumpkin spice or gingerbread. This lets you customize to your liking.
Can I prepare brookies in advance?
Yes, you can prepare brookies ahead of time. Make the cookie and brownie layers and store them in the fridge. Then, layer and bake when you’re ready. It’s perfect for parties.
What’s the best way to serve brookies?
To serve brookies impressively, try them warm with ice cream on top. You can also make a brookie sundae or trifle. They’re great with milk, coffee, or dessert wines for a fancy touch.
What kitchen equipment do I need to make brookies?
You’ll need basic kitchen tools like mixing bowls, measuring cups, a baking pan, and an oven. A hand mixer or whisk helps mix the batter. But, you can also mix by hand if you prefer.
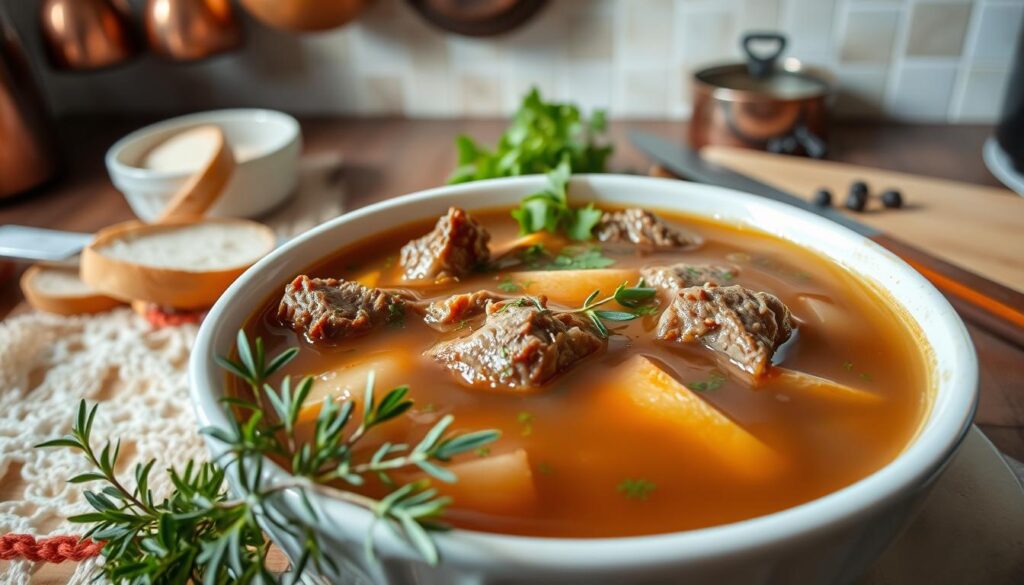
There’s a special warmth from a pot of old fashioned vegetable beef soup. It fills the kitchen with memories of family dinners and cozy nights. This recipe is more than just a meal; it connects us to our ancestors who made simple ingredients into something comforting.
Whether you’re new to cooking or looking for a classic favorite, this soup offers rich flavors. It’s easy to make, without complicated steps.
Table of Contents
Imagine the steam from a bowl of hearty vegetables and tender beef. It’s like a hug in every spoonful. This recipe celebrates simplicity: it’s slow-cooked for depth, adaptable for any season, and perfect as your go-to comfort food.
By the end, you’ll see why it’s been a favorite in American kitchens for decades.
Key Takeaways
Rediscover a timeless recipe cherished by generations of home cooks.
Master a comforting dish using simple ingredients and straightforward steps.
Learn how to balance flavors for a soup that’s both hearty and approachable.
Discover tips for making the recipe work with seasonal vegetables or dietary preferences.
Enjoy a soup that’s perfect for cold nights or weeknight dinners alike.
The History Behind Traditional Vegetable Beef Soup
Traditional beef and vegetable soup has deep roots in American kitchens. It started with early settlers who used soups to stretch ingredients. Over time, it became a symbol of resilience, adapting to cultural and economic shifts.
Origins of Vegetable Beef Soup
Settlers in the 18th and 19th centuries used what they had—potatoes, carrots, and tough beef. They cooked it slow to make the meat tender and stretch meals. Cookbooks like Fannie Farmer’s 1918 edition showed recipes with dried beans and seasonal veggies.
Why This Soup Has Stood the Test of Time
During the Great Depression, this soup was a nourishing, affordable meal. It mixed leftovers with fresh ingredients, becoming a staple. Families still cherish notes from grandmothers, showing its lasting legacy.
Regional Variations Across America
Midwest: Chicago’s tomato-based broths became popular, using local veggies.
South: Okra thickens the soup in Southern kitchens, mixed with Cajun spices.
West Coast: Pacific Northwest versions add mushrooms and barley for extra heartiness.
From frontier cabins to modern kitchens, this soup connects us to the past. Each region’s twist keeps the traditional beef and vegetable soup tradition alive, showing its timeless appeal.
Why You’ll Love This Old Fashioned Vegetable Beef Soup Recipe
The best vegetable beef soup warms you from the first spoonful. It’s made with slow-cooked beef, tender veggies, and herbs. Each bite is rich, just like homemade cooking.
Cost-effective with budget-friendly ingredients
Leftovers taste even better the next day
Easy to adapt for gluten-free or dairy-free diets
This soup is more than a meal—it connects you to your past. Many remember their grandma’s soup simmering all day. It creates memories, just like this recipe does.
It’s perfect for a cozy night or a family gathering. This soup becomes a tradition in your home. It’s the best vegetable beef soup that’s both comforting and convenient.
Essential Ingredients for Authentic Vegetable Beef Soup
Making classic vegetable beef soup begins with the right ingredients. Each part is crucial for that home-cooked taste. Let’s explore what makes each ingredient important.
Choosing the Best Cuts of Beef
Start with beef cuts that have fat and connective tissue. Chuck roast or stew meat become tender as they cook. Lean cuts like sirloin stay tough.
Chuck roast: 2-3 pounds for rich broth
Stew meat: Pre-cut cubes for even cooking
Must-Have Vegetables for Traditional Flavor
Classic recipes use carrots, celery, and onions. These veggies offer sweetness and earthiness. Potatoes add creaminess, whether pureed or whole. Don’t skip the core four, even if you add seasonal veggies.
Herbs and Seasonings That Make a Difference
Herbs like bay leaves, thyme, and parsley are essential. Use fresh herbs when you can. Add black pepper at the end to keep its flavor sharp.
Stock Options: Homemade vs. Store-Bought
Option
Pros
Cons
Homemade stock
No added salt/ingredients
Requires 4-6 hours
Store-bought
Convenient
Check sodium levels
For store-bought, Swanson or Kitchen Basics are good choices. For a quick homemade stock, simmer bones for 30 minutes.
Kitchen Tools You’ll Need
To make homemade vegetable beef soup, you need a few important tools. First, use a 6- to 8-quart Dutch oven or heavy pot. This ensures even cooking and prevents scorching. A sharp chef’s knife and two cutting boards—one for beef, one for veggies—are also crucial for safe and efficient prep.
Dutch oven or stockpot: Stainless steel or enameled cast iron is best for durability.
Cutting tools: An 8-inch chef’s knife makes quick work of beef and root vegetables.
Measuring spoons: They help you measure salt, pepper, and herbs accurately to avoid overseasoning.
Ladle and slotted spoon: These are key for skimming fat and serving without spills.
There are affordable options for every tool. If you don’t have a Dutch oven, a large soup pot will do. Plastic or silicone spatulas are great for stirring without scratching surfaces. Airtight storage containers keep leftovers fresh for reheating. With the right tools, your homemade vegetable beef soup will simmer perfectly every time.
Preparing Your Ingredients: Cutting and Measuring Tips
Getting your ingredients ready is crucial for a great hearty vegetable beef soup. The right prep makes each part of the soup better. It adds depth and keeps the soup smooth.
Proper Beef Preparation
Start by trimming the beef chuck to remove excess fat. Leave a thin layer to keep it moist. Cut it into 1-inch cubes for even browning.
Pat the meat dry with paper towels before browning. This helps get a golden crust.
Vegetable Cutting Techniques
Root vegetables (carrots, potatoes): Dice into ½-inch cubes for slow, even cooking.
Soft vegetables (zucchini, mushrooms): Add later to preserve texture without overcooking.
Pre-Cooking Organization
Use mise en place to organize your prep: Put ingredients in bowls labeled by step. Here’s a timeline:
Trim and cube beef first—store in fridge until browning.
Prep vegetables in order of cooking time (root veggies first, soft veggies last).
Measure seasonings and broth into containers for quick access.
Organized prep stops last-minute stress. It ensures your hearty vegetable beef soup is full of flavor and texture.
Step-by-Step Old Fashioned Vegetable Beef Soup Recipe
Learn the easy vegetable beef soup recipe with these simple steps. Follow each step closely to mix tradition with ease.
Browning the Beef for Maximum Flavor
Start by heating a heavy skillet over medium-high heat. Dry the beef with paper towels and season with salt and pepper. Cook in batches to avoid overcrowding.
Sear the beef for 3-4 minutes on each side. This step creates a crust that keeps juices and flavors inside.
Building the Soup Base
Move the browned beef to a Dutch oven. Use ½ cup beef broth to deglaze the skillet, scraping off browned bits. Add sautéed onions, carrots, and celery to the pot.
Stir in tomato paste and 2 bay leaves. The deglazed liquid and aromatics make a rich base.
Adding Vegetables at the Right Time
Layer hearty veggies first: potatoes and parsnips simmer 45 minutes.
Add cabbage and corn last 20 minutes to retain crisp-tender texture.
Leafy greens like spinach go in final 5 minutes for vibrant color.
Simmering Secrets for Perfect Texture
Simmer uncovered on low heat for 1.5-2 hours. Stir occasionally to prevent sticking. Taste after 1 hour—adjust salt or add 1 tsp Worcestershire sauce for depth.
Let flavors meld without overcooking the meat.
Troubleshooting Common Soup Issues
Even seasoned chefs face challenges with the old fashioned vegetable beef soup recipe. Here are fixes for common problems to make sure your soup is perfect every time.
Tough Beef? Overcooked meat? Use tender cuts like chuck or round and simmer until it’s fork-tender.
Flat Flavor? Add depth with soy sauce or tomato paste. Stir in ½ tsp salt slowly to balance the taste.
Wrong Consistency? Thin soup? Mix in a roux (butter + flour) or add diced potatoes. Too thick? Thin with broth ¼ cup at a time.
Vegetables Overcooked? Start with sturdy veggies like carrots, then add softer ones like peas in the last 10 minutes.
Issue
Cause
Solution
Greasy broth
Excess fat from beef
Skim fat with a spoon after cooling
Cloudy broth
Over-stirring
Simmer gently without rapid stirring
Salty soup
Over-salting
Add unseasoned rice or potatoes to absorb excess salt
Adjust seasoning slowly and check textures often. These tips will help your old fashioned vegetable beef soup recipe stay rich and comforting.
Delicious Variations to Try
Traditional beef and vegetable soup is full of possibilities. Try these changes to fit your schedule or use seasonal ingredients. You won’t lose that classic taste.
Slow Cooker Adaptation
Brown the beef in a skillet first. Then, move it to the slow cooker with all ingredients except tender veggies like peas. Cook on low for 8-10 hours or high for 4-6 hours.
Add delicate veggies in the last 30 minutes. This prevents them from getting overcooked.
Instant Pot Method
Sear the beef right in the pot. Then, add all the ingredients. Pressure cook on high for 40 minutes.
Use the quick release valve for tender meat and crisp-tender veggies. Remember, always leave 1 inch of headspace.
Vegetable Substitutions
Keep the soup’s essence with these seasonal swaps:
Season
Vegetable Options
Spring
Peas, asparagus, green beans
Summer
Zucchini, corn, tomatoes
Autumn
Butternut squash, mushrooms, leeks
Winter
Parsnips, turnips, celery root
Adjust cooking times for denser veggies. Add winter roots earlier than tender greens like spinach or kale. Stir in greens last minute.
What to Serve with Your Hearty Vegetable Beef Soup
Enhancing your delicious vegetable beef soup experience is all about the right pairings. These simple additions can turn a bowl of soup into a memorable meal. They do so without overpowering its rich flavors.
Classic Bread Pairings
Crisp textures balance the soup’s warmth. Try:
Crispy garlic toast: Brush with olive oil and bake until golden.
Cornbread: Serve warm with butter for a Southern touch.
Cheese biscuits: Mix shredded cheddar into a quick biscuit dough.
Side Salad Suggestions
Light salads refresh the palate between spoonfuls. Consider:
Greek salad: Tangy feta and cucumbers contrast the soup’s heartiness.
Apple-walnut: Sweet apples add brightness with a light vinaigrette.
Classic garden: Mixed greens with balsamic dressing.
Complete Meal Planning
Transform meals with these tips:
For family dinners: Use bread bowls to serve the soup. Add salad as a first course.
Entertaining: Garnish servings with fresh herbs. Offer bread baskets and small salads.
Freeze extras: Portion bread and salad fixings for quick future meals.
Pairing the right sides ensures every bite of delicious vegetable beef soup shines. Experiment with these options to match your meal’s vibe—from cozy weeknights to festive gatherings.
Storage and Freezing Guidelines
Storing your homemade vegetable beef soup right keeps it fresh and delicious for weeks. Here’s how to keep it tasting great:
Cool soup quickly: Move it to shallow containers and chill in the fridge within 2 hours. This stops bacteria from growing.
Keep it in airtight containers in the fridge for up to 4 days. Glass containers are best to avoid plastic tastes.
Freeze it in labeled containers with 1-inch space. Freeze for up to 3 months. Use heavy-duty freezer bags for flat storage.
Storage Method
Container Type
Max Timeframe
Refrigeration
Glass or BPA-free plastic
3-4 days
Freezing
Freezer-safe containers/bags
2-3 months
When you reheat, use low heat in a pot. Add 1/4 cup broth if it’s too thick. Don’t microwave in metal. For best results, thaw frozen soup in the fridge overnight before reheating.
Before serving, try these tips: stir in fresh parsley or a bit of apple cider vinegar to refresh the taste. Never refreeze thawed soup for safety.
Nutritional Benefits of Homemade Vegetable Beef Soup
Homemade hearty vegetable beef soup is more than just comfort food. It’s a meal full of nutrients. It combines healthy ingredients to support a balanced diet. It offers protein, vitamins, and minerals without any additives.
Protein and Nutrient Content
Beef adds 20-25g of protein per serving. Carrots, celery, and potatoes bring fiber and vitamins A and C. Garlic and onions add antioxidants to boost immunity. Leafy greens like kale or spinach increase iron intake.
Comparing Homemade vs Canned Soup
Homemade: 500mg sodium/serving vs. 800mg+ in canned brands like Campbell’s
No preservatives like sodium benzoate found in store-bought options
2x more fiber from fresh vegetables compared to processed versions
Making Your Soup More Nutritious
Here are some tips to make your soup even healthier:
Add barley or quinoa for complex carbs and fiber
Swap broth for bone broth to boost collagen and minerals
Use low-sodium broth to cut sodium by 30%
Cooking at home lets you control what goes into your soup. This makes hearty vegetable beef soup a better choice than prepackaged meals. You can adjust recipes to fit your dietary needs, like keto or low-sodium diets.
Conclusion: Enjoying Your Classic Vegetable Beef Soup
Classic vegetable beef soup is a timeless favorite. It’s comforting and brings back memories. It’s perfect for cold evenings or family gatherings.
By following simple steps, you can make a delicious soup. Brown the beef, layer the vegetables, and season it right. This makes your soup better than ever.
Feel free to make it your own. Add different veggies, herbs, or spices. You can cook it in a slow cooker, Instant Pot, or on the stovetop. The key is to keep the core principles.
Sharing this soup with family and friends creates lasting memories. It becomes a special family tradition.
Keep track of your recipe in a journal or app. Each time you make it, you get better. It’s a dish that rewards your effort with delicious results.
Every spoonful of this soup tells a story. It’s simple yet full of tradition. When you serve it, you’re connecting with a long line of cooks. This recipe is a bridge between past and present, loved by all.
FAQ
What is the best cut of beef for vegetable beef soup?
For old-fashioned vegetable beef soup, chuck roast or stew meat are top choices. They have lots of marbling. This makes the soup taste better and feel softer as it cooks.
Can I use frozen vegetables in my homemade vegetable beef soup?
Yes, frozen veggies work great in classic vegetable beef soup. They’re easy to use and add flavor and nutrients. Just add them near the end to avoid overcooking.
How long can I store vegetable beef soup in the refrigerator?
You can keep homemade vegetable beef soup in the fridge for 3-4 days. Cool it down first to keep it fresh.
Can I make vegetable beef soup in a slow cooker?
Absolutely! Brown the meat first for a slow cooker version. Then, add all the ingredients. Cover and cook on low for 6-8 hours.
How do I make my vegetable beef soup more nutritious?
To make your soup healthier, add more veggies, use whole grains like barley, or choose bone broth. Bone broth adds collagen and minerals.
What seasonings are essential for an authentic vegetable beef soup?
Bay leaves, thyme, and parsley are key for a tasty vegetable beef soup. They boost the flavor and give it a classic taste.
Are there any common mistakes to avoid when making vegetable beef soup?
Yes, don’t skip browning the beef, add veggies in stages, and season well. Each step is important for a rich flavor.
Can I freeze leftover vegetable beef soup?
Yes, freeze leftover soup for 2-3 months. Leave space in containers for expansion. Add fresh herbs after thawing for better flavor.
How can I thicken my vegetable beef soup if it turns out too thin?
To thicken, make a roux, add mashed potatoes, or simmer uncovered. This lets some liquid evaporate.
What are some good side dishes to serve with vegetable beef soup?
Serve with crusty French bread or cornbread. A fresh salad is also a great side to balance the meal.
Did you know over 60% of honey sold in U.S. stores is creamed honey? Yet, only about 15% of households know how to make it at home? This smooth, spreadable treat is not just a luxury. It’s something anyone can make in their kitchen.
Creamed honey, also known as whipped or set honey, turns runny honey into a velvety spread. It’s more than a pantry staple. It’s a versatile ingredient for toast, baking, or even savory dishes. This guide will show you the creamed honey recipe and the secrets of how to make creamed honey.
Table of Contents
Key Takeaways
Creaned honey stays spreadable year-round without crystallizing.
Making it at home cuts costs by up to 40% compared to store-bought brands.
Its texture comes from controlled crystallization, not additives.
Works with any raw honey type, from clover to wildflower.
Easier to use in baking than liquid honey due to consistency.
What Is Creamed Honey and Why Make It at Home?
Creamed honey is honey that’s been made smooth and spreadable. It’s different from store-bought honey because you can add your own flavors. Plus, you don’t have to worry about additives. This part will dive into the science and perks of making it yourself.
The Science Behind Crystallized Honey
Honey turns into crystals naturally because of glucose. To make creamed honey, we control this process. We use temperature and tiny honey crystals to get a smooth texture.
This way, we turn liquid honey into a creamy spread. But we don’t change its taste or nutrients.
Difference Between Raw, Regular, and Creamed Honey
Raw honey: Unprocessed, unheated, and unfiltered, keeping pollen and particles.
Regular honey: Often pasteurized and filtered to slow down crystallization.
Creamed honey: Made by a special crystallization process for its spreadable form.
Benefits of Making Your Own Creamed Honey at Home
Making creamed honey at home gives you control over what goes into it. You can add spices like cinnamon or lavender for unique tastes. Unlike store-bought, homemade honey doesn’t have added sugars or preservatives.
It also lasts longer when stored properly. And, its creamy texture means no more sticky spills on your toast!
Essential Ingredients for the Perfect Creamed Honey Recipe
Making a smooth creamed honey recipe starts with the right ingredients. The easy creamed honey recipe needs high-quality parts for that velvety texture. Raw honey, seed honey, and optional flavorings are key. Each is crucial for success.
Selecting the Right Raw Honey
For the best results, pick raw, unprocessed honey. Pasteurized honey doesn’t have the natural crystals needed. Choose clover or wildflower honey for consistency. Here’s how different honeys compare:
Honey Type
Flavor Profile
Best For
Clover
Mild, sweet
Classic creamed honey
Wildflower
Complex, floral
Rich textures
Orange Blossom
Citrus notes
Flavor-enhanced batches
The Importance of a Quality Starter (Seed Honey)
Seed honey is a crystal catalyst. Choose honey that’s already started to crystallize smoothly. Use a 1:9 or 1:10 ratio of seed to liquid honey for even texture. Smooth, creamy seed honey is key for consistent results.
Check for small, uniform crystals in seed honey
Store extra seed honey in a cool place for future batches
Optional Flavor Additions
Customize your easy creamed honey recipe with natural additives. Vanilla, cinnamon, or citrus zest can be mixed in during blending. Add ½ teaspoon of spices or a few drops of essential oils per cup of honey. Avoid overmixing to prevent air bubbles.
Vanilla extract for warmth
Citrus zest for brightness
Spices like cinnamon or ginger for depth
Equipment You’ll Need for Homemade Creamed Honey
Follow creamed honey instructions with confidence by gathering the right tools. Every piece of equipment plays a role in achieving that silky texture.
Clean Glass Jars: Use sterilized containers for storage. Mason jars work well for small batches.
Stainless Steel Bowl: Ideal for mixing to avoid temperature fluctuations.
Food Thermometer: Monitor honey between 80–90°F to prevent overheating.
Whisk or Spatula: Stainless steel tools ensure even mixing without metal contamination.
Double Boiler: A heat-safe bowl over a pot of simmering water prevents scorching.
Essential Tools
Optional Upgrades
Plastic or silicone spatula
Electric mixer (bread hook attachment)
Measuring cups
Temperature-controlled incubator
Labels for jars
Large mixing paddle for commercial batches
For creamed honey tutorial success, avoid reactive metals like aluminum. A warming pad keeps batches stable during crystallization. Always sterilize jars in boiling water 10 minutes before use.
Reuse clean yogurt containers for small test batches.
Use a clean dish towel as a lid if jars lack lids.
Pro tip: Keep tools separate from acidic foods to avoid residue affecting honey’s flavor.
Step-by-Step Creamed Honey Process
To master the creamed honey process, follow these simple creamed honey steps. This method ensures smooth, consistent results every time.
Preparation Phase: Getting Your Honey Ready
Start by warming raw honey to 95–104°F (35–40°C). Use a candy thermometer to avoid overheating. Strain out crystals or debris with a fine mesh sieve. Prepare seed honey by selecting pre-creamed honey as your starter crystal base.
Mixing Method: Incorporating the Seed Honey
Combine 90% warmed honey with 10% seed honey in a clean bowl.
Use a spatula to fold gently until no visible seed honey streaks remain.
Avoid over-stirring to prevent air bubbles that disrupt crystallization.
The Waiting Game: Crystallization Period
Transfer mixture to a sterilized jar. Store at 57°F (14°C) in a pantry or cellar. Check daily for visible texture changes. Full crystallization takes 3–14 days—patience ensures even grain formation.
Final Processing Steps
Once fully set, stir gently with a clean spoon to refine texture. Transfer to airtight containers. Store at room temperature for best consistency. Properly processed honey remains spreadable for months when stored correctly.
How to Make Creamed Honey Without a Starter
Creating homemade creamed honey doesn’t need a starter. Try these easy methods for smooth results.
Alternative Seeding Methods
Start crystallization with common items instead of seed honey:
Naturally crystallized honey: Scrape crystals from old honey jars and blend into fresh honey.
Powdered sugar (1 tsp per cup of honey): Dissolve thoroughly before mixing.
Commercial crystallized honey: Even imperfect store-bought options work as substitutes.
Natural Crystallization Technique
Try this slow method for no-starter results:
Store honey at 50-59°F (10-15°C) for 7 days.
Shift to 40-45°F (4-7°C) for 14 days.
Bring to room temperature; stir daily to monitor crystal formation.
Method
Steps
Time
Alternative Seed
Blend crystals or additives
1-3 days
Natural Crystallization
Temperature cycling
3-4 weeks
Be patient—natural methods take time. Check texture and temperature weekly. Adjust steps if crystals form unevenly.
Troubleshooting Your Creamed Honey at Home
Even with a precise creamed honey tutorial, unexpected issues can arise during your homemade batches. This section addresses common pitfalls and practical fixes to ensure success with your creamed honey at home.
Common Problems and Solutions
Separtion or air pockets? Let the mixture rest overnight in a cool spot. Overly bubbly? Strain through a mesh sieve. Fermentation? Use fresh, raw honey and store below 70°F. Always seal jars tightly to prevent contamination.
When Your Honey Won’t Cream Properly
If honey remains runny, check these factors:
Overheating: Avoid temperatures above 120°F to preserve natural enzymes.
Moisture content: Use honey with under 18.6% moisture (test with a refractometer).
Inadequate starter: Ensure seed honey makes up 10-20% of the total batch.
Test small batches first to avoid waste.
Fixing Texture Issues
Grainy texture? Warm the batch gently to 95°F, remix with seed honey, and reprocess. Too hard? Microwave 10-second bursts until spreadable. Runny? Add more seed honey and refrigerate for 24 hours.
Patience is key—some fixes require 1-2 weeks for results. Adjust one variable at a time to track progress. Properly stored batches can last 6-12 months when sealed airtight. With these strategies, most batches can be salvaged even after setbacks.
Creative Ways to Customize Your Easy Creamed Honey Recipe
Turn your easy creamed honey recipe into a must-have in your kitchen. Add flavors like vanilla bean paste (1 tsp per cup of honey) or citrus zests. Lemon or orange zests are best when finely grated to avoid bitterness.
For a bold twist, mix in spices like ground cinnamon or cardamom. Or, try fresh herbs like lavender or thyme. Coffee or cocoa powder can add a surprising depth, pairing well with dark honey.
Citrus Zest: Use organic lemon or orange zest with orange blossom honey for a vibrant kick.
Spice Blends: Mix ½ tsp cinnamon or nutmeg into your creamed honey recipe for a cozy winter treat.
Herbal Infusions: Steep dried lavender or rosemary in warm honey before the crystallization phase.
Play with textures too: blend honey until it’s super smooth or add a pinch of pre-crystallized honey for a grainy texture. For color, add beetroot powder for pink or turmeric for golden. Store jars with different flavors layered for a pretty look.
Try small batches first to see how they turn out. Note that some ingredients, like high-moisture fruits, might slow down crystallization. Label jars with flavor names and dates for gifts. Your creamed honey recipe is a blank canvas for your creativity. Let your curiosity lead your next kitchen adventure!
Storing Your Homemade Creamed Honey
Keeping your homemade creamed honey fresh is key. Follow these tips to enjoy it for months. The right storage keeps it smooth and tasty.
Ideal Storage Conditions
Keep your creamed honey in a cool, dark spot like a pantry. Aim for temperatures between 50–70°F (10–21°C). This prevents it from separating or forming crystals.
Use glass jars with tight lids. Plastic can pick up smells. Don’t put it in the fridge, as temperature changes can mess up its texture.
Container choice: Glass jars with airtight seals.
Light exposure: Keep away from windows or direct sunlight.
Moisture control: Ensure lids are fully sealed to block air.
Shelf Life Expectations
Homemade creamed honey stays good 6–12 months when stored right. Honey doesn’t spoil, but long storage can change its texture or taste. Date your jars and use the oldest first. Don’t keep open jars for more than a year.
Mark containers with dates for easy tracking.
Discard jars with visible mold or off-odors immediately.
Signs Your Creamed Honey Has Gone Bad
Watch out for these signs:
Fermentation: Bubbles or a wine-like smell mean yeast is active. Toss it if you see this.
Pooling liquid: Too much moisture on top can cause bad growth.
Grainy texture: If it’s too grainy, it’s not stored right, but it’s not harmful.
Always check for strange smells or texture changes. If unsure, it’s best to throw it away for safety.
Delicious Ways to Enjoy Your Creamed Honey
Once your creamed honey is ready, it’s more than just for toast. It adds a smooth touch and a rich taste to any meal. Here are some creative ways to use it:
Breakfast Applications
Begin your day with creamed honey’s silky feel. It’s perfect for mixing into yogurt or swirling into overnight oats. Try these breakfast ideas:
Honey butter: Blend with softened butter for flaky biscuit toppings
Pancake glaze: Combine with vanilla extract and warm milk
Granola cups: Layer with Greek yogurt and fresh berries
Baking with Creamed Honey
Use it in your favorite creamed honey recipe for a sweet touch. Replace 1 cup of liquid honey with 3/4 cup of creamed honey in:
Sandwich cookies: Pipe into layers of vanilla wafers
Cinnamon rolls: Fold into dough or use as a filling
Muffins: Mix into batter for even moisture distribution
Savory Pairings
Try unexpected pairings with creamed honey. Its smooth texture is great for:
Glazes: Brush on roasted Brussels sprouts or pork chops
Marinades: Blend with soy sauce and ginger for chicken
Cheese boards: Pair with sharp cheddar or blue cheeses
It’s also perfect for drizzling over salads or mixing into vinaigrettes without clumping.
Health Benefits of Consuming Creamed Honey
When made right, creamed honey steps keep all the good stuff from raw honey. Unlike refined sugars, it has antioxidants and enzymes that boost health. Here’s how it helps you:
Antibacterial properties: Honey’s natural acidity and hydrogen peroxide fight off bad bacteria.
Antioxidant boost: Darker honeys like buckwheat have more disease-fighting compounds.
Gut-friendly prebiotics: Its natural sugars feed good gut bacteria.
Allergy relief: Local creamed honey at home made with pollen-rich honey may lessen allergy symptoms.
Honey’s glycemic index varies by type, often lower than refined sugar. It has minerals like zinc and potassium, unlike processed sugars. But, it’s important to eat it in moderation—experts say no more than 6–9 teaspoons a day.
“The crystallization process doesn’t change honey’s nutritional profile,” says the National Honey Board. “Properly made creamed honey keeps its natural goodness.”
While creamed honey steps make it smooth, it has the same health benefits as liquid honey. Its thicker texture might help you eat it slower, enjoying sweetness without too much. Always pick recipes that don’t heat the honey to keep its enzymes, like the starter method mentioned before.
Conclusion: Mastering the Art of Homemade Creamed Honey
This creamed honey tutorial shows how easy it is to make your own spread. You start with seed honey and learn to control the temperature. It’s a simple way to turn raw honey into a smooth treat.
Being patient and precise is key. Begin with a basic recipe and then try flavors like lavender or ginger. Each batch you make gets better, showing how small changes can make a big difference.
By making your own creamed honey, you avoid additives and control the sweetness. It lasts a long time and is great for gifts or special treats. This craft connects you to a long tradition of food making, with a modern twist.
Share your progress on social media or in online forums. Every batch you make helps you get better. Start your journey to making delicious homemade honey today.
FAQ
What is creamed honey?
Creamed honey, also known as whipped honey or spun honey, is honey that has been crystallized carefully. This makes it smooth and spreadable. It’s easy to use and tastes great.
How long does it take to make creamed honey at home?
Making creamed honey at home takes about 3 to 14 days. The quick mixing part is fast. But, waiting for the honey to become creamy takes time.
Can I make creamed honey without a starter?
Yes, you can make creamed honey without a starter. You can use other seeding methods or let it crystallize naturally. But, these methods might take longer and need careful temperature control.
What type of honey is best for making creamed honey?
Use high-quality raw honey for the best creamed honey. Clover, wildflower, or orange blossom honey can add great flavor. Unpasteurized honey also helps with crystallization.
How do I fix my creamed honey if it turns out too grainy?
If your creamed honey is grainy, try heating it gently to 95°F (35°C) and mix well. Adding a bit more seed honey can also help make it smooth.
What are some creative flavor additions for creamed honey?
You can add natural flavors like vanilla, cinnamon, citrus zest, or lavender to your creamed honey. Just make sure to use the right amounts so they don’t mess up the crystallization.
How should I store my homemade creamed honey?
Keep your creamed honey in a cool, dark place at 50-70°F (10-21°C). Use glass containers with tight lids to keep it fresh and prevent moisture.
What is the shelf life of homemade creamed honey?
Homemade creamed honey can last 6-12 months if stored right. It doesn’t really expire, but its texture and taste might change over time. It’s best to use it within a year for the best quality.
Are there any health benefits to consuming creamed honey?
Yes, creamed honey keeps all the good stuff from raw honey, like antioxidants and enzymes. It can help fight bacteria and might even help with allergies.
What’s the best way to enjoy creamed honey?
Creamed honey is great for many things. You can spread it on toast, use it in baking, or even in salad dressings. Its smooth texture makes it easy to use in many recipes.
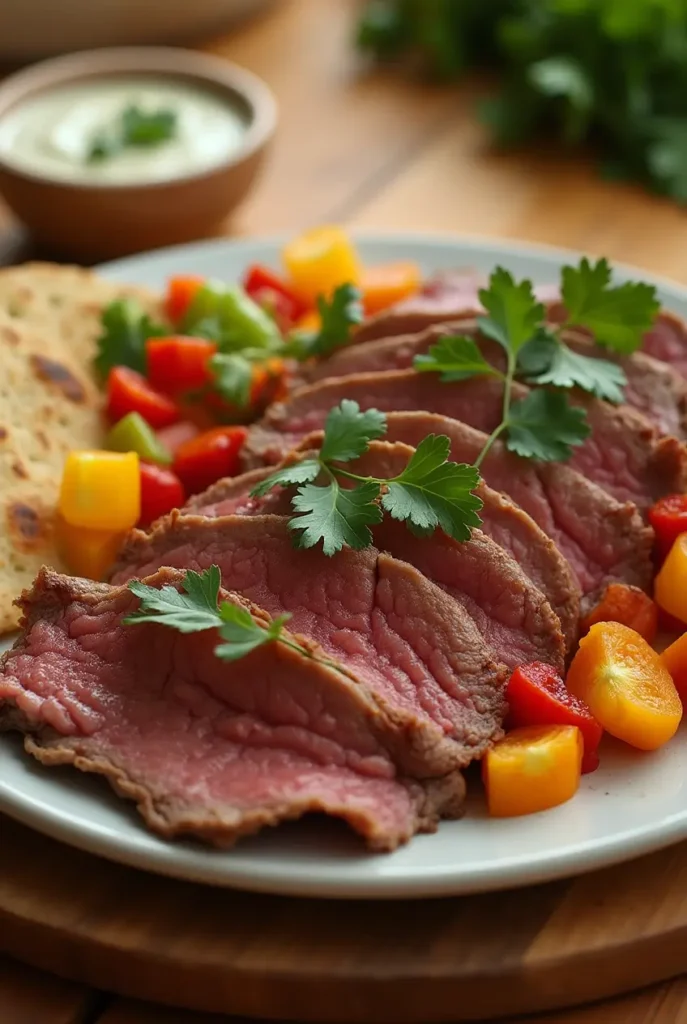
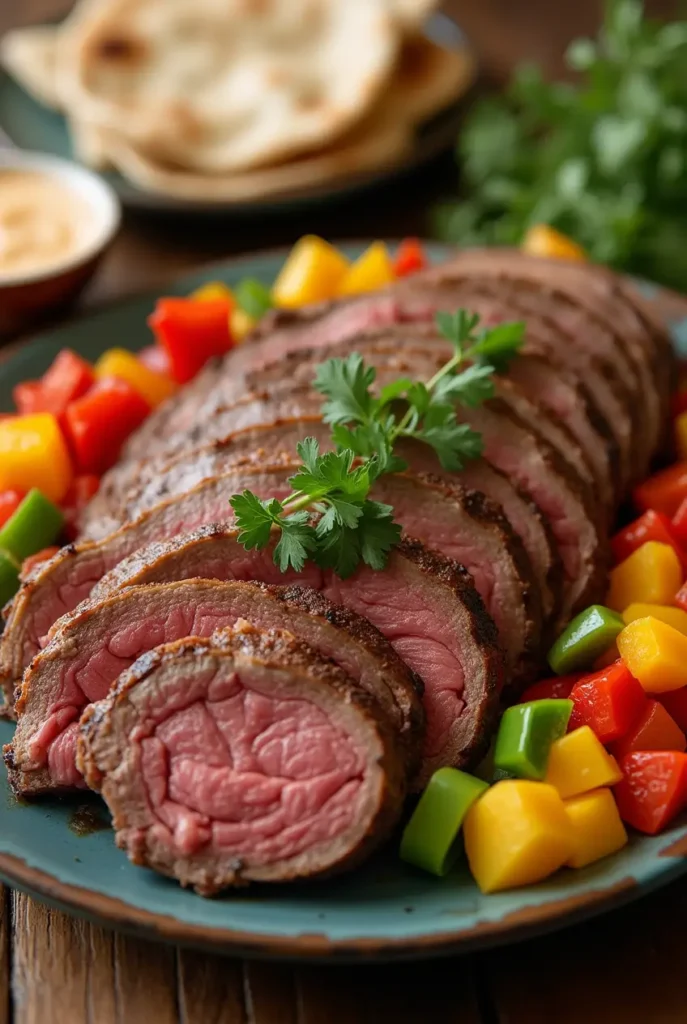
Mongolian Beef Stir-Fry is a delicious and easy dish that brings the flavors of Asian cuisine right to your kitchen. This dish features tender beef cooked with a mix of savory sauces and fresh green onions, making it a satisfying meal.
Table of Contents
Why Make This Recipe
You should make Mongolian beef stir-fry because it is quick to prepare and full of flavor. It’s perfect for busy weeknights when you want something tasty but don’t have a lot of time. You can serve it over rice or noodles, making it a great option for the whole family.
How to Make Mongolian Beef Stir-Fry
Ingredients:
1 lb thinly sliced sirloin steak
3 tablespoons soy sauce
2 tablespoons rice vinegar
2 tablespoons hoisin sauce
3 cloves garlic, minced
1 tablespoon grated ginger
1 teaspoon Asian chili paste (or to taste)
2 tablespoons vegetable oil
3 green onions, sliced
Directions:
In a bowl, mix the sirloin steak, soy sauce, rice vinegar, hoisin sauce, garlic, ginger, and chili paste. Toss to coat the beef well. Heat the vegetable oil in a large skillet or wok over high heat. Add the marinated beef and stir-fry for 5-7 minutes until cooked and the sauce thickens. Add the sliced green onions and cook for an additional 1-2 minutes until softened. Serve the Mongolian beef hot over steamed rice or noodles.
How to Serve Mongolian Beef Stir-Fry
Serve Mongolian beef stir-fry hot right from the stove. It’s great over a bed of fluffy white rice or tossed with noodles. You can also add extra green onions on top for a fresh touch and a dash of sesame seeds for added flavor.
How to Store Mongolian Beef Stir-Fry
If you have leftovers, let the Mongolian beef stir-fry cool completely before storing. Place it in an airtight container and keep it in the refrigerator for up to 3 days. To reheat, warm it up in a skillet or microwave until heated through.
Tips to Make Mongolian Beef Stir-Fry
Slice the beef against the grain to make it more tender.
Marinate the beef for at least 15-30 minutes for better flavor.
Feel free to add your favorite vegetables, like bell peppers or broccoli, for added nutrition.
Variation
You can substitute the sirloin steak with other cuts of beef like flank steak or even chicken if you prefer. The sauce works well with most meats and adds great flavor.
FAQs
1. Can I make this dish in advance? Yes, you can prepare the beef and the marinade ahead of time. However, it is best to stir-fry it just before serving to keep the beef tender.
2. Is Mongolian beef spicy? The spice level can vary depending on how much Asian chili paste you use. You can adjust the amount to suit your taste.
3. Can I freeze Mongolian beef stir-fry? Yes, you can freeze it. Just make sure to store it in a freezer-safe container. Thaw and reheat thoroughly before serving.
If you love the comforting flavors of Panera’s famous tomato soup, you’re in for a treat! This Copycat Panera Tomato Soup Recipe brings that delicious taste right into your kitchen. It’s creamy, hearty, and oh-so-easy to make. Perfect for a cozy dinner or a lunch with friends!
Table of Contents
Why Make This Recipe
Making this soup at home means you can enjoy all the rich flavors without the wait. It’s incredibly simple to whip up, and you can customize it to your liking. Plus, it’s perfect for busy days when you want something warm and filling without spending hours in the kitchen.
How to Make Copycat Panera Tomato Soup
Ingredients:
2 tablespoons olive oil
4 garlic cloves (minced)
1 large yellow onion (sliced)
2 (28 oz) cans San Marzano peeled tomatoes (do not drain)
1 cup chicken stock (or vegetable stock)
1 tablespoon sugar
1/4 cup heavy cream (or half and half)
8 large fresh basil leaves (roughly chopped)
1/4 teaspoon dried oregano
1/2 teaspoon crushed red pepper flakes
kosher salt and freshly ground black pepper (to taste)
1/3 cup shredded parmesan cheese (optional)
croutons (optional garnish)
Directions:
In a heavy-bottomed pot (like a Dutch oven), heat olive oil over medium-high heat. Add garlic and sauté for 30 seconds until it’s fragrant. Then, add the sliced onion and cook, stirring often, until the onion is translucent, about 8 minutes.
Next, add the San Marzano peeled tomatoes (including the juice), chicken stock, and sugar to the pot. Bring this mixture to a low simmer and cook uncovered for 12 minutes, or until it thickens.
Stir in the heavy cream, chopped basil, oregano, and crushed red pepper flakes. Season with salt and pepper to your liking.
Now, using an immersion blender, puree the soup until smooth and creamy. If you’re using a regular blender, be careful of hot splatters. You can cover the lid with a kitchen towel for safety or let it cool slightly.
Finally, stir in the parmesan cheese, and serve your lovely soup topped with croutons if you’d like!
How to Serve Copycat Panera Tomato Soup
Serve this soup warm with a side of crusty bread or grilled cheese for a classic combo. It’s perfect for sharing with family or enjoying all by yourself!
How to Store Copycat Panera Tomato Soup
You can store any leftover soup in an airtight container in the fridge for up to 3 days. It’s easy to reheat on the stove or in the microwave for a quick meal!
Tips to Make Copycat Panera Tomato Soup
Use quality San Marzano tomatoes for the best flavor.
Adjust the cream to your liking; for a lighter version, use less or substitute with milk.
Don’t skip the fresh basil; it really elevates the taste!
Variation
Feel free to add other ingredients like spinach or carrots for extra nutrition. You can also substitute the chicken stock with vegetable stock for a vegetarian version.
FAQs
Q: Can I freeze this soup? A: Yes! This soup freezes well. Just let it cool down first, then store it in a freezer-safe container for up to 3 months.
Q: What can I serve with this soup? This tomato soup pairs perfectly with grilled cheese sandwiches, a fresh salad, or crusty bread.
Q: Can I use fresh tomatoes instead of canned?
A: Yes! If using fresh tomatoes, you’ll need about 2 pounds. Roast them first for better flavor.
Enjoy making this comforting Copycat Panera Tomato Soup and share it with your loved ones!
70% of people in the United States want to try new recipes. Many are interested in unique cultural dishes like the bayou’s swamp soup. This recipe offers a tasty and simple way to enjoy bayou flavors at home. It’s a culinary adventure that celebrates Louisiana’s heritage.
Table of Contents
The easy swamp soup is ideal for those eager to taste new flavors without spending hours cooking. It’s a dish with deep history and cultural importance. It’s perfect for a weeknight dinner or a special event, thanks to its simplicity and rich taste.
Key Takeaways
The swamp soup recipe is a delicious and easy swamp soup to make
It brings the flavors of the bayou right to your table
The easy swamp soup is perfect for anyone looking to explore new flavors
The swamp soup recipe has a rich history and cultural significance
It is a great option for a weeknight dinner or a special occasion
The swamp soup recipe is a great way to experience the flavors of the bayou
Origins of Swamp Soup and Its Bayou Heritage
Swamp soup is deeply rooted in Louisiana’s bayou heritage. It has a rich history that shows the importance of Louisiana cuisine. The origins of this flavorful swamp soup come from traditional bayou cooking. This method involves slow-cooking local ingredients to make a hearty stew.
This slow-cooking process creates deep flavors. It makes homemade swamp soup a favorite in the region.
Swamp soup’s cultural significance in Louisiana cuisine is clear. It shows the state’s ability to mix new flavors with traditional ones. The dish is a key part of Louisiana’s culinary identity. Its unique ingredients and cooking methods make it stand out from other soups.
Traditional Bayou Cooking Methods
Traditional bayou cooking methods were key in making swamp soup. These methods, like slow-cooking over an open flame, create rich and flavorful swamp soup. Local ingredients, like andouille sausage and crawfish, add to the dish’s unique taste.
Cultural Significance in Louisiana Cuisine
Swamp soup’s cultural significance in Louisiana cuisine is huge. It’s a key part of the state’s culinary identity. Its unique ingredients and cooking methods make it different from other soups.
Whether at a family gathering or a restaurant, homemade swamp soup brings people together. It showcases Louisiana’s rich culinary heritage.
Essential Ingredients for Authentic Swamp Soup Recipe
To make a unique swamp soup, use fresh, local ingredients that capture the bayou’s essence. The best swamp soup recipe often includes shrimp, crab, and crawfish. These seafood add protein and flavor.
Here are the key ingredients for a real swamp soup:
Seafood: shrimp, crab, crawfish, and oysters
Spices: cayenne pepper, paprika, and thyme
Vegetables: onions, bell peppers, and mushrooms
Broth: a mix of chicken and seafood broth for extra flavor
Together, these ingredients make a tasty, authentic unique swamp soup. Using the freshest ingredients and a traditional best swamp soup recipe ensures your soup is delicious and true to its bayou roots.
Adding these ingredients to your swamp soup recipe makes it flavorful and genuine. The secret to a great unique swamp soup is balancing flavors and textures. This way, every ingredient shines, making the soup a perfect blend of taste and texture.
Kitchen Tools and Equipment Needed
To make a tasty swamp stew, you need the right kitchen tools and equipment. It’s not just about following a recipe. You also need the right tools for the job. A large, heavy-bottomed pot is key for cooking a big batch of swamp soup.
This type of pot helps distribute heat evenly. This is important to prevent ingredients from burning or sticking to the bottom.
Having the right equipment is crucial for a delicious swamp stew. Investing in a good quality pot and other necessary tools will make your swamp soup flavorful and delicious. To start making a swamp stew, you’ll need a few essential items, including:
A large, heavy-bottomed pot
A cutting board and knife for chopping ingredients
A spoon and ladle for stirring and serving
There are also some optional kitchen gadgets that can make cooking easier and safer. For example, a food processor can quickly chop ingredients. A timer helps you keep track of cooking time. To learn more about making swamp soup, having the right tools and equipment is essential.
With the right kitchen tools and equipment, you’re on your way to making a delicious swamp stew. With the right equipment and a bit of practice, you’ll be able to make a swamp soup that’s both flavorful and authentic.
Preparation and Cooking Time Overview
Cooking an easy swamp soup is quick and easy. It’s perfect for a weeknight dinner because it cooks fast. You won’t spend hours in the kitchen like with other dishes.
This recipe is easy to prepare. It lets you make a tasty meal without a lot of work. Just get all your ingredients ready fast, and then let the soup simmer until it’s perfect.
Here are some key points to consider when preparing and cooking your easy swamp soup:
Preparation time: approximately 20-30 minutes
Cooking time: approximately 30-40 minutes
Total time: approximately 50-70 minutes
https://youtube.com/watch?v=mFygkcOObPA
This easy swamp soup recipe is great for a quick meal. It’s easy to follow and cooks fast. You’ll have a delicious bowl of swamp soup in no time.
Step-by-Step Swamp Soup Instructions
To make a tasty swamp soup, follow a step-by-step guide. This ensures each part of the dish is made right. Start with a rich base, which is the soup’s foundation.
A good swamp soup needs a mix of spices and seasonings. By following these steps, you can make a soup that tastes like the bayou. Begin by making the soup’s base, which is vegetables and broth.
Creating a Rich Base
Start by sautéing onions, garlic, and bell peppers in a big pot. When they’re soft, add your broth and boil. Use a low-sodium, flavorful broth for the best taste.
Adding Proteins and Vegetables
After the base is ready, add proteins like seafood or chicken. Then, add vegetables like okra and carrots. Make sure to add them in the right order for perfect cooking.
Final Seasoning Tips
To finish your soup, add spices like thyme, oregano, and cayenne pepper. A squeeze of lemon juice and some chopped scallions add extra flavor. Using quality ingredients makes your soup delicious and authentic.
Some key ingredients for your swamp soup are:
Onions
Garlic
Bell peppers
Okra
Carrots
Seafood or chicken
Thyme
Oregano
Cayenne pepper
By following these steps and using these ingredients, you can make a flavorful and delicious homemade swamp soup. It’s perfect for any time.
Flavor Variations and Regional Adaptations
The unique swamp soup has changed a lot, adapting to different tastes and ingredients in various places. This change has led to many flavor variations, each with its own special touch. From Cajun country’s spicy flavors to the Gulf Coast’s fresh seafood, every area has put its own twist on this dish.
Local spices like filé powder in Louisiana and fresh catches like shrimp and crab in coastal areas are just a few examples. These changes show off the creativity and resourcefulness of local chefs. The unique swamp soup has become a place where chefs can show off their skills, adding their own unique touches to the recipe.
Looking closer at these regional changes, we see a wide range of ingredients and techniques. For example:
Spicy andouille sausage is a staple in Cajun country, adding a bold flavor to the unique swamp soup
Fresh okra is often used in Southern variations, thickening the soup and adding a delicate texture
Smoked paprika is a common addition in some regions, imparting a deep, smoky flavor to the dish
The beauty of these regional changes is how they enhance the unique swamp soup without changing its core. Whether you’re in Louisiana or exploring other areas, the unique swamp soup is always a comforting dish to enjoy.
Serving Suggestions and Pairings
When serving the best swamp soup, it’s important to match its rich flavors. Choose simple yet effective sides, drinks, and garnishes. Start with crusty bread or a fresh green salad. These add contrasting textures that enhance the meal.
Choosing the right drink can also elevate the experience. A cool glass of sweet tea or a crisp lager pairs well. The beer’s bitterness or the tea’s sweetness balances the soup’s richness. For a non-alcoholic option, lemonade or sparkling water with lime are great choices.
Complementary Side Dishes
Crusty bread with butter or olive oil
Fresh green salad with light vinaigrette
Grilled or roasted veggies like asparagus or bell peppers
Beverage Recommendations
Sweet tea over ice with a lemon slice
Crisp lager with a lemon or lime slice
Fresh lemonade with a sprig of mint
With these serving tips, you can create a memorable dining experience. Whether for a crowd or a quiet night, the right sides and drinks highlight the swamp stew’s unique flavors.
Storage and Reheating Guidelines
Learning how to store and reheat swamp soup is key to keeping its taste and safety. After cooking, let the soup cool down to room temperature. This stops bacteria from growing. Then, put it in airtight containers and store them in the fridge or freezer.
To reheat, use the microwave or stovetop until it’s at least 165°F (74°C). This makes sure the soup is safe to eat and still tastes great. If you want to enjoy your swamp soup over a few days, following these steps is crucial to avoid getting sick.
Here are some important tips for storing and reheating swamp soup:
Always use airtight containers to prevent contamination and spoilage.
Label and date the containers so you can easily keep track of how long the soup has been stored.
Reheat the soup to the recommended temperature to ensure food safety.
By following these simple steps, you can enjoy your homemade swamp soup while keeping it safe and tasty. Whether you’re starting from scratch or just want to get better at storing and reheating, these guidelines will help you succeed.
Conclusion: Mastering Your Homemade Swamp Soup
Learning to make a homemade swamp soup recipe is a fun journey. It mixes the deep flavors of the bayou with easy cooking. We’ve shown you how to make this tasty dish, from its roots to how to serve it. It’s easy to make, so anyone can try it.
By following our guide, you can make a swamp soup that’s both delicious and true to its roots. It’s a dish that brings people together. So, go ahead and try new things. Enjoy the bayou’s flavors and make your own swamp soup.
FAQ
What are the origins of swamp soup and its bayou heritage?
Swamp soup’s roots are in the bayou, where cooks slow-cooked ingredients for a hearty stew. This dish is a big part of Louisiana’s food culture. It shows how the state’s cuisine has grown, adding new tastes and methods.
What are the essential ingredients for an authentic swamp soup recipe?
Real swamp soup needs fresh, local ingredients. This includes seafood like shrimp, crab, and crawfish. Spices and veggies add depth and warmth.
What kitchen tools and equipment are needed to make swamp soup?
You’ll need a big, heavy pot for swamp stew. Also, some gadgets can help, and safety gear is a must to avoid accidents.
How long does it take to prepare and cook swamp soup?
Swamp soup is quick and easy to make. It’s ready fast, perfect for a simple yet tasty meal.
What are the step-by-step instructions for making swamp soup?
Making swamp soup is straightforward. Start with a flavorful base, add seafood and veggies, and season well.
Are there any flavor variations or regional adaptations of swamp soup?
Swamp soup can change with local tastes. You can add spices, seafood, or veggies to make it your own. Each version is delicious in its own way.
How should swamp soup be served and what are some recommended pairings?
Serving swamp soup right is key. Pair it with bread, salads, drinks, and herbs for a better experience. The right sides make each spoonful special.
How should swamp soup be stored and reheated?
Knowing how to store and reheat swamp soup is important. It keeps the soup fresh and safe to eat. Follow simple tips to enjoy it over a few days.
What makes a ground beef bulgogi recipe truly authentic? Can an easy bulgogi recipe still capture the essence of traditional Korean cuisine? The answer is yes, with the right mix of flavors and ingredients. Ground beef bulgogi is a beloved Korean dish known for its unique taste and texture.
Table of Contents
Using ground beef in a bulgogi recipe makes it simpler and quicker to make. Yet, it still keeps the authentic taste of traditional bulgogi. This easy recipe is great for those who want to try Korean cuisine without the fuss of complex ingredients and cooking methods. With a ground beef bulgogi recipe, you can enjoy bold and savory Korean flavors right at home.
Key Takeaways
Ground beef bulgogi is a popular Korean dish known for its unique flavor and texture
An easy bulgogi recipe can still capture the essence of traditional Korean cuisine
Ground beef makes the recipe more accessible and easier to prepare
The authentic flavor of traditional bulgogi is maintained in a ground beef bulgogi recipe
This easy bulgogi recipe is perfect for those who want to experience Korean cuisine at home
A ground beef bulgogi recipe offers a bold and savory flavor profile
The Art of Korean Bulgogi: A Brief Introduction
Korean bulgogi is a beloved dish in Korean cuisine for centuries. It’s called “fire meat” because it’s grilled over an open flame. Using ground beef makes a quick bulgogi recipe easier and faster, perfect for today’s cooks.
Traditionally, bulgogi uses thinly sliced beef, which takes time to prepare. But ground beef makes a best bulgogi recipe just as tasty and tender, with less effort. This change has made bulgogi more popular, letting people enjoy it at home.
Traditional Bulgogi vs. Ground Beef Version
The ground beef version of bulgogi is gaining fans fast. It’s quicker to make and easier to prepare. Some might say it’s not as authentic, but many see it as a smart way to make bulgogi more accessible.
Why Ground Beef Makes This Recipe Accessible
Ground beef makes bulgogi easier in many ways. It skips the need for slicing beef, saving time. Plus, it cooks faster, ideal for quick meals or busy nights.
Historical Significance in Korean Cuisine
Bulgogi’s history in Korean cuisine goes back to the Goguryeo era. It was once a luxury dish for special occasions. Now, it’s a favorite enjoyed by many, with many variations worldwide.
Essential Ingredients for Ground Beef Bulgogi Recipe
To make a tasty and true simple bulgogi recipe, you need the right stuff. The main parts are ground beef, Korean chili flakes (gochugaru), soy sauce, brown sugar, garlic, and sesame oil. You can find these at most Asian stores or online.
Choosing the best ingredients is key. Freshly ground beef makes the dish tender and flavorful. High-quality Korean chili flakes give it a deeper taste.
Here’s what you’ll need for your simple bulgogi recipe:
1 pound ground beef
2 tablespoons Korean chili flakes (gochugaru)
2 tablespoons soy sauce
1 tablespoon brown sugar
2 cloves garlic, minced
1 tablespoon sesame oil
With these ingredients and a simple recipe, you’ll make a delicious Korean dish. It’s sure to wow your family and friends.
Kitchen Tools and Equipment Needed
To make tasty ground beef bulgogi, you need the right tools. A big skillet or wok is key. It cooks the bulgogi evenly and quickly.
You’ll also need a cutting board, knife, and measuring cups. These help you chop and measure ingredients right. This is important for the real flavor of ground beef bulgogi.
Must-Have Utensils
Cutting board
Knife
Measuring cups
Large skillet or wok
Optional but Helpful Tools
While not a must, a marinade container and a spatula are nice to have. A marinade container keeps the beef ready in the fridge. A spatula makes stirring and flipping easier.
With these tools, you’re ready to make delicious ground beef bulgogi. It’s sure to impress anyone.
Preparing Your Signature Bulgogi Marinade
To make a great ground beef bulgogi recipe, the marinade is key. It adds flavor and tenderness to the meat. A good marinade can make the dish unforgettable.
The marinade has soy sauce, Korean chili flakes, brown sugar, garlic, and sesame oil. These ingredients mix to create sweet, spicy, and savory flavors. It’s important to mix them right to get the perfect taste.
Key Components of the Marinade
Soy sauce: provides a rich, savory flavor
Korean chili flakes: adds a spicy kick
Brown sugar: balances out the heat with a touch of sweetness
Garlic: adds a pungent flavor and aroma
Sesame oil: enhances the overall flavor and texture
Knowing the marinade’s key parts lets you adjust the recipe to your liking. You can make it spicier or sweeter. This easy bulgogi recipe helps you make a delicious Korean dish that will wow everyone.
Step-by-Step Ground Beef Bulgogi Instructions
To make a quick bulgogi recipe, start by heating a large skillet or wok over medium-high heat. Add a small amount of oil to the pan. Then, add the marinated ground beef. Cook until the beef is browned, breaking it up into small pieces as it cooks.
This process should take about 5-7 minutes, depending on the heat and the size of the pieces. As you cook the ground beef, make sure to stir frequently to prevent burning. Once the beef is cooked, remove it from the pan and set it aside.
In the same pan, add a bit more oil if necessary. Then, add any desired vegetables, such as onions, bell peppers, or mushrooms. Cook the vegetables until they are tender. Then, return the cooked ground beef to the pan and stir to combine.
For a quick bulgogi recipe, it’s essential to have all the ingredients ready and to cook the dish quickly over high heat. This helps to preserve the texture and flavor of the ingredients. Some key tips to keep in mind include using a high-quality marinade, cooking the beef and vegetables quickly, and serving the dish immediately.
By following these steps, you can create a delicious and authentic quick bulgogi recipe in your own kitchen.
Cook the ground beef in a large skillet or wok over medium-high heat, breaking it up into small pieces as it cooks.
Add desired vegetables to the pan and cook until they are tender.
Return the cooked ground beef to the pan and stir to combine with the vegetables.
Serve the dish immediately, garnished with green onions and sesame seeds if desired.
By following these steps and using a high-quality marinade, you can create a delicious and authentic quick bulgogi recipe that is sure to please even the most discerning palates.
Mastering the Cooking Technique
To get the best bulgogi recipe, mastering the cooking technique is key. It’s all about controlling the temperature and cooking time. Cooking the meat at the right temperature is crucial for the perfect texture.
Overcooking makes the meat dry and tough. Undercooking makes it raw and unsafe. So, it’s important to get it just right.
Here are some tips for cooking bulgogi:
Cook the meat at a medium-high heat for a nice sear.
Use a thermometer to check the meat’s internal temperature.
Don’t overcrowd the pan to keep the temperature up.
By following these tips and practicing, you can make a delicious bulgogi.
Temperature Control Tips
Temperature control is vital when cooking bulgogi. The ideal temperature is between 130°F and 135°F. This temperature gives a nice sear on the outside and keeps the inside juicy.
Achieving the Perfect Texture
Getting the perfect texture is also important. The meat should be tender and juicy but still have some texture. Overcooking makes it dry and tough, while undercooking makes it raw and unsafe.
Traditional Side Dishes and Accompaniments
When you serve a simple bulgogi recipe, think about the traditional side dishes. These side dishes, called “banchan” in Korean cuisine, are key. They balance the meal’s flavors and textures.
A simple bulgogi recipe pairs well with many side dishes. You can serve kimchi, steamed rice, and stir-fried vegetables. These add flavor, texture, and nutrition to your meal. Here are some great side dishes for bulgogi:
Kimchi: a spicy fermented Korean cabbage dish that adds a burst of flavor
Steamed rice: a staple in Korean cuisine that helps to balance the spiciness of the bulgogi
Stir-fried vegetables: quickly cooked vegetables that add texture and flavor to the meal
For a better dining experience, serve your simple bulgogi recipe with these traditional sides. The mix of flavors and textures makes for a satisfying meal.
Storage and Reheating Guidelines
To keep your ground beef bulgogi tasty, follow the right storage and reheating steps. Let it cool down to room temperature before refrigerating or freezing it in a sealed container. This stops moisture from ruining the dish.
When you’re ready to eat it again, just microwave or stir-fry it until it’s hot. This keeps the flavors and textures just right. Reheat it in short bursts, checking often to avoid burning.
Storage Methods
Refrigerate: Store the bulgogi in a covered container and keep it in the refrigerator at a temperature of 40°F (4°C) or below.
Freeze: Place the bulgogi in an airtight container or freezer bag and store it in the freezer at 0°F (-18°C) or below.
Reheating Tips
To reheat your delicious ground beef bulgogi, follow these tips:
Microwave: Reheat the bulgogi in short intervals, checking on it frequently to avoid overcooking.
Stir-fry: Reheat the bulgogi in a pan with a small amount of oil, stirring constantly to prevent burning.
By following these storage and reheating guidelines, you can enjoy your delicious ground beef bulgogi for a longer period while maintaining its flavor and quality.
Conclusion: Enjoying Your Homemade Korean Feast
Congratulations on mastering the art of ground beef bulgogi! This easy recipe lets you bring Korea’s flavors home. It’s perfect for both Korean food lovers and newcomers. This easy bulgogi recipe will surely wow your taste buds.
Enjoy your homemade ground beef bulgogi with Korean side dishes. The mix of tender meat and side dishes will feel like a trip to Seoul. Try different side dishes to find your favorites and make your meal even better.
The ground beef bulgogi recipe is very flexible. You can change the seasonings, try different meats, or add your own twist. This lets you make the dish your own, with endless possibilities.
Keep exploring Korean cuisine. Look for authentic Korean restaurants, check out Korean cooking blogs and YouTube. Dive into the rich flavors and traditions of Korean food. There’s so much to discover in the world of Korean cuisine.
section>
FAQ
What is ground beef bulgogi?
Ground beef bulgogi is a Korean dish. It’s made with ground beef marinated in a sweet and savory sauce. Then, it’s quickly cooked over high heat.
What are the key ingredients in ground beef bulgogi?
The main ingredients are ground beef, Korean chili flakes (gochugaru), soy sauce, brown sugar, garlic, and sesame oil. These give the dish its unique flavor.
How does ground beef bulgogi differ from traditional bulgogi?
Ground beef bulgogi uses ground beef instead of thinly sliced beef. This makes it easier to prepare at home. It’s a simpler version of the traditional dish.
What are the best cooking techniques for ground beef bulgogi?
To get the best results, control the cooking temperature and avoid overcooking. Use a large skillet or wok over medium-high heat. This ensures the meat stays juicy and flavorful.
What are some traditional side dishes to serve with ground beef bulgogi?
Serve it with kimchi (spicy fermented Korean cabbage), steamed rice, and stir-fried vegetables. These dishes enhance the flavors and textures of the bulgogi.
How should I store and reheat leftover ground beef bulgogi?
Cool it down to room temperature, then refrigerate or freeze it in an airtight container. To reheat, microwave or stir-fry until it’s hot and steaming.
75% of American households use beef broth in their cooking. It’s a favorite because of its rich, savory taste. Beef broth is great for many dishes, like stews and soups. I’m excited to share howhomemade beef broth recipescan make your cooking better.
Table of Contents
Beef broth is perfect for both slow-cooked meals and quick dinners. It’s great for anyone, whether you’re a pro chef or just starting. I’ll show you how to use beef broth to make delicious meals that will wow your guests.
Introduction to Beef Broth
We’ll look at how to use beef broth in soups, stews, sauces, and more. You’ll learn a lot about this amazing ingredient. Beef broth is loved for its flavor and health benefits, making it a staple in many homes.
Key Takeaways
Beef broth is a versatile ingredient that can be used in a wide range of dishes
Homemade beef broth recipes offer numerous health benefits and a richer flavor than store-bought alternatives
Recipes with beef broth can be used to create comforting, slow-cooked meals or quick and easy weeknight dinners
Beef broth is a great base for soups, stews, sauces, and gravies
With a little creativity, you can use beef broth to elevate your cooking and create delicious, mouth-watering meals
Beef broth is a staple ingredient in many American households, and its popularity continues to grow
Understanding the Magic of Beef Broth in Cooking
Exploring cooking with beef broth has been a thrilling journey. It’s not just about the flavor; it’s also about the health benefits. Beef broth can make any dish better, and I’m excited to try out different recipes.
Beef broth is great at bringing out the taste of other ingredients. It’s perfect for stews or soups, making them both tasty and healthy. Using high-quality beef broth means my dishes are not only delicious but also good for me.
I always choose homemade beef broth over store-bought. Homemade beef broth lets me control the ingredients and cooking process. This way, I get a more flavorful and nutritious dish. But, I know store-bought broth is handy for those who are short on time.
Here are some common uses for beef broth in cooking:
As a base for soups and stews
As a cooking liquid for grains and vegetables
As a ingredient in sauces and marinades
Adding beef broth to my cooking has opened up a world of tasty and healthy meals. Its rich flavor and health perks make it a must-have in my kitchen. I’m looking forward to trying more beef broth recipes.
Essential Tips for Cooking with Beef Broth
When cooking with beef broth, a few key tips are important. First, pick the right broth for your recipe. You can use store-bought or make your own. Homemade broth is often tastier and healthier, but store-bought is quick when you’re in a rush.
Proper storage is also key. Keep it in the fridge for up to a week or freeze it. When you’re ready, thaw and heat it up. Beef broth is great for soups, stews, and sauces.
Here are some tips for cooking with beef broth:
Use it as a base for soups and stews
Add it to sauces and gravies for extra flavor
Use it to cook vegetables, rice, and other grains
Make a big batch and freeze it for later use
By following these tips and using easy beef broth recipes, you can make delicious dishes. Beef broth is versatile and can help you create many tasty meals. It’s great for both seasoned chefs and beginners.
Classic Soup Recipes with Beef Broth
Soups are a comfort food favorite in many cultures. Beef broth adds flavor and nutrition to meals. Let’s look at some classic soups that use beef broth.
Homemade beef broth can make your soups taste better. Here are some tips to start:
Choose high-quality ingredients, like beef bones and fresh veggies.
Simmer the broth for at least an hour to get all the flavors.
Season it with salt, pepper, and herbs to taste.
French Onion Soup
This classic soup has caramelized onions, beef broth, and is topped with croutons and melted cheese.
Beef and Barley Soup
This hearty soup combines beef broth, barley, and tender beef chunks.
Asian-Inspired Noodle Soups
These soups use beef broth, noodles, and Asian ingredients like soy sauce and ginger.
Savory Main Dishes Using Beef Broth
Beef broth opens up a world of flavors in cooking. It’s great for making savory main dishes. Braised short ribs and roasted chicken are just a few examples. These dishes get a rich flavor boost from beef broth.
Here are some top ways to use beef broth in main dishes:
Braising short ribs or lamb shanks in beef broth for a fall-off-the-bone tender dish
Using beef broth as a base for a hearty beef stew
Adding beef broth to a roasted chicken recipe for extra moisture and flavor
Choosing high-quality beef broth is key. Look for low-sodium options made with wholesome ingredients. You can also make your own broth from beef bones, veggies, and aromatics.
Beef broth can make your main dishes taste amazing. It’s perfect for both seasoned chefs and beginners. So, try out different recipes and find your new favorite dish.
Dish
Ingredients
Cooking Time
Braised Short Ribs
Short ribs, beef broth, vegetables
2-3 hours
Roasted Chicken
Chicken, beef broth, herbs
45-60 minutes
Beef Stew
Beef, beef broth, vegetables
1-2 hours
Creating Rich Sauces and Gravies
Adding a great sauce or gravy can really elevate savory dishes with beef broth. We’ll dive into making rich, flavorful sauces with beef broth. You’ll learn from basic pan sauces to more complex wine-enhanced ones.
Beef broth is key in sauce making. It brings depth of flavor and moisture. With simple ingredients and basic techniques, you can whip up tasty sauces for your favorite meals.
Basic pan sauce: a simple and versatile sauce made with beef broth, butter, and flour
Mushroom gravy: a hearty and flavorful sauce made with sautéed mushrooms and beef broth
Wine-enhanced sauce: a rich and complex sauce made with red wine, beef broth, and a touch of cream
Using savory dishes with beef broth can add flavor and moisture to many dishes. And with these easy beef broth recipes, making delicious sauces and gravies is a breeze. So, why not give it a try and see the difference for yourself?
Elevating Rice and Grain Dishes with Beef Broth
Rice and grain dishes can become more flavorful with recipes with beef broth. A simple way to do this is by swapping water with homemade beef broth recipes. This change brings a deep, savory taste that boosts the dish’s flavor.
Popular dishes like chicken and rice, beef and barley, and paella can benefit from beef broth. When using recipes with beef broth, it’s key to balance the flavors. A good rule is to mix beef broth with water to get the right taste.
You can also use homemade beef broth recipes as a base for sauces and gravies. This adds more flavor to your rice and grain dishes. By trying out different recipes with beef broth, you can make a variety of tasty meals. These are sure to delight your family and friends.
Quick and Easy Recipes with Beef Broth
When it comes to cooking with beef broth, I always look for ways to make it easier and faster. Our busy lives mean we need quick and easy recipes. In this section, we’ll explore delicious and easy dishes that use beef broth.
Cooking with beef broth adds flavor to your meals. A simple soup with beef broth, veggies, and protein is a favorite of mine. You can also make sauces and gravies with beef broth. For example, a tasty gravy for roast beef is made by reducing broth and adding flour.
15-Minute Dinner Solutions
Beef and vegetable stir-fry: Cook your favorite vegetables and beef in a wok or large skillet with some beef broth and soy sauce.
One-pot pasta: Cook pasta, tomato sauce, and beef broth in one pot for a quick and easy dinner.
Tacos: Use beef broth to make a delicious and flavorful taco filling with ground beef and your favorite toppings.
These quick and easy recipes are perfect for busy weeknights. They let you add flavor and moisture to your dishes without spending hours cooking. Whether you’re making a hearty soup or a quick stir-fry, beef broth makes mealtime easier and more enjoyable.
Creative Ways to Use Leftover Beef Broth
When I cook with beef broth, I often have some left over. I don’t want to throw it away. So, I’ve found some creative ways to use it. I love using it as a base for soups or stews. Just add veggies, noodles, or meat, and you get a tasty meal.
Another great idea is to make flavorful sauces or gravies with it. I reduce the broth to intensify the flavors. Then, I mix it with flour or butter for a creamy sauce. It’s perfect over mashed potatoes, rice, or roasted veggies. I also use it to cook grains like rice, quinoa, or barley, adding flavor and moisture.
Make a hearty beef and vegetable soup
Use it as a braising liquid for pot roast or short ribs
Add it to scrambled eggs or omelets for extra flavor
Use it as a base for homemade noodle soups
By being creative with leftover beef broth, I can cut down on waste. And I get to enjoy tasty and easy beef broth recipes all week.
Troubleshooting Common Issues When Cooking with Beef Broth
Cooking with beef broth can be tricky. Sometimes, problems pop up that mess with your dish. Knowing common issues and how to fix them is key, whether you’re using store-bought or homemade broth.
Common problems include too much salt, uneven flavors, and bad storage. Understanding the basics of using beef broth is vital. Having some quick fixes ready can save your dish.
Fixing Over-Salted Broth
Too much salt is a big problem. To fix it, you can water down the broth or add potatoes or rice. These absorb the salt, making the broth just right.
Adjusting Flavors and Consistency
Flavors or textures that don’t match can also be a problem. Adding onions, carrots, and celery can help with flavors. For texture, try reducing the broth to concentrate it or add cornstarch to thicken.
Storage and Preservation Tips
Storing your beef broth right is important for its quality and safety. You can keep it in the fridge for up to 5 days or freeze it for 3 months. Always label the containers with the date and contents. Thaw slowly in the fridge or on the counter.
By using these tips and quality recipes, you can make tasty dishes. They’ll highlight the rich flavors of homemade beef broth.
Conclusion: Making the Most of Your Beef Broth Adventures
We’ve explored the world of beef broth together. Now, you’re ready to use it in many ways. It can make soups, main dishes, sauces, and even rice and grain dishes better.
Try making your own broth or use store-bought. I want you to keep trying new things with cooking with beef broth. The beef broth recipe ideas and tips we shared will help you discover new flavors.
Beef broth makes your food richer and more nutritious. So, use what you’ve learned and start cooking with beef broth. Enjoy your meals!
FAQ
What makes beef broth special in cooking?
Beef broth adds a rich, savory flavor to dishes. It has natural gelatin that enhances its taste. This makes it key in many cuisines.
What are the nutritional benefits of beef broth?
Beef broth is full of protein, minerals, and vitamins. It boosts the nutrition of your meals. It’s also known for its health benefits.
How do homemade and store-bought beef broth differ?
Homemade broth tastes richer and more complex than store-bought. You can customize it to your taste. Store-bought is convenient but often less flavorful.
What are some essential tips for cooking with beef broth?
Choose the right broth and store it well. Use it to enhance flavors in your dishes. Try different recipes to find the best ways to use beef broth.
What are some classic soup recipes that feature beef broth?
Beef broth is great in French onion soup, beef and barley soup, and Asian noodle soups. These dishes highlight its rich flavor.
How can I use beef broth to create delicious savory main dishes?
Beef broth adds moisture and depth to dishes like braised short ribs and roasted chicken. It’s also good for beef stew and lamb shanks. Use it for braising or as a sauce base.
What techniques can I use to create rich sauces and gravies with beef broth?
For rich sauces, try a basic pan sauce or a mushroom gravy. You can also experiment with wine-enhanced sauces. Beef broth adds complexity to these dishes.
How can I use beef broth to elevate my rice and grain dishes?
Use beef broth instead of water for a savory flavor in rice and grain dishes. It’s great in chicken and rice, beef and barley, risotto, or paella.
What are some quick and easy recipes that feature beef broth?
Beef broth is perfect for quick meals like 15-minute dinners and one-pot dishes. It’s also great for make-ahead meals. It saves time and effort.
How can I use leftover beef broth creatively?
Use leftover broth in soups, sauces, stews, and braises. It reduces waste and boosts flavor. Proper storage and freezing help preserve it for later.
How can I troubleshoot common issues when cooking with beef broth?
For over-salted broth or flavor issues, adjust seasonings and consistency. Proper storage helps too. These tips ensure success with beef broth.