Making sushi at home can be a fun and delicious activity. The Easy Sushi Roll Recipe is a simple way to enjoy this Japanese favorite without needing to go to a restaurant. With a few ingredients and a little practice, you can create beautiful sushi rolls that are perfect for any occasion.
Table of Contents
Why Make This Recipe
This sushi roll recipe is perfect for anyone who loves sushi and wants to try making it at home. It allows you to choose your favorite fillings and get creative in the kitchen. Plus, it’s a great dish for sharing with friends and family. Making sushi can also be a fun cooking project, especially when you get everyone involved!
How to Make Easy Sushi Roll
Ingredients:
Sushi rice
Nori seaweed sheets
Fillings such as salmon, tuna, avocado, or cucumber
Spicy mayo
Soy sauce
Pickled ginger
Wasabi paste
Directions:
Prepare the rice by rinsing 2 cups of Japanese short-grain rice until the water runs clear.
Cook the rice with 2 cups of water until tender.
Mix 4 tablespoons rice vinegar, 2 tablespoons sugar, and 2 teaspoons salt. Gently fold the vinegar mixture into the cooked rice, then let it cool.
To make the rolls, place a nori sheet on a bamboo mat.
Spread a thin layer of rice, leaving a small gap at the top.
Add your chosen fillings in a line near the center of the rice.
Roll the nori and rice over the fillings using the mat, pressing tightly.
Moisten the exposed edge with water to seal the roll.
Cut the roll into 8 slices with a sharp, wet knife.
Serve by arranging sushi rolls on a platter and garnishing with pickled ginger and wasabi. Offer soy sauce, spicy mayo, or coconut aminos for dipping.
How to Serve Easy Sushi Roll
Serve your sushi rolls fresh on a plate with a side of soy sauce, spicy mayo, pickled ginger, and wasabi. This adds extra flavor and makes it even more enjoyable. You can add some colorful vegetables or salad on the side for a complete meal.
How to Store Easy Sushi Roll
If you have leftover sushi rolls, wrap them tightly in plastic wrap and store them in the refrigerator. They are best eaten within a day, as the rice can become hard when stored for too long. Simply enjoy them cold or let them come to room temperature before eating.
Tips to Make Easy Sushi Roll
Use a sharp knife to cut the sushi rolls for clean edges.
Wet your hands while handling sushi rice to prevent it from sticking.
Experiment with different fillings to find your favorite combinations.
Variation
You can change up the ingredients to create different types of rolls. Try a California roll with imitation crab, avocado, and cucumber or a spicy tuna roll with fresh tuna and spicy mayo.
FAQs
Q1: Can I use regular rice instead of sushi rice?
A1: No, sushi rice is specially prepared for sushi and has the right stickiness to hold the rolls together. It’s best to use sushi rice for this recipe.
Q2: Is sushi safe to eat if I don’t use raw fish?
A2: Yes! You can use cooked fish like shrimp or crab or vegetarian fillings like vegetables and avocado to make delicious sushi rolls without raw fish.
Q3: Do I need a bamboo mat to make sushi?
A3: While a bamboo mat makes rolling sushi easier, you can also use parchment paper or just your hands if you don’t have one. Just be sure to roll tightly to keep the filling inside.
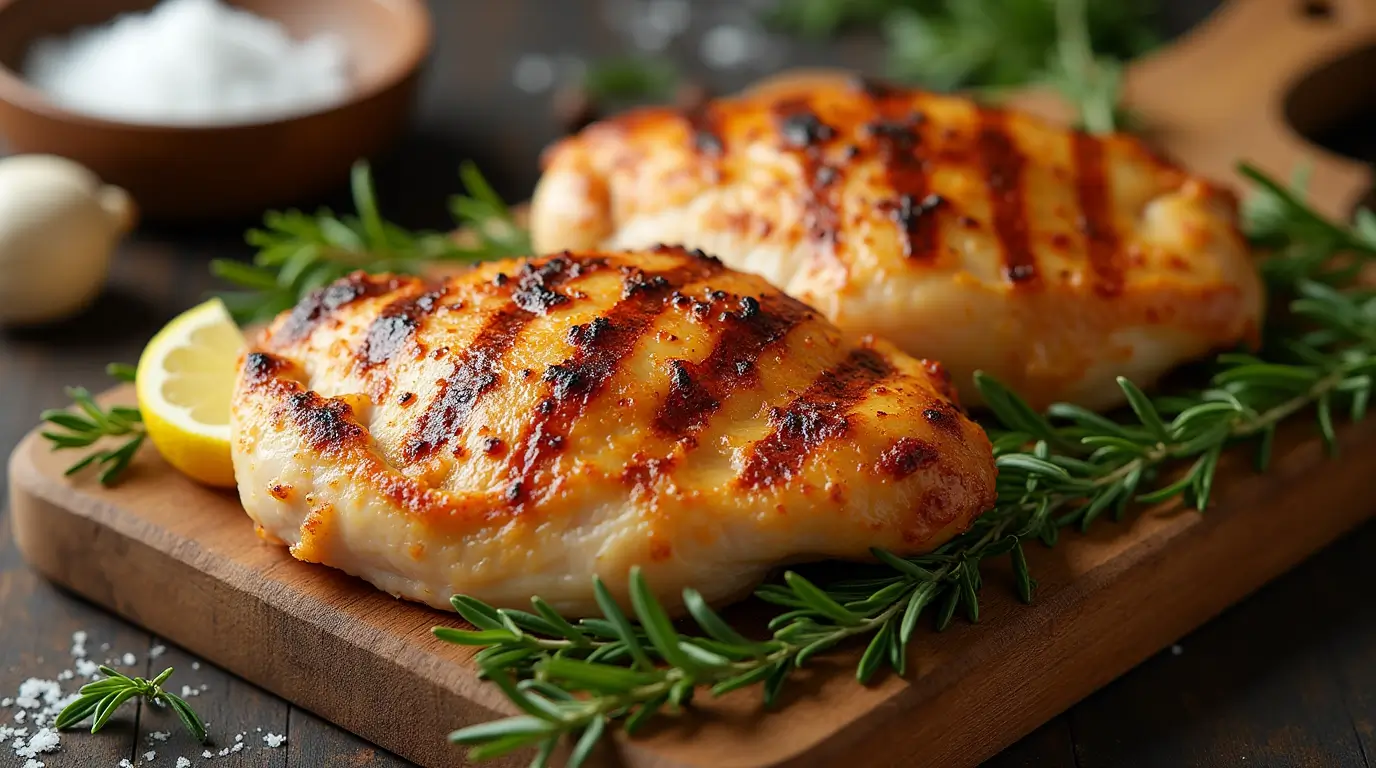
Brined chicken breasts are a delicious way to enjoy juicy and flavorful chicken. Brining involves soaking the chicken in a saltwater mixture, which helps keep it moist during cooking. This method is simple and yields great results, making it a favorite for many home cooks.
Table of Contents
Why Make This Recipe
Making brined chicken breasts is a great idea if you want tender and juicy chicken. The brine adds flavor and moisture, making the chicken much more enjoyable to eat. Whether you plan to bake or grill, brined chicken is sure to impress your family and friends.
How to Make Brined Chicken Breasts
Ingredients:
2 cups water
2 tablespoons salt
1 tablespoon lemon juice
1 tablespoon sugar
3-4 bay leaves
3 cloves smashed garlic
1/2 teaspoon black pepper
Chicken breasts
Directions:
Combine brine ingredients in a bowl until the salt dissolves.
Submerge chicken breasts in the brine, ensuring they are fully covered.
Refrigerate for 1 hour per pound of chicken; bone-in chicken may need up to 2 hours.
To bake, preheat the oven to 450°F. Dry the chicken with paper towels and bake for 15-20 minutes or until the internal temperature reaches 165°F. Let rest for 5-10 minutes.
To grill, heat the grill to medium-high. Dry the chicken with paper towels and grill for 6-8 minutes per side or until the internal temperature reaches 165°F. Let rest for 5-10 minutes.
To freeze, brine chicken for 30-60 minutes, drain excess brine, pat chicken dry, and place in an airtight container or bag. Freeze for up to 6 months.
How to Serve Brined Chicken Breasts
Brined chicken breasts can be served in many ways. Slice the chicken and add it to salads, sandwiches, or wraps. You can also serve it with your favorite sides, like vegetables or rice, for a complete meal.
How to Store Brined Chicken Breasts
If you have leftover brined chicken, store it in an airtight container in the refrigerator. It should stay fresh for about 3-4 days. If you want to keep it longer, freeze it right after brining. Make sure to pat it dry and place it in a freezer-safe bag.
Tips to Make Brined Chicken Breasts
Use fresh herbs like thyme or rosemary in the brine for extra flavor.
Make sure the brine is completely cooled before adding the chicken.
Do not over-brine the chicken, as it can become too salty.
Variation
You can try different flavors by adding spices like paprika, cayenne pepper, or even a splash of soy sauce to the brine. Experimenting with flavors can make your brined chicken breasts even more exciting!
FAQs
1. Can I brine chicken breasts overnight? Yes, you can brine chicken breasts overnight, but be careful not to over-brine them as it may become too salty.
2. How do I know when the chicken is cooked through? Use a meat thermometer to check the internal temperature. It should reach 165°F.
3. Can I use frozen chicken breasts? Yes, you can boil frozen chicken breasts. Just make sure they are fully thawed before brining them for the best results.
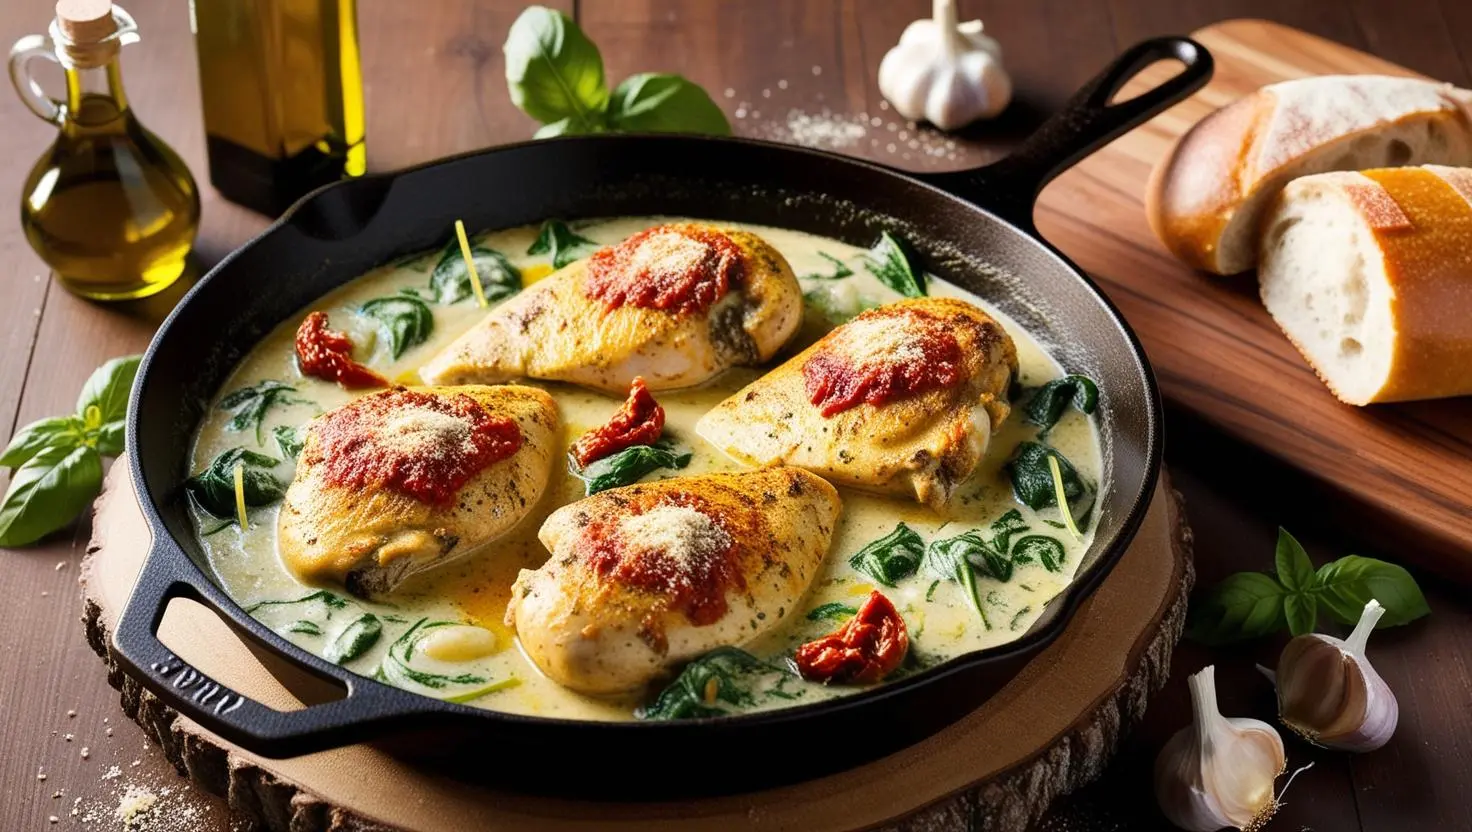
Tuscan Chicken is a warm and creamy dish that brings the flavors of Italy right to your table. It’s quick to prepare and bursting with delicious ingredients. Perfect for family dinners or a cozy evening at home!
Table of Contents
Why Make This Recipe
You should make Tuscan chicken because it’s not only tasty but also super easy to put together. With simple ingredients like chicken, spinach, and sun-dried tomatoes, you can create a delightful meal that everyone will love. Plus, it’s a great way to impress your family and friends with minimal effort!
How to Make Tuscan Chicken
Ingredients:
2 large chicken breasts, sliced thin
1 cup heavy cream
1/2 cup sun-dried tomatoes, oil packed
2 cups fresh spinach
3 cloves garlic, minced
1/2 cup chicken broth
1/3 cup Parmesan cheese, grated
1 teaspoon Italian seasoning
1 tablespoon olive oil
Salt and pepper, to taste
Directions:
Season the chicken breasts with salt, pepper, and Italian seasoning. Heat the olive oil in a skillet over medium-high heat. Cook the chicken for 5-6 minutes on each side until golden brown. Once done, remove it from the skillet and set it aside.
In the same pan, add the minced garlic and sauté for about 1 minute. Pour in the chicken broth, scraping up any crispy bits left in the pan. Then, add the heavy cream and grated Parmesan cheese. Stir everything together until it thickens, which will take about 3 minutes.
Toss in the sun-dried tomatoes and fresh spinach, cooking until the spinach wilts, around 1-2 minutes.
Finally, return the chicken to the pan and let it simmer for another 2 minutes. You can garnish it with extra Parmesan cheese if you like!
How to Serve Tuscan Chicken
Serve your Tuscan chicken over pasta, rice, or with a side of garlic bread. It’s also perfect with a mixed salad. This meal is satisfying and is sure to make everyone ask for seconds!
How to Store Tuscan Chicken
To store any leftovers, place them in an airtight container in the refrigerator. It will stay fresh for up to three days. If you plan to enjoy it later, you can freeze it for up to two months. Just make sure to thaw it in the fridge before reheating.
Tips to Make Tuscan Chicken
Make sure to slice the chicken breasts thinly for quicker cooking.
Feel free to add more veggies like mushrooms or bell peppers for added flavor.
Taste as you go! Adjust the seasoning to your preference for the perfect dish.
Variation
You can easily turn this Tuscan chicken into a creamy pasta dish. Just cook your favorite pasta alongside and mix it all together for a delightful twist.
FAQs
Q: Can I use chicken thighs instead of breasts? A: Yes! Chicken thighs will add a richer flavor and stay juicy while cooking.
Q: Is this recipe good for meal prep? A: Absolutely! It reheats well and makes a great meal prep option for busy days.
Q: Can I use fresh tomatoes instead of sun-dried? A: Yes, you can use fresh tomatoes, but they will need to be cooked longer to develop the right flavor and consistency.
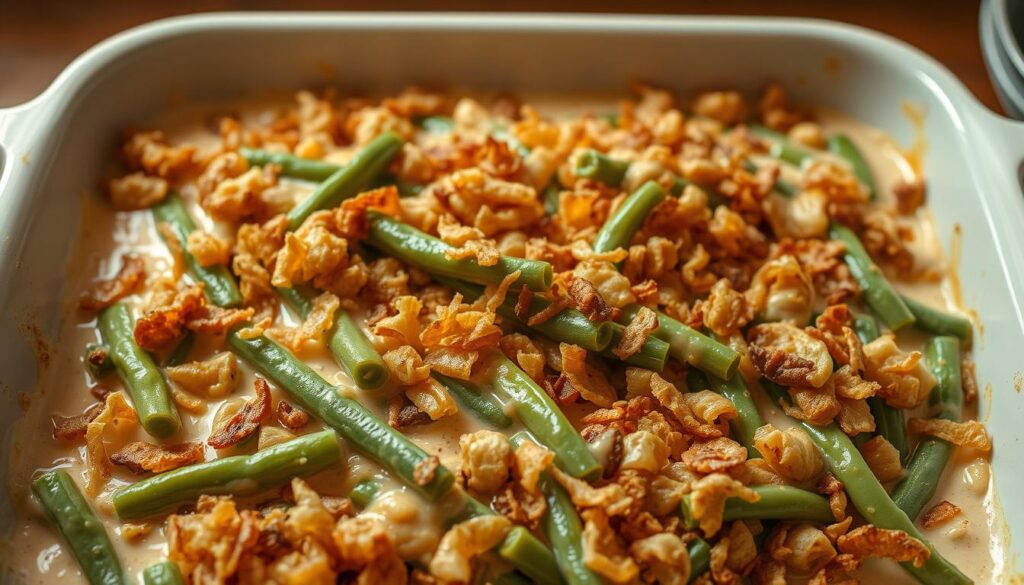
The Campbell’s Green Bean Casserole recipe is a timeless favorite. It brings warmth and nostalgia to any occasion. We’ll explore its history, preparation, and presentation. This guide will help you make the perfect green bean casserole.
Key Takeaways
Learn the history behind the Campbell’s Green Bean Casserole recipe
Discover the essential ingredients for the perfect green bean casserole
Get step-by-step instructions for preparing the dish
Understand the importance of kitchen tools and equipment
Explore time-saving tips and preparation shortcuts
Avoid common mistakes and ensure a delicious outcome
The History Behind Campbell’s Green Bean Casserole
The campbell soup recipe for Green Bean Casserole has a long history. It was created in the 1950s by Dorcas Reilly, a home economist at Campbell’s Soup. The recipe was made simple, using ingredients that were easy to find and affordable for families.
Over time, the classic green bean casserole has changed a bit. But its main ingredients and charm have stayed the same. It’s a favorite at American holiday meals, like Thanksgiving and Christmas. This is because it’s easy to make, tastes great, and brings back memories.
Origins in Campbell’s Test Kitchen
The Green Bean Casserole started in Campbell’s test kitchen. Dorcas Reilly and her team were trying to make a new recipe with Campbell’s products. They came up with a tasty mix of green beans, cream of mushroom soup, and french-fried onions.
Evolution into an American Classic
Now, the classic green bean casserole is loved by millions in the U.S. It’s a must-have at holiday meals and family events. The campbell soup recipe has seen changes, but its core ingredients and appeal have stayed the same.
Why This Recipe Became a Holiday Staple
The classic green bean casserole is a holiday favorite. It’s easy to make, tastes amazing, and brings back memories. It’s a dish that’s often linked with family and holiday meals. Serving it at Thanksgiving, Christmas, or other holidays will surely please your guests.
Essential Ingredients for the Perfect Casserole
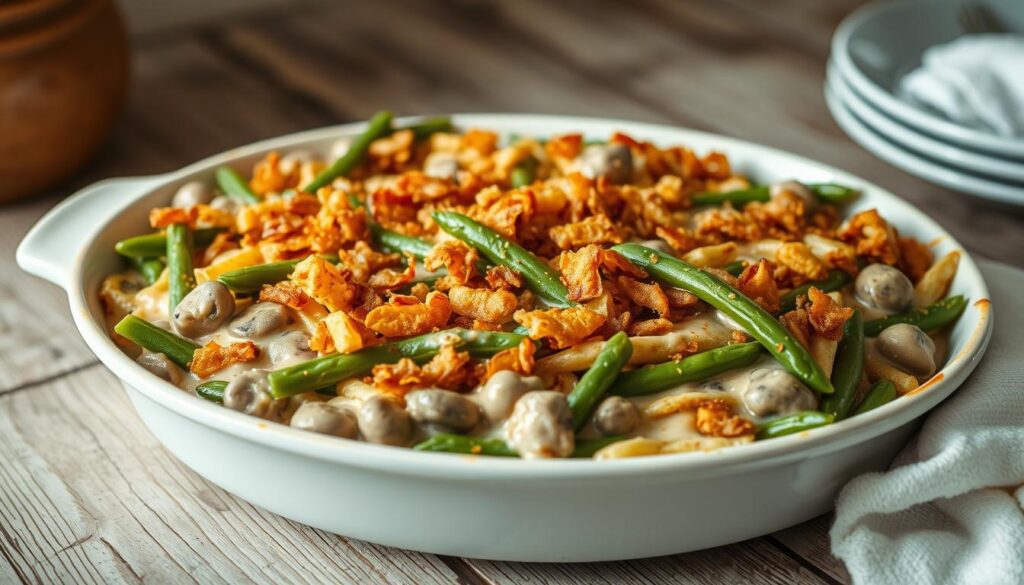
To make a delicious homemade green bean casserole, you need the right ingredients. The quality of these ingredients greatly affects the taste and texture. For an easy green bean casserole, you’ll need fresh or frozen green beans, cream of mushroom soup, milk, black pepper, salt, and french-fried onions.
Here’s a list of the essential ingredients:
1 pound fresh or frozen green beans
1 can of cream of mushroom soup
1/2 cup milk
1/2 teaspoon black pepper
1/2 teaspoon salt
1 1/2 cups french-fried onions
You can also add garlic, onion powder, or grated cheese to customize your casserole. Using fresh green beans and quality cream of mushroom soup will enhance the flavor.
With these ingredients, you’ll make a delicious homemade green bean casserole. It’s perfect for any occasion, whether it’s a weeknight dinner or a special event. These ingredients will help you create a tasty and satisfying dish.
Campbell Soup Green Bean Casserole Recipe: Step-by-Step Instructions
To make a tasty campbell soup green bean casserole, start by preheating your oven to 350°F (175°C). This step is crucial for even cooking. The green bean casserole recipe is a timeless favorite. With these steps, you’ll craft a dish that’s ideal for any event.
Here’s a list of steps to follow:
Prepare your green beans by trimming the ends and cutting them into 1-inch pieces.
Make the mushroom sauce by mixing the cream of mushroom soup, milk, black pepper, and salt in a saucepan.
Bring the mixture to a simmer over medium heat, whisking constantly, until it thickens.
Combine the green beans, mushroom sauce, and half of the french-fried onions in a 9×13 inch baking dish.
Top the casserole with the remaining french-fried onions and bake for 25-30 minutes, or until the onions are golden brown and the casserole is hot and bubbly.
The secret to a fantastic green bean casserole recipe is using top-notch ingredients and following the steps closely. With these guidelines, you’ll whip up a mouthwatering campbell soup green bean casserole. It’s sure to impress your loved ones.
Kitchen Tools and Equipment Needed
To make a tasty easy green bean casserole, you’ll need some basic kitchen tools. The right tools make cooking easier and faster. For a campbell soup recipe, having the right cookware and utensils is key.
A 9×13 inch baking dish is essential for any casserole, like the easy green bean casserole. You’ll also need a saucepan for the mushroom sauce, a crucial part of the campbell soup recipe. Don’t forget a cutting board for chopping the green beans.
Cookware and Utensils
9×13 inch baking dish
Saucepan for making the mushroom sauce
Cutting board for preparing the green beans
Optional tools can make things easier. A food processor for chopping green beans, a whisk for mixing, and a spatula for serving are helpful. These tools can make cooking more fun and less stressful.
Time-Saving Tips and Preparation Shortcuts
Making a homemade green bean casserole can be quicker with some tips. Using frozen green beans saves time. They thaw fast and fit well in a Campbell soup casserole.
Preparing the mushroom sauce early is another shortcut. Store it in the fridge until you’re ready. Pre-chopped onions or french-fried onions also cut down prep time. These tips are great for big gatherings.
Preparing the casserole a day in advance and refrigerating it overnight, then baking it the next day
Using a pre-made cream of mushroom soup to save time on making the sauce from scratch
Assembling the casserole in the morning and baking it in the evening, allowing for a more flexible schedule
These tips make making a Campbell soup green bean casserole easier. You’ll enjoy a tasty casserole with less stress.
Common Mistakes to Avoid When Making Green Bean Casserole
When making a classic green bean casserole, knowing common mistakes is key. This ensures your dish is tasty. Temperature control is vital for texture and safety. Also, overcooking green beans or a too-thick mushroom sauce can cause problems.
To avoid these issues, cook green beans until they’re tender but still crisp. Adjust the mushroom sauce’s thickness by adding milk or cream. Seasoning mistakes can also ruin the flavor. So, taste and adjust as you go. This way, you’ll make a delicious green bean casserole everyone will love.
Some common mistakes to watch out for include:
Overcooking the green beans, resulting in a mushy texture
Using too much salt, which can overpower the other flavors
Not adjusting the seasoning to taste, leading to a bland casserole
By being mindful of these potential pitfalls, you can create a delicious classic green bean casserole. It’s perfect for any occasion. Whether it’s a holiday gathering or a family dinner, this dish will be a hit.
Creative Variations and Modern Twists
The campbell soup green bean casserole recipe can be made in many ways. Try adding diced ham or bacon for a smoky taste. You can also use different cheeses like cheddar or parmesan for more flavor. For an easy green bean casserole, use pre-cut beans and store-bought cream of mushroom soup.
Here are some other creative ideas:
Add sautéed mushrooms and onions for extra taste and texture.
Use fresh green beans and make your own cream of mushroom soup.
Try different spices like garlic powder, onion powder, or paprika for a unique taste.
These modern twists can make the classic campbell soup green bean casserole recipe more exciting. Whether you want an easy green bean casserole or something more complex, you can make it your own.
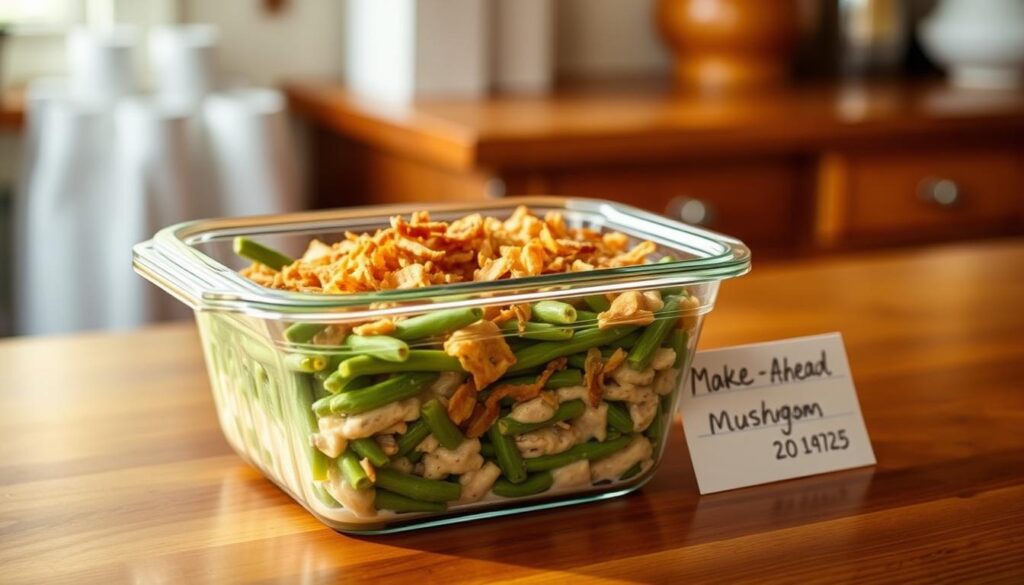
Make-Ahead and Storage Guidelines
Timing is key when making a homemade green bean casserole, like the classic Campbell soup version. To get your dish ready for family gatherings or holiday meals, make it ahead of time. This is a big time-saver, perfect for busy holiday seasons.
To make ahead, prepare the casserole up to a day before, but don’t bake it. Store it in the fridge overnight and bake it the next day. For longer storage, freeze it. Prepare it without baking, then wrap it tightly in plastic or foil and put it in a freezer-safe bag.
Refrigerate the casserole overnight and bake it the next day for optimal flavor and texture.
Freeze the casserole for longer storage, and thaw it overnight in the refrigerator before baking.
Follow safe reheating guidelines to ensure that your Campbell soup green bean casserole is heated evenly and thoroughly.
By following these make-ahead and storage tips, you can enjoy a tasty homemade green bean casserole whenever you want. It’s perfect for holiday meals or family gatherings. This classic dish is sure to impress everyone.
Conclusion: Mastering Your Campbell’s Green Bean Casserole
Learning to make the Campbell’s green bean casserole is simpler than you might think. This guide offers detailed steps and useful tips. You’ll soon be making a dish that will impress your loved ones.
The Campbell’s green bean casserole has been a favorite for many years. It’s a mix of tender green beans, creamy mushroom sauce, and crispy fried onions. This combo makes a side dish that’s both comforting and satisfying. It’s perfect with turkey, ham, or any main dish.
So, try making this Campbell’s green bean casserole and let the smell of it fill your home. Your taste buds will thank you, and your guests will be amazed. Enjoy the tasty flavors and the tradition it brings to your holiday meals.
FAQ
What is the history behind Campbell’s Green Bean Casserole?
Campbell’s Green Bean Casserole was created in 1955 by Dorcas Reilly. She worked at the Campbell Soup Company. The recipe was simple and used common ingredients like green beans and french-fried onions.
Over time, it became a favorite for holidays like Thanksgiving and Christmas.
What are the essential ingredients for making the perfect Campbell’s Green Bean Casserole?
You’ll need fresh or frozen green beans, cream of mushroom soup, and milk. Also, black pepper, salt, and french-fried onions are key. Using fresh green beans and quality soup makes a big difference.
How do I make the Campbell’s Green Bean Casserole step-by-step?
Start by preheating your oven to 350°F (175°C). Prepare the green beans by trimming and cutting them into 1-inch pieces.
Make the mushroom sauce by mixing the cream of mushroom soup, milk, black pepper, and salt in a saucepan. Simmer it, whisking constantly, until it thickens.
Combine the green beans, mushroom sauce, and half of the french-fried onions in a 9×13 inch baking dish. Top it with the remaining onions and bake for 25-30 minutes. The onions should be golden brown and the casserole hot and bubbly.
What kitchen tools and equipment do I need to make the Campbell’s Green Bean Casserole?
You’ll need a 9×13 inch baking dish, a saucepan for the mushroom sauce, and a cutting board for the green beans. Optional tools include a food processor, whisk, and spatula for convenience.
What are some time-saving tips and preparation shortcuts for making the Campbell’s Green Bean Casserole?
Use frozen green beans to save time. Prepare the mushroom sauce ahead and store it in the fridge. Use pre-chopped onions or french-fried onions to cut down on prep time.
Make the casserole a day in advance and refrigerate it overnight. Then, bake it the next day.
What are some common mistakes to avoid when making the Campbell’s Green Bean Casserole?
Avoid temperature control issues to keep the casserole safe and tasty. Don’t overcook the green beans to prevent a mushy texture.
Make sure the mushroom sauce isn’t too thick. Seasoning mistakes can also affect the flavor.
What are some creative variations and modern twists on the classic Campbell’s Green Bean Casserole?
Add diced ham or bacon for a smoky flavor. Use different cheeses like cheddar or parmesan for depth. Try various spices and seasonings like garlic powder or paprika.
Use fresh green beans and make your own cream of mushroom soup. Add sautéed mushrooms and onions for extra flavor and texture.
How can I make the Campbell’s Green Bean Casserole ahead of time and store it?
Make the casserole ahead and store it in the fridge or freezer. Prepare it up to a day in advance but don’t bake it. Store it in the fridge overnight, then bake it the next day.
To freeze, prepare the casserole without baking. Cover it tightly with plastic wrap or aluminum foil and place it in a freezer-safe bag. Thaw it overnight in the fridge, then bake it according to the recipe.
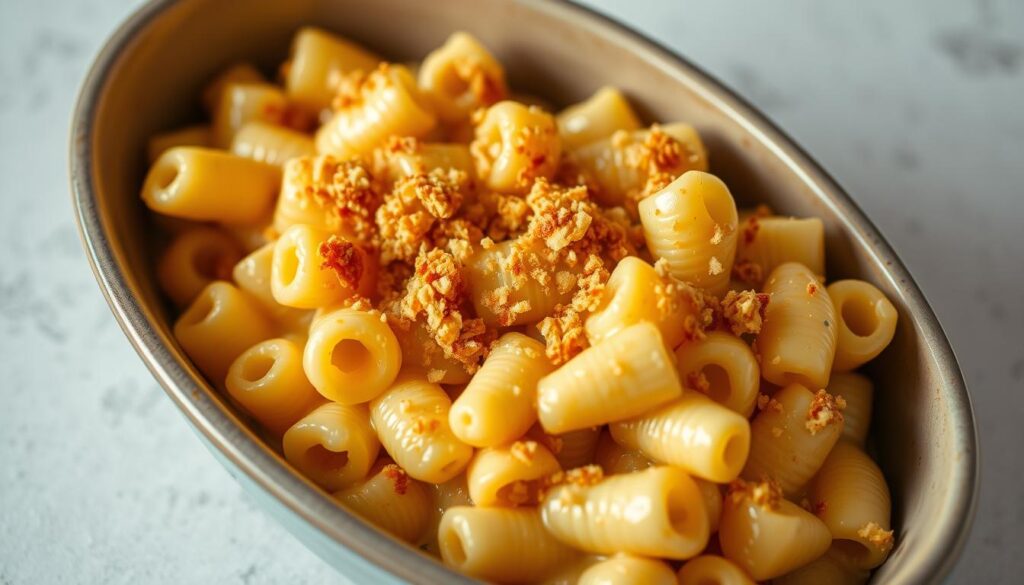
Imagine a party appetizer that’s both comforting and elegant – that’s what you get with a tini mac and cheese recipe. You can create a mini mac and cheese that’s perfect for any gatherin. It has a creamy sauce and a crispy top. This small mac and cheese dish is easy to make and fun to eat, and it’s sure to be a hit with your guests.
Table of Contents
As you explore the world of tini mac and cheese, you’ll discover the joy of creating a delicious, bite-sized dish that’s perfect for any occasion. With a tini mac and cheese recipe, you can make a big impact with a small, creamy, and delicious dish. Whether you’re looking for a quick snack or a party appetizer, a mini mac and cheese is the perfect choice. You’ll learn how to make a small mac and cheese that’s both flavorful and fun to eat.
Introduction to Tini Mac and Cheese
In this article, you’ll learn the secrets of making a perfect tini mac and cheese recipe. From the essential ingredients to the step-by-step preparation guide, you’ll get everything you need to create a delicious mini mac and cheese. You’ll discover how to make a small mac and cheese that’s both creamy and crispy, and you’ll learn how to customize it to your taste.
Key Takeaways
You can make a delicious tini mac and cheese recipe at home
A mini mac and cheese is perfect for parties and gatherings
You can customize your small mac and cheese with different ingredients
A tini mac and cheese recipe is easy to make and fun to eat
You’ll learn how to make a creamy sauce and a crispy top
You’ll discover the secrets of making a perfect small mac and cheese
Understanding Tini Mac and Cheese: A Perfect Party Appetizer
Easy mac and cheese is a hit at parties. Tini mac and cheese is a mini version of this classic dish. Its small size is perfect for grabbing off the platter.
You can make a big batch of homemade mac and cheese. Then, divide it into smaller portions for each guest.
Tini mac and cheese is also customizable. You can add different toppings or mix-ins for unique flavors. Some ideas include:
Adding cooked bacon or ham for a smoky flavor
Mixing in steamed vegetables, such as broccoli or carrots
Using different types of cheese, such as cheddar or parmesan
This dish is also great because it’s easy to make ahead. Prepare the mac and cheese mixture, then assemble the portions just before serving. It’s perfect for busy hosts who want to impress their guests with a delicious pasta appetizer.
Essential Ingredients for the Perfect Tini Mac and Cheese Recipe
To make a tasty macaroni and cheese, pick the right ingredients. Start with top-notch pasta like macaroni or elbow macaroni. The pasta you pick changes the dish’s texture and taste.
For cheese, you have many choices. Cheddar, parmesan, and gouda are popular. Mixing different cheeses can make a unique taste. For a fancy mac and cheese, try a mix of artisanal cheeses.
Other key ingredients include:
Milk or cream for a creamy sauce
Butter or oil for flavor and texture
Seasonings like salt, pepper, and paprika
With these ingredients, you can make a creamy gourmet mac and cheese. Don’t be afraid to try new combinations to find your favorite flavor.
Kitchen Equipment and Tools You’ll Need
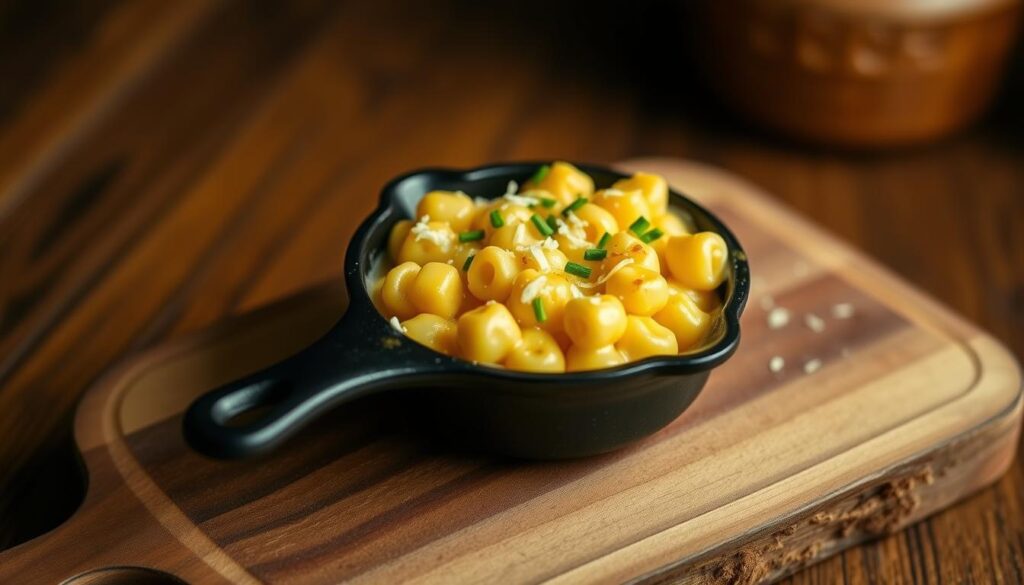
To make tasty cheesy pasta bites like mini mac and cheese, you need the right tools. Having the right equipment makes cooking easier and more fun. You can then focus on making the best mini mac and cheese recipe.
For baking, you’ll need small dishes for each cheesy pasta bite. These dishes should handle high heat and have a non-stick surface. This prevents the mac and cheese from sticking.
Required Baking Dishes
Mini cast-iron skillets
Small ceramic ramekins
Individual-sized baking dishes
Optional Equipment for Enhanced Results
Some optional tools can make cooking better and the results even tastier. A food processor helps mix the cheese sauce. A pastry brush adds a golden-brown crust to the cheesy pasta bites.
Cheese Selection Guide for Maximum Flavor
The type of cheese used in a tini mac and cheese recipe is crucial. For a standout homemade mac and cheese, pick a mix of cheeses for a creamy flavor. A blend of cheddar, parmesan, and mozzarella offers a classic taste.
When choosing cheese, think about the flavor, melting point, and texture. Aged cheeses like parmesan and cheddar have a sharp taste. Soft cheeses like mozzarella and brie melt better. Try different cheese mixes to find your perfect homemade mac and cheese.
Here are some popular cheese options to consider:
Cheddar: a classic choice for mac and cheese, with a sharp, tangy flavor
Mozzarella: a mild, creamy cheese that melts well and adds a smooth texture
Parmesan: a nutty, aged cheese that adds depth and complexity to your tini mac and cheese recipe
Choosing the right cheese mix can make your homemade mac and cheese both delicious and unique. Whether you want a classic comfort or something new, the right cheese selection is key.
Step-by-Step Tini Mac and Cheese Preparation
To make a tasty easy mac and cheese, follow a few easy steps. This pasta appetizer is great for parties and gatherings. With these steps, you can make it easily.
First, cook your pasta as the package says. This makes sure it’s just right, not too hard or too soft. While your pasta cooks, start making the cheese sauce.
Pasta Cooking Instructions
Bring a large pot of salted water to a boil
Add your pasta and cook until al dente
Drain the pasta and set it aside
Creating the Perfect Cheese Sauce
To make the cheese sauce, mix cheddar, parmesan, and mozzarella. This mix gives your easy mac and cheese a creamy taste.
Assembly and Baking Tips
After you’ve cooked your pasta and made the cheese sauce, it’s time to put it together. Mix the pasta and cheese sauce in a baking dish. Then, add more cheese and breadcrumbs on top.
Customization Options and Flavor Variations
Gourmet mac and cheese offers endless possibilities. You can mix and match ingredients, spices, and seasonings for unique flavors. Try adding caramelized onions or crispy bacon for a smoky taste.
Here are some ways to enhance your tini mac and cheese:
Spicy: Add diced jalapenos or red pepper flakes for a spicy kick
Smoky: Use smoked paprika or chipotle peppers for a deep flavor
Herby: Add fresh herbs like parsley or thyme for a fresh taste
Quality ingredients are key to a great gourmet mac and cheese. Don’t be afraid to try new things. With creativity, you can make a mac and cheese that’s uniquely yours.
Consider adding cooked veggies like broccoli or bell peppers. Or, use different cheeses like goat cheese or feta. You could also add cooked meats like ham or chicken for a heartier meal.
Make-Ahead and Storage Guidelines
Preparing homemade mac and cheese is convenient. It’s perfect for parties or weeknight dinners. To keep it fresh, follow proper storage methods.
Store it in an airtight container in the fridge for up to 3 days. Reheat it in the oven at 350°F (180°C) for 15-20 minutes. For a crispy top, broil for 2-3 minutes more.
Here are some reheating and freezing tips:
Reheat in the oven or microwave until hot and creamy.
Freeze for up to 2 months. Thaw overnight in the fridge before reheating.
Freeze individual portions for a quick snack or lunch.
Follow these guidelines to enjoy your mac and cheese anytime. It’s a comforting dish that will become a favorite.
Serving Suggestions and Presentation Ideas
When serving your mini mac and cheese, how you present it matters a lot. You want to impress your guests, whether at a party or at home. Think about the look you want to achieve. Do you prefer a rustic, homemade feel or something sleek and modern?
To make your dish more appealing, try garnishing with fresh herbs like parsley or thyme. You can also add some crunch with breadcrumbs or crushed crackers. For a richer topping, consider cooked bacon or a dollop of sour cream.
Garnishing Tips
Choose fresh, high-quality herbs for the best flavor and appearance
Don’t be afraid to get creative with your garnishes – try using edible flowers or microgreens for a unique touch
Keep your garnishes simple and understated if you want the focus to be on the mac and cheese itself
Plating Recommendations
To make your plate look great, think about colors and textures. A white or beige plate can be a clean base for your dish. A colorful plate can add to the visual appeal. Make sure to leave some space on the plate for balance.
Troubleshooting Common Issues
When making a tini mac and cheese recipe, you might face some common problems. We’ve gathered some tips to help you solve these issues. If your mac and cheese is too dry, add a bit more milk or cheese to the sauce. If it’s too wet, add more pasta or cheese to fix it.
Common issues include overcooked or undercooked pasta. To avoid this, carefully follow the cooking instructions. Check the pasta often. Using a thermometer can help ensure the cheese sauce is at the right temperature. Stir the sauce constantly for a creamy, smooth mac and cheese.
Use high-quality cheese for the best flavor
Don’t overmix the pasta and cheese sauce
Experiment with different seasonings to find your favorite
By following these tips, you’ll make a delicious tini mac and cheese. Remember, practice makes perfect. Don’t worry if your first try isn’t perfect. With patience and practice, you’ll soon be a pro at making easy mac and cheese.
Conclusion: Mastering Your Tini Mac and Cheese Creation
Now that you know how to make delicious macaroni and cheese in small sizes, it’s time to get creative. Try out different cheese mixes and unique flavors. You can also customize your tini mac and cheese to your liking.
Whether you’re having a party or just want a cozy treat, your homemade mac and cheese will impress. Keep these tips in mind to become a pro at making tini mac and cheese. Enjoy your culinary adventures!
FAQ
What is tini mac and cheese?
Tini mac and cheese is a mini version of the classic macaroni and cheese. It’s perfect for parties or as a snack. You can enjoy the comfort of mac and cheese in a small, easy-to-eat format.
What makes tini mac and cheese special?
Tini mac and cheese is special because it’s a fun twist on the classic dish. The small size makes it great as an appetizer. It still has the creamy, cheesy flavor you love, but in a bite-sized way.
What are the essential ingredients for tini mac and cheese?
You’ll need small pasta, like elbow macaroni or mini shells. Also, shredded cheese, milk or cream, butter, and seasonings like salt, pepper, and paprika. These ingredients make the dish creamy and flavorful.
What kitchen equipment do I need to make tini mac and cheese?
You’ll need a small baking dish or muffin tin for the portions. A saucepan for cooking pasta and a mixing bowl for the cheese sauce. A piping bag or small spoon helps fill the portions.
How do I choose the right cheese for tini mac and cheese?
Choose cheeses that melt well, like cheddar, gruyere, and parmesan. The right cheese mix affects the taste and creaminess. Pick wisely for the best flavor.
What are the steps to prepare tini mac and cheese?
First, cook the pasta. Then, make a creamy cheese sauce. Fill the baking cups or muffin tins with pasta and sauce. Bake until the cheese is melted and bubbly. Serve your delicious tini mac and cheese bites.
Can I customize or add variations to tini mac and cheese?
Yes! You can add different cheeses, herbs, spices, or mix-ins like bacon, spinach, or caramelized onions. Get creative and make your tini mac and cheese unique.
How can I make tini mac and cheese in advance?
You can prepare the cheese sauce and pasta ahead of time. Assemble the dish and bake it just before serving. You can also freeze and reheat it later.
How can I present and serve tini mac and cheese?
You can garnish the bites with fresh herbs, grated cheese, or a drizzle of sauce. Serve them on a platter or in individual ramekins or cupcake liners. It’s a fun and easy-to-grab party appetizer.
What are some common issues with tini mac and cheese, and how can I troubleshoot them?
Common issues include overcooked pasta, a too-thin or too-thick cheese sauce, and trouble removing the bites. Follow the cooking instructions carefully, adjust the cheese sauce as needed, and use proper baking dishes or liners for easy removal.
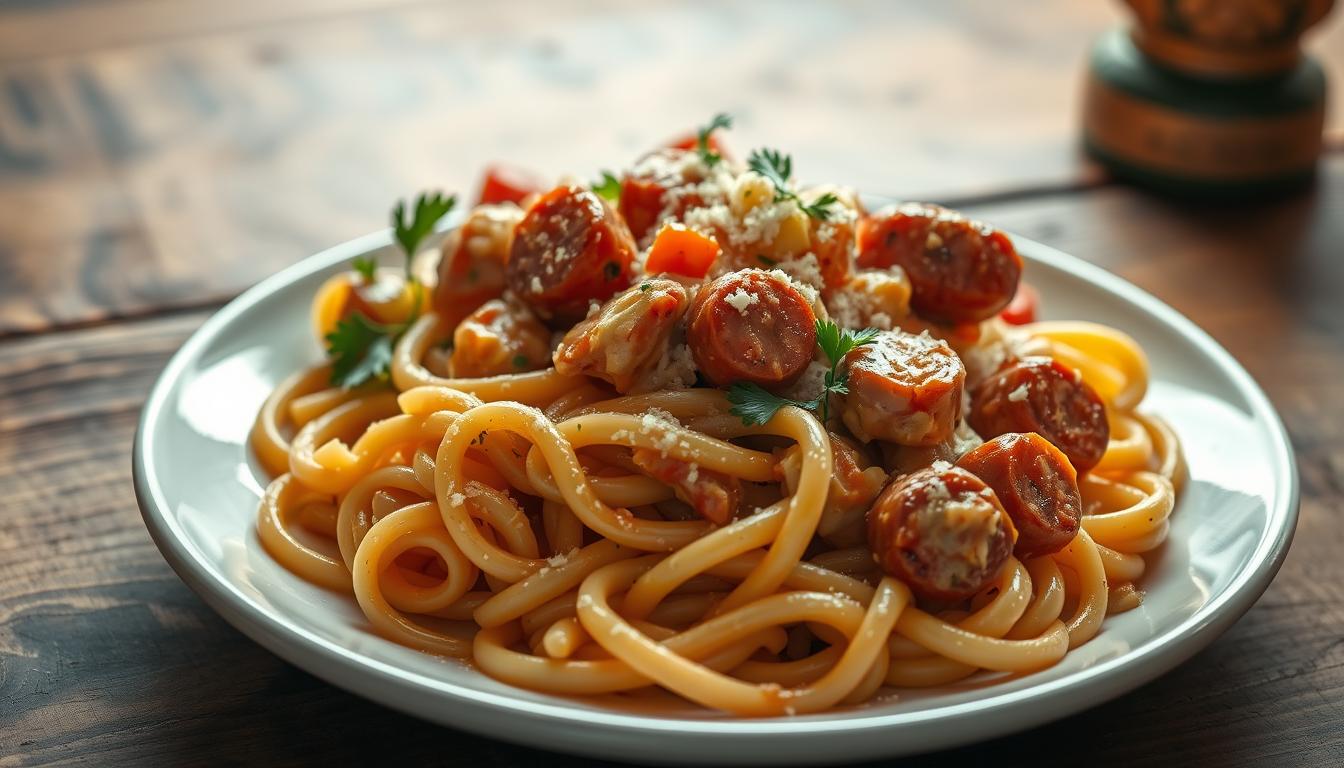
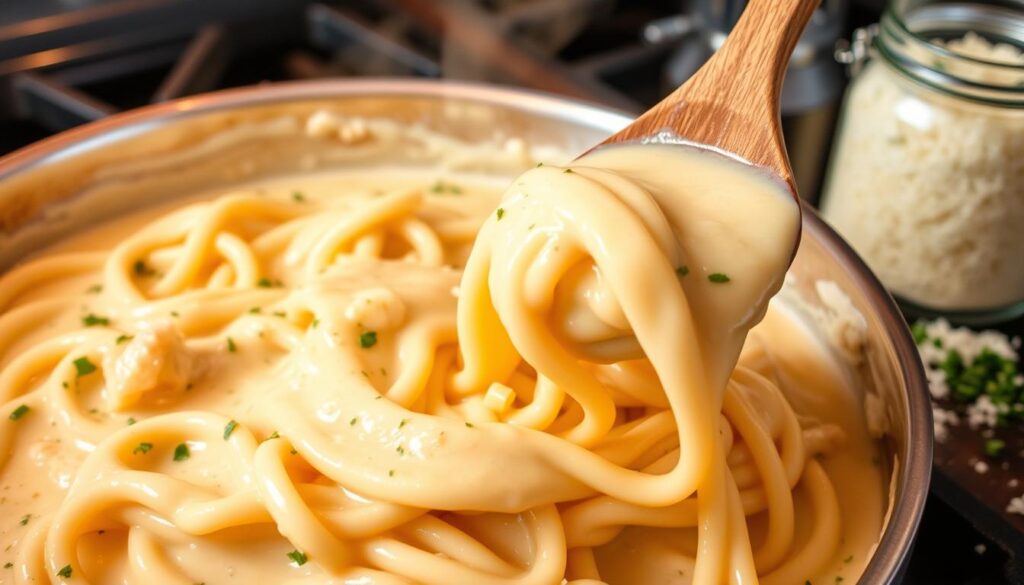
Introduction to Creamy Chicken and Italian Sausage Pasta Recipes
Easy creamy chicken and sausage pasta is a treat for the taste buds. It combines rich flavors and satisfying textures. This dish, rooted in Italian cuisine, brings together savory chicken, spicy Italian sausage, and a creamy sauce. It’s both comforting and exciting.
Exploring easy creamy chicken and sausage pasta reveals the importance of balance. The slow-cooked sauce, perfectly cooked pasta, and spices come together for a memorable meal. Whether you’re experienced or new to cooking, making a great Italian sausage pasta dish is achievable.
The use of high-quality Italian sausage, which adds a depth of flavor and a touch of spice to the dish.
The slow-cooked sauce, which is simmered to perfection to create a rich, creamy texture that coats the pasta perfectly.
The addition of fresh herbs and spices, which add a bright, freshness to the dish and balance out the richness of the sauce.
Understanding these elements will help you create your own signature dish. Your easy creamy chicken and sausage pasta will impress everyone.
Essential Ingredients for Your Pasta Creation
To make a tasty creamy chicken and sausage pasta recipe, start with the best ingredients. You’ll need fresh veggies, top-notch meats, and cheeses. Think about the flavors you want in your homemade creamy pasta recipes.
Here are some key ingredients for your creamy chicken and sausage pasta recipe:
Fresh chicken breast or thighs
Italian sausage, such as sweet or hot sausage
Onions, garlic, and bell peppers
Mushrooms, such as button or cremini
Heavy cream or half-and-half
Grated Parmesan cheese
Fresh parsley or basil
When you shop, pick the freshest ingredients. Choose organic or hormone-free meats. Go for high-quality, freshly grated cheeses. With the right ingredients, you’ll make a rich and satisfying homemade creamy pasta recipe that everyone will love.
Kitchen Equipment and Tools Needed
To make a tasty pasta dish like creamy pasta with italian sausage, you need the right tools. Having the right tools makes cooking easier and more fun. You’ll be able to make a perfect meal with the right equipment.
When cooking pasta, the right tools are key. Here are some must-haves to get started:
Large pot for boiling pasta
Skillet or sauté pan for cooking italian sausage
Colander for draining pasta
Measuring cups and spoons for accurate ingredient measurement
There are also optional tools that can help with creamy pasta with italian sausage. A food processor for chopping and a stand mixer for the cream sauce are great.
With the right tools, you’ll make a delicious creamy pasta with italian sausage. It’s sure to please everyone. With practice, you’ll become a pro at making tasty pasta dishes.
Equipment
Description
Large Pot
For boiling pasta
Skillet
For cooking italian sausage
Colander
For draining pasta
Preparing Your Ingredients
To start making your creamy chicken and italian sausage recipes with pasta, get your ingredients ready. This step is key to a tasty dish. Chop your onions and bell peppers into small pieces first.
Then, prepare your proteins. Slice the sausage thinly and cut the chicken into small pieces. Marinating the chicken in your favorite seasonings can add more flavor.
Here are some tips for preparing your ingredients:
Wash and dry your vegetables before chopping to avoid moisture issues.
Use a sharp knife for chopping and slicing to ensure even cooking.
Avoid overcooking your chicken and sausage to keep them tender.
By following these tips, you’ll make a delicious creamy chicken and italian sausage recipes with pasta dish. Stay organized and work efficiently to prepare your meal quickly and easily.
Step-by-Step Cooking Instructions for Creamy Chicken and Italian Sausage Pasta
To make a tasty italian sausage pasta dish, follow some steps. First, cook your pasta as the package says. This makes it al dente and ready for the creamy sauce.
Then, slice the italian sausage into thin rounds. Season the chicken with your favorite herbs and spices. This adds extra flavor to the dish.
Cooking the Pasta
Cooking the pasta is key to a great creamy chicken and sausage pasta recipe. Make sure not to overcook it. Overcooked pasta is mushy and not good.
Preparing the Meat
Preparing the meat means cooking the italian sausage and chicken until they’re browned and cooked through. Then, set them aside to start making the cream sauce.
Creating the Cream Sauce
The cream sauce is a vital part of the creamy chicken and sausage pasta recipe. Mix heavy cream, parmesan cheese, and your favorite seasonings in a pan. Simmer it until it thickens.
Combining Components
After cooking the pasta, preparing the meat, and making the cream sauce, it’s time to mix everything. Add the cooked pasta to the cream sauce and toss until coated. Then, add the cooked italian sausage and chicken and stir to combine.
By following these steps, you can make a delicious creamy chicken and sausage pasta recipe. It’s sure to please even the pickiest eaters. So, go ahead and try it out. Enjoy your tasty italian sausage pasta dish!
Mastering the Perfect Cream Sauce
Creating a tasty creamy pasta with italian sausage starts with the cream sauce. Use heavy cream, Parmesan cheese, and garlic for a rich flavor. This will make your homemade creamy pasta recipes stand out.
When making the sauce, whisk constantly to avoid lumps. Add salt and black pepper to enhance the taste. This ensures a smooth sauce.
For an extra flavor, sauté onions or mushrooms in the sauce. Try different cheeses like Gruyère or Asiago for a unique taste. With practice, you’ll make a perfect cream sauce for your creamy pasta with italian sausage dishes.
Troubleshooting Common Issues
Too thick: add a little more heavy cream or milk
Too thin: add a little more Parmesan cheese or simmer for a few minutes
Lumpy: whisk constantly and add a pinch of salt
Follow these tips to make a delicious cream sauce for your homemade creamy pasta recipes. Taste and adjust as you go. Don’t hesitate to try new ingredients for a unique dish.
Recipe Variations and Customizations
Exploring creamy chicken and italian sausage recipes with pasta opens up a world of possibilities. You can make this dish your own by adding new ingredients. Try adding fresh vegetables or herbs for a flavor boost.
Customizing your delicious pasta recipes also means trying different pasta types. You might choose whole wheat pasta for health or gluten-free pasta for dietary needs. The goal is to find what you like best.
Here are some ideas to make your creamy chicken and italian sausage recipes with pasta unique:
Adding a sprinkle of parmesan cheese for extra flavor
Using different types of sausage, such as sweet or hot Italian sausage
Adding some heat with red pepper flakes or diced jalapenos
By trying these variations, you can make a delicious pasta recipe that’s uniquely yours. So, don’t hesitate to experiment with new ingredients and ideas. Your taste buds will appreciate it!
Serving Suggestions and Presentation Tips
Your easy creamy chicken and sausage pasta is now ready. It’s time to think about how to present it. You want it to look as appealing as it tastes. Adding fresh herbs like parsley or basil can add color.
Grated Parmesan cheese can also enhance the flavor. When serving, consider garlic bread or a side salad. These can make the meal more satisfying. Serving with steamed vegetables like broccoli or asparagus is also a good idea.
Garnishing Options
There are many ways to garnish your pasta. Chopped fresh herbs like parsley or basil can add color. Grated Parmesan cheese can also add flavor. Here are some other options:
Chopped fresh herbs, such as parsley or basil
Grated Parmesan cheese
Sliced cherry tomatoes
Chopped fresh bell peppers
Wine Pairing Recommendations
Choosing the right wine for your pasta can be fun. Here are some good choices:
Pinot Grigio
Chardonnay
Merlot
Storage and Reheating Guidelines
Storing and reheating your creamy chicken and sausage pasta recipe right is key. To keep it fresh and tasty, proper storage is a must. You can chill your homemade creamy pasta recipes for up to three days. Or, freeze them for up to two months.
Here are some tips for reheating your creamy chicken and sausage pasta:
Reheat it in the microwave, covered, for 2-3 minutes or until heated through.
Reheat it on the stovetop, over low heat, stirring occasionally, until warmed through.
Reheat it in the oven, covered, at 350°F (180°C) for 10-15 minutes or until heated through.
By following these guidelines, you can enjoy your creamy chicken and sausage pasta recipe for longer. These tips are great for reheating a homemade creamy pasta recipe for a quick meal. They ensure your dish stays delicious and fresh.
Conclusion
This creamy pasta with italian sausage dish is a true delight for the senses. The rich, velvety sauce perfectly complements the juicy chicken and spicy Italian sausage. This creates a harmonious blend of flavors that will have you coming back for more.
Whether you’re serving it for a cozy family dinner or impressing guests at a dinner party, this delicious pasta recipes is sure to be a hit. It’s perfect for any occasion.
We hope you’ve found our step-by-step instructions and expert tips helpful. With the right techniques and a little attention to detail, you can elevate your pasta game. You’ll wow your loved ones with a dish that’s both comforting and sophisticated.
So, gather your ingredients, fire up the stove, and get ready to savor every bite of this creamy and satisfying pasta creation.
FAQ
What are the key ingredients in a creamy chicken and Italian sausage pasta dish?
The main ingredients are chicken, Italian sausage, and cream or milk. You’ll also need Parmesan cheese, garlic, onions, and spices like oregano and basil.
How do I achieve the perfect creamy sauce for my pasta?
For a creamy sauce, cook it slowly. This lets the flavors blend well. Use heavy cream, milk, and Parmesan cheese for the right consistency.
Can I make this dish ahead of time?
Yes, you can prepare it ahead. It can stay in the fridge for 3-4 days or in the freezer for 2-3 months. Just reheat it well before serving.
What type of pasta works best for this recipe?
Penne, rigatoni, or fettuccine are great choices. These shapes match well with the creamy sauce.
Can I substitute the Italian sausage with something else?
Absolutely! You can use chorizo or turkey sausage instead. Ground beef or turkey also work well for a different taste.
How do I know when the pasta is perfectly cooked?
Check the package for cooking times. Taste it a few minutes before the time. It should be slightly firm but tender.
Can I add any additional vegetables to this dish?
Yes, adding vegetables is a great idea. Bell peppers, mushrooms, spinach, or sun-dried tomatoes are good choices. Just adjust the cooking time.
What’s the best way to reheat leftover creamy chicken and Italian sausage pasta?
Reheat it on the stovetop or in the microwave. Add milk or cream to keep the sauce creamy.
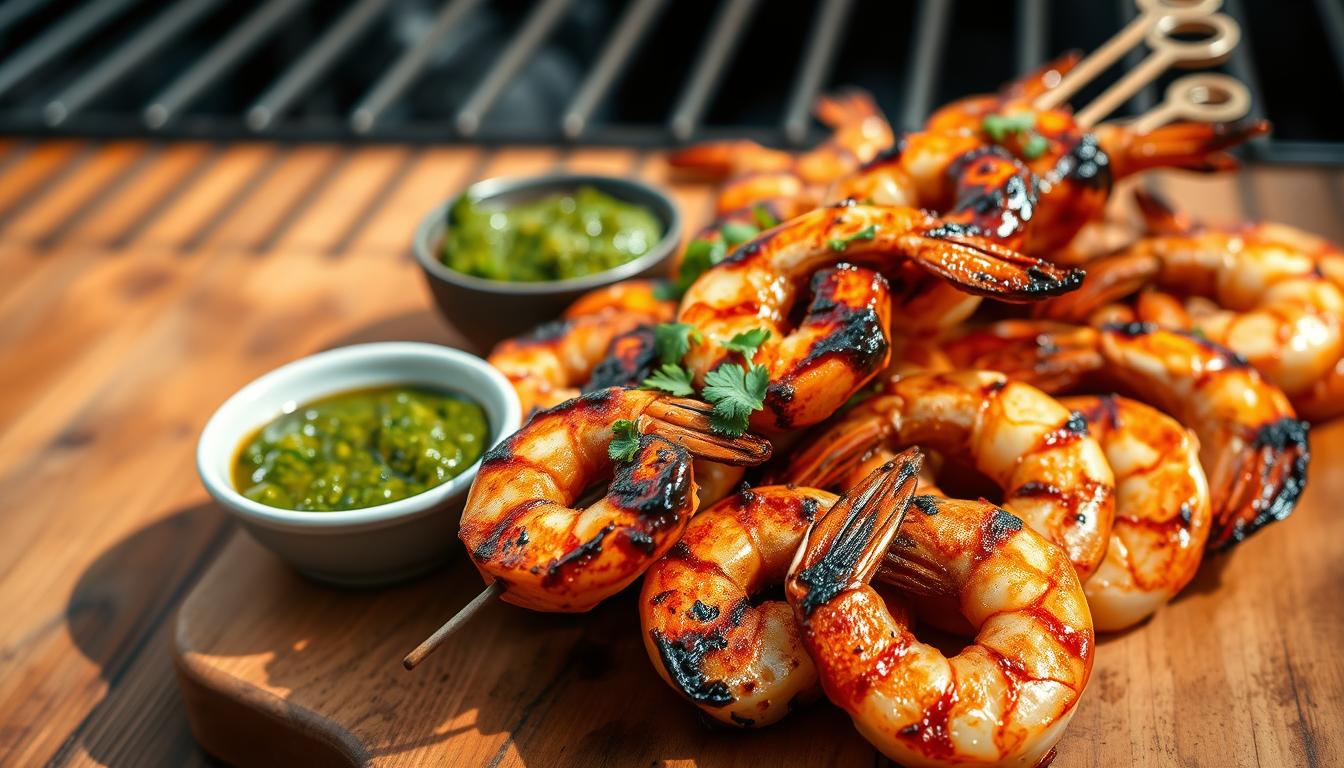
Imagine the smell of sizzling grilled bbq shrimpon a summer evening. The sound of laughter and conversation fills the air as you gather with friends and family. You can create this experience with the perfect bbq shrimp recipe. This guide will show you how to make mouth-watering grilled bbq shrimp that will leave everyone wanting more.
Table of Contents
This guide focuses on the ultimate grilling guide for bbq shrimp. You’ll learn the tips and tricks for achieving perfect results. From the rich heritage of bbq shrimp in New Orleans cuisine to the essential ingredients and techniques, this article will cover everything. You’ll become a master griller of bbq shrimp recipe and grilled bbq shrimp.
Key Takeaways
Learn the ultimate grilling guide for bbq shrimp recipe
Discover the rich heritage of bbq shrimp in New Orleans cuisine
Get the essential ingredients and techniques for perfect grilled bbq shrimp
Master the art of creating mouth-watering bbq shrimp recipe
Improve your grilling skills with tips and tricks for bbq shrimp recipe and grilled bbq shrimp
Enjoy delicious grilled bbq shrimp with your friends and family
The Rich Heritage of BBQ Shrimp in New Orleans Cuisine
New Orleans is famous for its rich flavors and history. BBQ shrimp holds a special spot in the city’s food scene. By trying a new orleans cuisinebbq shrimp recipe, you can taste the city’s unique flavors. Each chef adds their own twist to this classic dish, making it a family tradition.
In New Orleans, you’ll find many restaurants with their own BBQ shrimp dishes. They range from traditional to modern, showing off the city’s culinary heritage. You can enjoy a classic bbq shrimp recipe or try something new with fresh ingredients.
Grilling with a sweet and spicy sauce
Sauteing with garlic and herbs
Serving with crusty bread or over rice
These methods highlight BBQ shrimp’s versatility. It can be paired with many flavors and ingredients. Whether you prefer traditional or modern bbq shrimp recipe, New Orleans has something for everyone.
Essential Ingredients for Perfect BBQ Shrimp
To make delicious grilled bbq shrimp, you need the right stuff. The type of shrimp, marinades, and seasonings are key. They affect the taste and feel of your dish. Here are the freshest ingredients for a great bbq shrimp recipe.
Fresh, sustainable shrimp are a must. They should be firm, smell mild, and look good. You can pick from Gulf, whiteleg, or Pacific white shrimp. The marinade is also important, adding flavor and softness. It usually has olive oil, garlic, lemon, and herbs like parsley or thyme.
For the best taste, choose the right seasonings. Paprika, cayenne pepper, and Old Bay are popular choices. A bit of lemon juice or vinegar adds a nice tang. With these ingredients, you’ll make a tasty grilled bbq shrimp dish that everyone will love.
Fresh and sustainable shrimp
Mixture of olive oil, garlic, and herbs for the marinade
Paprika, cayenne pepper, and Old Bay seasoning for added flavor
Acidity from lemon juice or vinegar
With these ingredients, your bbq shrimp recipe will be unforgettable. It’s perfect for any occasion, whether you’re grilling for a big group or a cozy night in. The right ingredients make all the difference in your grilled bbq shrimp.
Selecting and Preparing Your Shrimp
Choosing the right shrimp is key for a tasty bbq shrimp recipe. You need fresh, juicy shrimp that can handle the grill. For a spicy shrimp recipe, go for jumbo or extra-large shrimp. They can take the bold flavors better.
To get your shrimp ready, rinse them under cold water and dry them with a paper towel. Then, clean and devein the shrimp. This removes the shell and the dark vein, ensuring they’re clean and cook evenly.
Choose fresh, sustainably-sourced shrimp for the best flavor and texture
Opt for larger shrimp, such as jumbo or extra-large, for a spicy shrimp recipe
Clean and devein the shrimp to ensure they are free of impurities and will cook evenly
Store the shrimp in a sealed container in the refrigerator to keep them fresh
By following these tips, you’ll make a delicious bbq shrimp recipe. It will impress everyone. Whether you’re making a spicy shrimp recipe or a traditional bbq shrimp recipe, the secret is in the shrimp selection and preparation.
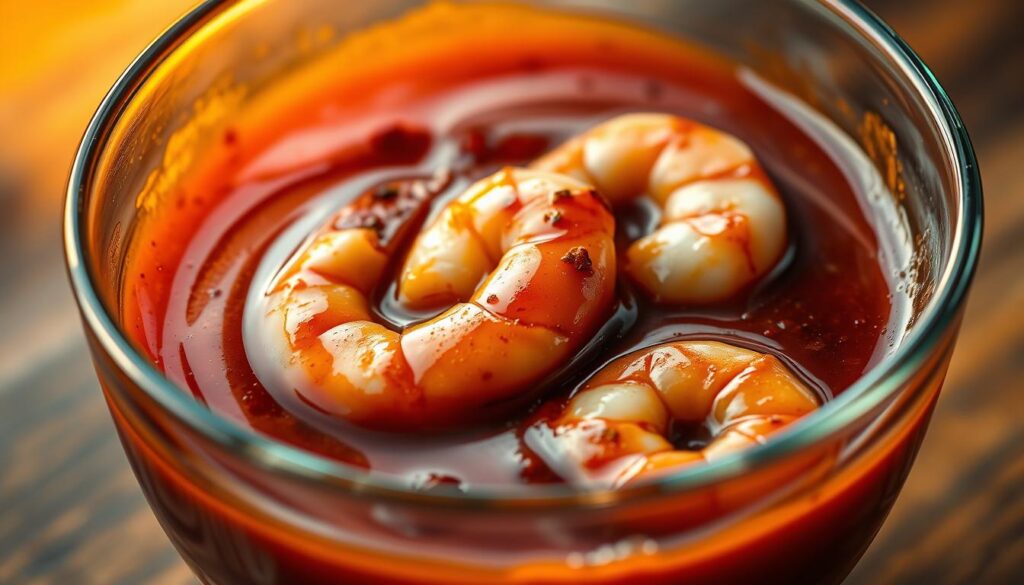
Creating Your Signature BBQ Shrimp Marinade
To make a tasty grilled bbq shrimp dish, a great marinade is crucial. In new orleans cuisine, the secret is mixing flavors and spices well. Start with olive oil, garlic, and herbs like thyme and rosemary.
A good marinade balances acidic, sweet, and savory tastes. For grilled bbq shrimp, mix lemon juice, honey, and hot sauce. Lemon juice breaks down proteins, honey adds sweetness, and hot sauce brings spice.
Here are some key ingredients for your marinade:
Lemon juice
Garlic
Herbs like thyme and rosemary
Honey
Hot sauce
Adjust each ingredient to your taste. You can also add Worcestershire sauce or paprika for a unique flavor. The goal is to find the perfect mix for you.
By following these tips, you can make a signature bbq shrimp marinade. It will take your dish to the next level. Whether for a big group or a few friends, a good marinade makes a meal unforgettable. So, don’t hesitate to try new things – your taste buds will love it!
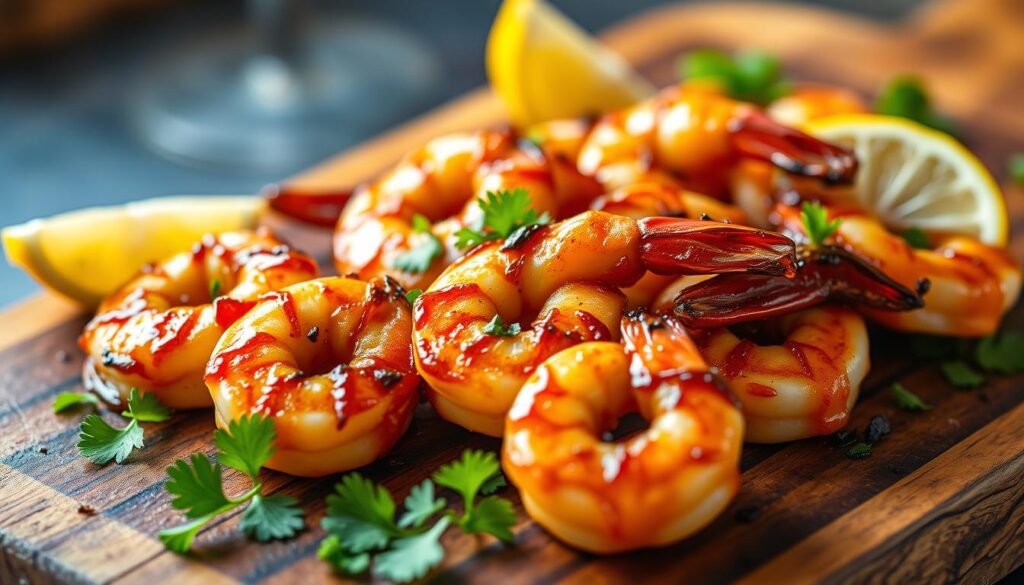
The Ultimate BBQ Shrimp Recipe: Step-by-Step Guide
To make a delicious bbq shrimp recipe, start with fresh, large shrimp. Prepare them for the marinade first. A great spicy shrimp recipe needs a mix of flavors. So, choose your seasonings carefully to get the right taste.
Here are the main steps:
Make your marinade with olive oil, garlic, and spices.
Season the shrimp with salt, pepper, and other seasonings you like.
Grill the shrimp over medium-high heat, turning them often for even cooking.
For a spicy twist, add diced jalapenos or cayenne pepper to your bbq shrimp recipe. It’s important to balance flavor and heat. Taste and adjust as you go. With these steps and basic ingredients, you’ll make a tasty spicy shrimp recipe.
Focus on the flavors and techniques that make a bbq shrimp recipe stand out. Follow these steps and try different seasonings and ingredients. You’ll impress your friends and family with a great spicy shrimp recipe. So, get grilling and enjoy!
Mastering the Grilling Temperature and Timing
To get perfectly grilled bbq shrimp, you need to know how to control the heat and time. Aim for a medium-high heat, around 400-450°F, for a nice sear. The recipe you choose will also affect the best temperature and cooking time.
Grill the shrimp for 2-3 minutes on each side. They should turn pink and not be translucent anymore. To avoid overcooking, use a food thermometer. It should read 145°F inside.
Here are some tips for grilling like a pro:
Preheat your grill to the right temperature before adding the shrimp
Use a timer to ensure you’re cooking the shrimp for the right amount of time
Don’t overcrowd the grill, as this can lower the temperature and affect cooking time
Follow these tips and use a good bbq shrimp recipe. Stay focused on temperature and timing. Don’t be afraid to try new things to find what works best for you.
Sauce and Basting Techniques for Extra Flavor
To make your BBQ shrimp dish better, learning sauce and basting techniques is key. In New Orleans, a great sauce can change everything. For a spicy shrimp recipe, getting the flavors right is crucial. Start with a basic sauce of butter, garlic, and herbs, a common New Orleans choice.
Exploring sauce and basting methods can add layers of flavor. Here are some tips:
Marinate your shrimp in olive oil, lemon juice, and spices before grilling. This boosts your spicy shrimp’s flavor.
Baste your shrimp with a tasty sauce while grilling. This adds moisture and flavor, a New Orleans favorite.
Try different sauces like BBQ, cocktail, or remoulade. Find the best match for your spicy shrimp.
Getting the sauce’s consistency right is important. It should coat the shrimp well but not be too thick. Aim for a sauce like honey, a staple in New Orleans sauces.
Mastering sauce and basting techniques will make your BBQ shrimp dish delicious. With practice and trying new things, you’ll impress everyone with your cooking skills.
Serving Suggestions and Perfect Pairings
When serving your bbq shrimp, aim for a dish that looks and tastes great. You’ve grilled your shrimp perfectly. Now, think about what sides will go well with it.
Consider sides like garlic mashed potatoes, grilled vegetables, and corn on the cob. These options are tasty and balance the shrimp’s richness. For a heartier meal, try cajun rice or hushpuppies with your shrimp.
For drinks, a crisp white wine like Sauvignon Blanc or Pinot Grigio is a good match. If you prefer beer, a light lager or pale ale works well. For something non-alcoholic, fresh lemonade or iced tea are refreshing choices.
To enhance your dish, add fresh herbs, lemon wedges, or cocktail sauce. Paying attention to presentation makes your meal memorable and enjoyable. It will surely impress your guests.
Troubleshooting Common BBQ Shrimp Challenges
When you make a spicy shrimp recipe, you might face some common problems. New Orleans cuisine is famous for its bold tastes. But, even with great skills, things can still go wrong. Issues like overcooking or undercooking the shrimp can mess up the dish’s texture and taste.
To solve these problems, you need to find the cause and change your methods. If your shrimp are always overcooked, you might need to adjust the grilling time or heat. If they’re undercooked, try grilling them for longer or at a higher temperature.
Some common problems with BBQ shrimp include:
Overcooking or undercooking the shrimp
Insufficient or excessive seasoning
Inadequate marinade time
Knowing these common issues and how to fix them will help your spicy shrimp recipe always be a hit. Whether you’re experienced or new to grilling, mastering BBQ shrimp takes practice and patience. With these tips, you’ll be on your way to making delicious, authentic New Orleans cuisine that will wow your loved ones.
Conclusion: Mastering Your BBQ Shrimp Game
Learning to make BBQ shrimp is a journey that takes dedication and patience. You now know the history, traditional ways, and key ingredients. This knowledge lets you make delicious grilled BBQ shrimp that will wow your loved ones.
The secret to great BBQ shrimp is finding the right flavors and grilling them just right. Also, using basting and saucing techniques well is important. With more practice, you’ll find your own way to make BBQ shrimp and become an expert.
So, get your grill ready, gather your ingredients, and start cooking. Let the smell of tasty BBQ shrimp fill your space. Enjoy making a dish that honors New Orleans’ rich food culture. Happy grilling!
FAQ
What are the essential ingredients for making the perfect BBQ shrimp dish?
To make the perfect BBQ shrimp, you need fresh, high-quality shrimp. You also need a tasty marinade with Worcestershire sauce, lemon juice, and spices. Don’t forget the right seasonings to enhance the flavor.
How do I choose the best type and size of shrimp for my BBQ shrimp recipe?
Choose larger, peeled, and deveined shrimp for your BBQ. Look for jumbo or extra-large sizes. The size and type of shrimp affect the dish’s texture and taste.
What are some tips for creating the perfect BBQ shrimp marinade?
For a great marinade, mix Worcestershire sauce, lemon juice, garlic, and spices. Let the shrimp marinate for at least 30 minutes. This lets the flavors soak in fully.
How do I properly grill BBQ shrimp to achieve the perfect level of doneness?
Grilling BBQ shrimp needs attention to temperature and timing. Grill over medium-high heat, turning often, until they’re opaque and cooked, about 2-3 minutes per side.
What are some tasty side dish and beverage pairings that complement BBQ shrimp?
Pair BBQ shrimp with creamy grits, crisp coleslaw, and roasted veggies. For drinks, try a crisp white wine, a refreshing lager, or a New Orleans-style cocktail like a Hurricane or Sazerac.
How can I add a spicy twist to my BBQ shrimp recipe?
For a spicy twist, add Cajun seasoning, hot sauce, or crushed red pepper flakes to your marinade or seasoning. Serve with spicy remoulade or cocktail sauce for extra heat.
What are some common challenges when grilling BBQ shrimp, and how can I troubleshoot them?
Common grilling challenges include overcooking or undercooking, and marinade or sauce issues. To fix these, watch the cooking time and temperature closely. Adjust your methods to get the perfect flavor and doneness.
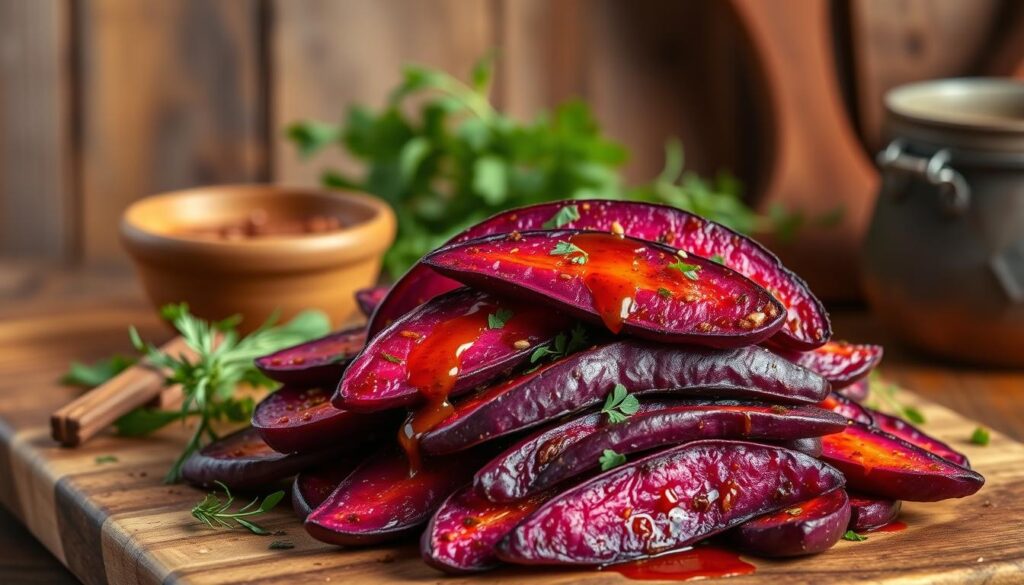
Imagine a dish that’s not only delicious but also packed with nutrients. A purple sweet potato recipe can be just that. It offers health benefits and versatility in cooking. With an easy purple sweet potato recipe, you can make a variety of healthy dishes for any occasion.
Table of Contents
Cooking with purple sweet potatoes adds excitement to your meals. With the right techniques, you can bring out their natural sweetness. Whether you’re looking for a simple side dish or a main course, a purple sweet potato recipe is a great option. In this article, we’ll explore the basics of cooking with purple sweet potatoes. We’ll cover tips for selecting the perfect potatoes and essential kitchen tools.
Key Takeaways
Purple sweet potatoes are a nutrient-rich food that can be used in a variety of dishes
An easy purple sweet potato recipe can be a great addition to your meal
Healthy purple sweet potato dishes can be created with simple ingredients and techniques
Cooking with purple sweet potatoes can add excitement to your meals
With the right techniques, you can bring out the natural sweetness of purple sweet potatoes
A purple sweet potato recipe can be a great option for a simple side dish or main course
Cooking with purple sweet potatoes requires some basic kitchen tools and techniques
Introduction to Purple Sweet Potatoes
Purple sweet potatoes are packed with nutrients and offer many health benefits. They are full of fiber, vitamins, and minerals. This makes them a great choice for healthy purple sweet potato dishes. Their unique taste and texture make them perfect for both savory and sweet dishes.
These potatoes are also high in antioxidants, which can fight chronic diseases. They are rich in vitamins A and C, potassium, and fiber. This makes them ideal for those seeking simple purple sweet potato meal ideas. Purple sweet potatoes are a fantastic choice for a tasty and healthy meal or snack.
What Makes Purple Sweet Potatoes Unique
Purple sweet potatoes have a naturally sweet taste and a soft, creamy texture. They are also full of antioxidants and have anti-inflammatory properties. This makes them a great pick for delicious purple sweet potato dishes. Here are some key features that make them stand out:
High antioxidant content
Rich in vitamins and minerals
Anti-inflammatory properties
Naturally sweet flavor
Nutritional Benefits and Health Properties
Purple sweet potatoes are a nutrient-dense food with many health benefits. They are loaded with fiber, vitamins, and minerals. This makes them a top choice for a healthy and tasty meal. Here are some of the key nutritional benefits:
High in fiber and vitamins
Rich in minerals such as potassium and iron
Anti-inflammatory properties
Selecting the Perfect Purple Sweet Potatoes
Choosing the right ingredients is key for a tasty purple sweet potato recipe. Look for purple sweet potatoes that are firm and have a deep purple color. Stay away from potatoes with soft spots or bruises, as they might be spoiled.
For an easy purple sweet potato recipe, keep these tips in mind:
Look for purple sweet potatoes that are heavy for their size
Choose potatoes with a smooth, even skin
Avoid potatoes with green spots or sprouts, as they can be toxic
A great purple sweet potato recipe starts with top-notch ingredients. By picking the perfect purple sweet potatoes, you’ll make a dish that’s not just tasty but also healthy. Follow these tips to make an easy purple sweet potato recipe that will wow everyone.
Whether you’re an experienced chef or just starting out, picking the right purple sweet potatoes is crucial. By using these simple tips, you’ll make a delicious and easy purple sweet potato recipe perfect for any event.
Purple Sweet Potato Variety
Characteristics
Taste
Stokes Purple
Deep purple color, firm texture
Sweet, nutty flavor
Okinawan
Light purple color, soft texture
Sweet, slightly sweet flavor
Essential Kitchen Tools and Equipment
To make tasty purple sweet potato dishes, you need the right tools. Simple recipes can be done with basic items. A chef’s knife, cutting board, and large pot are must-haves. They help you chop, boil, and mash the potatoes easily.
For more complex recipes, you might need a food processor or slow cooker. These tools help you make everything from mashed potatoes to soups. With the right gear, you can try out many purple sweet potato recipes and even create your own.
Chef’s knife
Cutting board
Large pot
Colander
Measuring cups and spoons
Optional tools for advanced recipes include:
Food processor
Slow cooker
Mixer
With these tools, you can make a wide range of purple sweet potato dishes. From simple meals to complex recipes, you’re all set.
Tool/Equipment
Description
Chef’s knife
Used for chopping and slicing purple sweet potatoes
Cutting board
Used for chopping and preparing purple sweet potatoes
Large pot
Used for boiling and cooking purple sweet potatoes
Preparation and Cleaning Methods
To start cooking purple sweet potatoes, you need to clean them first. Wash them well, scrub off dirt, and dry them with a towel. A good easy purple sweet potato recipe begins with clean, dry potatoes.
Here’s how to do it:
Wash the potatoes under cold running water to remove any dirt or debris.
Use a vegetable brush to scrub off any stubborn dirt or stains.
Dry the potatoes with a clean towel to remove excess moisture.
By following these steps, your healthy purple sweet potato dishes will be made with fresh ingredients. Clean and prepared potatoes are key for a tasty and healthy easy purple sweet potato recipe.
Choosing the right cooking method is also important. It helps bring out their natural sweetness and flavor. This makes them a great addition to any healthy purple sweet potato dishes.
Preparation Method
Description
Boiling
Cooking the potatoes in boiling water until they are tender.
Roasting
Cooking the potatoes in the oven with some oil and seasoning until they are crispy on the outside and tender on the inside.
Basic Purple Sweet Potato Recipe for Beginners
Cooking purple sweet potatoes is easy and fun. This simple recipe is great for beginners. You’ll need just a few things: 2-3 large purple sweet potatoes, 2 tablespoons of olive oil, and a pinch of salt.
There are many ways to cook purple sweet potatoes. You can bake or boil them. For extra flavor, add herbs and spices. Try mashing with garlic and rosemary or roasting with olive oil and paprika.
Ingredients List
2-3 large purple sweet potatoes
2 tablespoons of olive oil
1 teaspoon of salt
1/2 teaspoon of black pepper
1/4 teaspoon of paprika
Step-by-Step Cooking Instructions
Preheat the oven to 400°F (200°C).
Wash and peel the purple sweet potatoes.
Cut the sweet potatoes into 1-inch cubes.
Place the sweet potatoes on a baking sheet lined with parchment paper.
Drizzle with olive oil and sprinkle with salt, black pepper, and paprika.
Bake for 20-25 minutes or until the sweet potatoes are tender.
Common Mistakes to Avoid
Don’t overcook purple sweet potatoes. It makes them dry and taste bad. Check them often while baking. Take them out when they’re tender but still a bit firm.
Ingredient
Quantity
Purple sweet potatoes
2-3
Olive oil
2 tablespoons
Salt
1 teaspoon
Advanced Cooking Techniques
For those who love to cook, purple sweet potatoes offer a chance to get creative. Advanced cooking techniques can make these potatoes even sweeter and more flavorful. Roasting them brings out their natural sweetness and adds a caramelized layer. Grilling adds a smoky taste that pairs well with their sweetness.
Consider sautéing purple sweet potatoes for a different twist. This method lets you add garlic and onions, boosting the flavor. It’s key to cook them until they’re tender but still firm. Try adjusting cooking times and temperatures to get the perfect texture.
Here are some advanced cooking techniques to try with purple sweet potatoes:
Roasting with herbs and spices for added depth of flavor
Grilling with a drizzle of olive oil and a sprinkle of salt
Sautéing with garlic and onions for a savory flavor
Using these techniques, you can make a variety of purple sweet potato recipes. They’re perfect for impressing guests or making a weeknight meal special. These methods will help you bring out the best in purple sweet potatoes, making your dishes truly delicious.
Cooking Technique
Flavor Profile
Texture
Roasting
Caramelized, sweet
Tender, slightly firm
Grilling
Smoky, savory
Charred, tender
Sautéing
Savory, aromatic
Crispy, tender
Creative Seasoning and Flavor Combinations
Purple sweet potatoes can be seasoned in many ways. You can go from sweet and spicy to savory and umami. It’s key to try out different flavors to make tasty purple sweet potato dishes.
For sweet flavors, think cinnamon, nutmeg, and maple syrup. These can make a dish sweet and indulgent. For savory tastes, garlic, rosemary, and thyme add a rich, earthy flavor.
Sweet Flavor Profiles
Cinnamon and sugar
Nutmeg and honey
Maple syrup and ginger
Savory Seasoning Options
Garlic and rosemary
Thyme and olive oil
Paprika and chili powder
Global flavors can also make purple sweet potatoes delicious. Korean chili flakes add spice, while Indian spices like cumin and coriander bring warmth. Trying new flavor mixes can lead to unique and tasty purple sweet potato recipes.
Flavor Combination
Ingredients
Description
Sweet and Spicy
Cinnamon, nutmeg, maple syrup, Korean chili flakes
A sweet and spicy flavor combination that adds a kick to purple sweet potato dishes
Savory and Umami
Garlic, rosemary, thyme, olive oil
A savory and umami flavor combination that adds depth and richness to purple sweet potato dishes
Storage and Preservation Tips
To keep your purple sweet potatoes fresh, store them right. Place them in a cool, dark spot with air flow. This way, they can stay fresh for weeks. For healthy purple sweet potato dishes, keeping them fresh is key.
Here are some tips for storing and preserving purple sweet potatoes:
Keep them away from direct sunlight and heat sources.
Store them in a breathable bag or container to maintain air circulation.
Do not wash the sweet potatoes before storing them, as excess moisture can cause them to rot.
For simple purple sweet potato meal ideas, freezing or canning is great. To freeze, wash, peel, and chop the sweet potatoes. Then, blanch them in boiling water for a few minutes before freezing. Canning is also a good choice, as it keeps the sweet potatoes for months.
Here is a summary of the storage and preservation methods:
Method
Description
Room Temperature
Store in a cool, dark place with good ventilation.
Freezing
Wash, peel, chop, and blanch before freezing.
Canning
Preserve sweet potatoes for several months by canning.
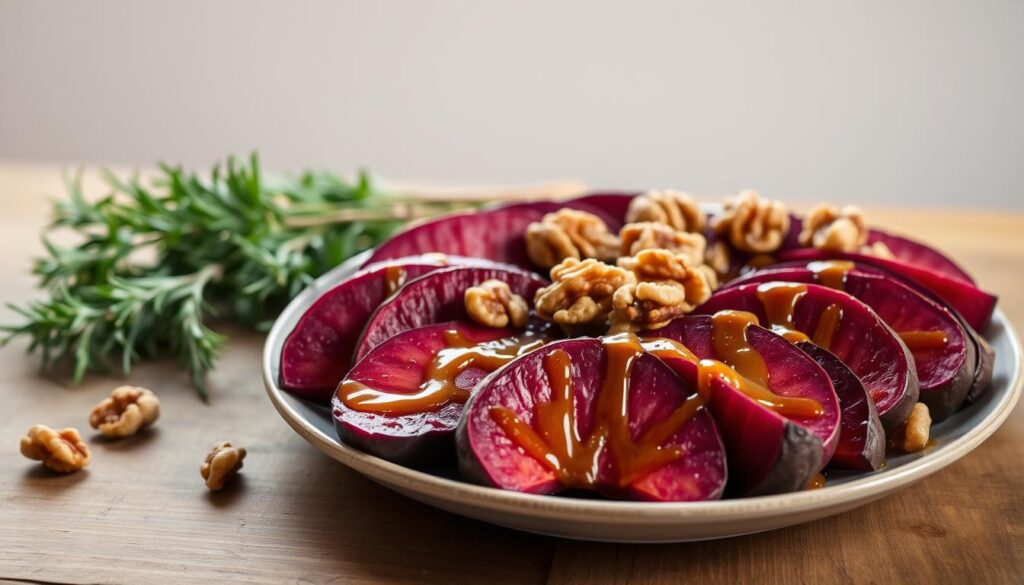
Pairing Suggestions and Side Dishes
There are many ways to make a meal complete with purple sweet potatoes. You can pair them with proteins and veggies to bring out their taste. Try them with grilled chicken or roasted turkey breast for a tasty dish.
For more flavor, add salmon or shrimp to your purple sweet potatoes. These not only taste great but also offer omega-3s and other nutrients. If you prefer plants, pair them with roasted veggies like brussels sprouts or asparagus.
Complementary Proteins
Grilled chicken
Roasted turkey breast
Salmon
Shrimp
Vegetable Combinations
Roasted brussels sprouts
Grilled asparagus
Sauteed spinach
Roasted bell peppers
Pairing purple sweet potatoes with these options makes for a tasty and easy recipe. It’s perfect for anyone, even the pickiest eaters. So, get creative and enjoy the health benefits of purple sweet potatoes.
Protein
Vegetable
Purple Sweet Potato Recipe
Grilled chicken
Roasted brussels sprouts
Mashed purple sweet potatoes with grilled chicken and roasted brussels sprouts
Salmon
Grilled asparagus
Roasted purple sweet potatoes with salmon and grilled asparagus
Shrimp
Sauteed spinach
Purple sweet potato soup with shrimp and sauteed spinach
Troubleshooting Common Cooking Issues
When cooking with purple sweet potatoes, you might run into problems like undercooked or overcooked potatoes. Understanding the causes and taking steps to prevent these issues is key. A well-thought-out purple sweet potato recipe can help avoid mistakes and result in a tasty dish.
Some common issues and their solutions include:
Undercooked potatoes: Check the cooking time and temperature to ensure they are cooked through.
Overcooked potatoes: Reduce the cooking time and check for doneness regularly.
Mushy or dry potatoes: Adjust the cooking method, such as boiling or roasting, to achieve the desired texture.
For simple purple sweet potato meal ideas, start with roasting or boiling. These methods are simple and can lead to a flavorful dish. By following some basic tips and solving common problems, you can make a variety of tasty meals with purple sweet potatoes.
With practice and patience, you’ll get better at cooking with purple sweet potatoes. You’ll be able to make a range of delicious, healthy meals. Whether you’re after a simple purple sweet potato meal idea or a more complex purple sweet potato recipe, success comes from understanding the basics and being open to trying new things.
Cooking Method
Cooking Time
Temperature
Roasting
45-60 minutes
425°F (220°C)
Boiling
15-20 minutes
212°F (100°C)
Health-Conscious Cooking Modifications
Preparing healthy purple sweet potato dishes is easy with a few tweaks. These changes make it simple to create recipes that fit different diets. For example, those with dietary restrictions can find low-fat options and special adaptations.
For a healthier approach, use herbs and spices for flavor instead of salt and sugar. Choose low-fat cooking methods like baking or steaming. These methods keep the natural nutrients of purple sweet potatoes, making them a great choice for a healthy diet.
There are many options for different dietary needs. Vegans can use plant-based alternatives instead of dairy. Those with gluten-free diets can find gluten-free flours and ingredients. These changes allow for tasty and easy purple sweet potato recipes for various diets.
Low-Fat Alternatives
Use herbs and spices for flavor instead of salt and sugar
Opt for low-fat cooking methods such as baking or steaming
Substitute dairy products with plant-based alternatives
Dietary Restriction Adaptations
With a few simple changes, you can make healthy purple sweet potato dishes for any diet. Whether you need low-fat options or special adaptations, there are many choices. This way, you can enjoy delicious and easy purple sweet potato recipes.
Conclusion
Cooking with purple sweet potatoes is a fun and creative journey. It lets you try out many tasty purple sweet potato recipes. You can add this versatile ingredient to your meals in many ways.
Whether you’re new to cooking or have lots of experience, we hope this guide helps you. It teaches you how to work with purple sweet potatoes. You’ll learn to make dishes that are not only good for you but also look amazing.
Now, it’s time to dive into the world of purple sweet potatoes! Try out different recipes and cooking methods. Finding your favorite purple sweet potato dishes is a fun and tasty adventure.
FAQ
What are the unique characteristics of purple sweet potatoes?
Purple sweet potatoes have a deep purple skin and vibrant, almost violet-colored flesh. They taste sweet and earthy. Their dense, creamy texture is different from traditional orange sweet potatoes.
What are the health benefits of purple sweet potatoes?
Purple sweet potatoes are full of antioxidants, vitamins, and minerals. They are rich in fiber, vitamin C, and vitamin A. They also have potassium and manganese. The purple color comes from anthocyanins, which fight chronic diseases.
How do I select the best purple sweet potatoes?
Choose tubers that are firm, heavy, and have a deep purple color. Avoid soft spots, blemishes, or sprouts. These signs indicate spoilage.
What essential kitchen tools are needed to cook purple sweet potatoes?
You’ll need a sharp chef’s knife, a cutting board, a large pot or baking sheet, and a vegetable peeler. For advanced recipes, consider a food processor, slow cooker, or grill.
How do I properly prepare and clean purple sweet potatoes?
Wash them under running water to remove dirt. Use a vegetable brush to scrub the skin. Pat dry with a clean towel. Peel if desired, or leave the skin for extra texture and nutrition.
What is a basic recipe for cooking purple sweet potatoes?
Peel and cube the potatoes. Toss with olive oil, salt, and pepper. Roast in a preheated oven at 400°F (200°C) for 20-25 minutes, until tender and lightly browned.
What are some advanced cooking techniques for purple sweet potatoes?
Experienced cooks can grill, sauté, mash, or puree purple sweet potatoes. These methods enhance their natural sweetness and texture.
How can I add flavor to my purple sweet potato dishes?
Season with sweet spices like cinnamon and nutmeg, or savory herbs and spices. Try global flavors like curry powder or miso paste for unique dishes.
How can I properly store and preserve purple sweet potatoes?
Store them in a cool, dark place like a pantry or root cellar. Refrigeration can affect texture and sweetness. Freeze cooked or raw cubes or puree for longer storage.
What are some good pairing suggestions and side dishes for purple sweet potatoes?
Pair with grilled chicken, roasted pork, or sautéed tofu. They’re also great with roasted vegetables, quinoa, or leafy greens. Serve with a protein, vegetable, and whole grain for a complete meal.
How can I troubleshoot common cooking issues with purple sweet potatoes?
If they’re undercooked, cook longer or at a higher temperature. If overcooked, cook less or at a lower temperature. Even-sized pieces help prevent uneven cooking.
How can I modify purple sweet potato recipes to be more health-conscious?
Use low-fat or non-dairy alternatives like Greek yogurt or almond milk. Adapt recipes for vegan, gluten-free, or other diets by choosing the right ingredients and methods.
Imagine the sweet and tangy taste of Bush’s Baked Beans, a classic American favorite, made right in your own home. With a homemade baked beans recipe, you can enjoy this beloved dish anytime. You won’t need to rely on store-bought versions. The bush’s baked beans recipe is a staple in many American households. Making it from scratch can be a fun and rewarding experience.
Table of Contents
Making bush’s baked beans at home lets you control the ingredients, sweetness, and spice. This way, you can create a personalized flavor that suits your taste. Whether you’re a fan of the original Bush’s Baked Beans or want to try a new twist, this guide will help. You’ll learn how to make a mouth-watering homemade baked beans recipe.
Key Takeaways
Learn how to make a delicious homemade baked beans recipe
Discover the benefits of making bush’s baked beans at home
Get tips on customizing the recipe to suit your taste preferences
Understand the importance of using high-quality ingredients
Find out how to store and reheat your homemade baked beans
Explore ideas for serving and pairing your homemade bush’s baked beans
The Story Behind Bush’s Baked Beans
Bush’s baked beans have been a favorite in America for many years. Their story shows how family traditions and new recipes can make a big impact. It all started with a simple best baked beans recipe that grew into the bush’s baked beans recipe we all love.
Bush’s success comes from their focus on quality and making delicious baked beans. They aim to bring people together with their bush’s baked beans recipe. Whether you want to try their best baked beans recipe or make your own, Bush’s story is both inspiring and delightful.
History of Bush’s Family Business
The Bush family started in a small cannery in Tennessee. They created a bush’s baked beans recipe that quickly became popular. They’ve always used the best ingredients and traditional methods to make their famous baked beans.
What Makes Bush’s Baked Beans Special
So, what makes Bush’s baked beans stand out? It’s their special blend of spices and cooking process. This gives their bush’s baked beans recipe a unique taste that’s both sweet and tangy. Bush’s uses top-quality ingredients to make a best baked beans recipe for any event.
Why Make Them at Home
Making bush’s baked beans recipe at home lets you adjust the flavor to your taste. It’s rewarding to make a delicious meal yourself. With just a few ingredients and some basic cooking skills, you can make a best baked beans recipe that will wow everyone.
Ingredient
Quantity
Baked beans
1 can
Brown sugar
1/4 cup
Ground mustard
1 tsp
Essential Ingredients for Bush’s Baked Beans Recipe
To make a true easy baked beans recipe, you need top-notch ingredients. The heart of a great homemade baked beans recipe is the beans, sauces, and spices. For a classic Bush’s Baked Beans taste, navy beans are key. They’re small, white, and mild.
Other must-haves include a blend of sauces like tomato sauce, brown sugar, and apple cider vinegar. These give the beans a sweet and tangy flavor. Spices like ground mustard, ground cloves, and smoked paprika add warmth and depth. Using these will help you get the real Bush’s Baked Beans taste in your homemade version.
Here’s a list of the key ingredients you’ll need:
Navy beans
Tomato sauce
Brown sugar
Apple cider vinegar
Ground mustard
Ground cloves
Smoked paprika
Remember, the quality of your ingredients will directly impact the flavor of your easy baked beans recipe. Choose the best ingredients you can find to ensure your homemade baked beans recipe turns out delicious.
Required Kitchen Equipment and Tools
To make a tasty homemade baked beans recipe, you’ll need some basic kitchen tools. The right tools can greatly improve your easy baked beans recipe. A large pot, preferably stainless steel or cast iron, is key for cooking the beans. You’ll also need a colander, a can opener, and a wooden spoon for stirring.
There are also optional tools that can make cooking better. These include a slow cooker, a pressure cooker, and a food processor. A slow cooker is great for long cooking times. A pressure cooker can cook beans faster. A food processor helps with chopping onions and other ingredients.
Basic Kitchen Tools Needed
Large pot (stainless steel or cast iron)
Colander
Can opener
Wooden spoon
Optional Equipment for Best Results
Slow cooker
Pressure cooker
Food processor
With these kitchen tools, you’re ready to make a delicious homemade baked beans recipe. Choose the right tools for your easy baked beans recipe for the best results.
Equipment
Description
Large pot
For cooking the beans
Slow cooker
For cooking the beans over a long period
Food processor
For chopping onions and other ingredients
Preparing Your Beans from Scratch
To make the best baked beans, start with the right ingredients. Bush’s recipe uses navy or haricot beans. These beans have a mild flavor and smooth texture.
Soaking the beans is key to rehydrate them and save time. You can soak them overnight, quickly, or under pressure. Choose based on your schedule and tools.
Selecting the Right Beans
Navy beans: These small, white beans are a classic choice for baked beans and have a mild, slightly sweet flavor.
Haricot beans: Similar to navy beans, haricot beans are small, white, and have a mild flavor, making them an excellent choice for bush’s baked beans recipe.
Soaking Methods
Soaking the beans is a crucial step. The most common methods include:
Overnight soak: Soak the beans in water for at least 8 hours or overnight.
Quick soak: Soak the beans in boiling water for 1-2 hours.
Pre-cooking Process
After soaking, pre-cook the beans to make them tender. You can boil them or use a pressure cooker to speed up the process.
Soaking Method
Cooking Time
Result
Overnight soak
1-2 hours
Tender beans with a mild flavor
Quick soak
30 minutes to 1 hour
Slightly firmer beans with a more pronounced flavor
The Secret Sauce: Making the Perfect Bean Base
To make a great easy baked beans recipe, focus on the bean base. This is where the magic happens. The flavors blend together to create a rich, velvety sauce that goes well with the beans. A homemade baked beans recipe needs a top-notch base, so it’s key to get it right.
When making the bean base, consider these key ingredients:
Brown sugar
Apple cider vinegar
Tomato paste
Spices like ground mustard and ground cloves
These ingredients will give you a deep, complex flavor. This is what makes a classic easy baked beans recipe. By mixing these elements just right, you’ll make a homemade baked beans recipe that will wow everyone.
Remember, the secret to a great bean base is balance. You want a mix of sweet, tangy, and spicy flavors. Don’t be shy to adjust the ingredients to taste. With practice and patience, you’ll make a delicious, easy baked beans recipe for any event.
Mastering the bean base is the first step to a fantastic homemade baked beans recipe. So, take your time to experiment and improve your skills. The effort will be worth it.
Ingredient
Quantity
Brown sugar
1/2 cup
Apple cider vinegar
1/4 cup
Tomato paste
2 tablespoons
Step-by-Step Cooking Instructions
To make the perfect bush’s baked beans recipe, follow a step-by-step guide. This guide includes an initial cooking phase, adding special flavors, and a final simmer. These steps help you create a best baked beans recipe that tastes great and is true to its roots.
First, cook the beans in a big pot of water until they’re soft. It’s important to watch them closely. This way, they won’t get too soft or mushy.
Initial Cooking Phase
After the beans are cooked, it’s time to add the special flavors. Mix in tomato sauce, brown sugar, and spices. Finding the right mix of sweet and tangy is key to a great bush’s baked beans recipe.
Adding the Signature Flavors
The final step is simmering the beans in the flavor mix for at least an hour. This lets the flavors blend together. The result is a best baked beans recipe that’s rich, flavorful, and perfect for any event.
Final Simmering Process
Here are some tips for cooking:
Use top-quality ingredients for the best taste.
Keep an eye on the cooking time to avoid overcooking.
Adjust the seasoning to your liking.
By following these steps and tips, you’ll make a delicious bush’s baked beans recipe. It’s sure to impress even the most finicky eaters.
Customization Options and Variations
Customizing Bush’s Baked Beans at home is fun and easy. You can make it vegetarian or try new flavors. Using a vegetarian baked beans recipe is a tasty option.
Adjusting the spice level is a big part of customization. If you like it milder, use less spice. For a spicy kick, add more or try different peppers. It’s also a quick way to make an easy baked beans recipe.
Vegetarian Adaptations
Vegetarians can make simple changes to enjoy a great meal. Try using vegetarian bacon or sausage. Add extra veggies like bell peppers or mushrooms. You can also use different beans for a unique taste.
Regional Style Variations
Each region has its own baked beans style. Try a Boston-style with molasses and salt pork. Or go Southern with brown sugar and bacon. The fun is in experimenting with flavors and ingredients.
Storage and Reheating Guidelines
Perfecting your homemade baked beans recipe is just the start. It’s key to store and reheat them right to keep their taste and texture. A great homemade baked beans recipe can be a family favorite. With the right storage and reheating, you can enjoy them for days.
To store your homemade baked beans, use airtight containers. Keep them in the fridge for up to 5 days. For longer storage, freeze them in airtight containers or bags. When reheating, heat them slowly over low heat, stirring often, to avoid burning or sticking.
Here are some tips for reheating your homemade baked beans:
Reheat them in the oven: Place the beans in a covered dish and heat them in a preheated oven at 250°F (120°C) for about 30 minutes.
Reheat them on the stovetop: Place the beans in a saucepan and heat them over low heat, stirring occasionally, until they’re warmed through.
Reheat them in the microwave: Place the beans in a microwave-safe dish and heat them on high for about 2-3 minutes, stirring every minute, until they’re warmed through.
By following these storage and reheating tips, you can enjoy your homemade baked beans for longer. They’ll stay delicious and fresh. Whether you’re using a homemade or the best baked beans recipe, proper storage and reheating are key to keeping them great.
Perfect Pairings and Serving Suggestions
There are endless ways to serve your homemade bush’s baked beans recipe. You can choose from classic pairings or modern twists. This easy recipe lets you create dishes that everyone will love.
Traditional Accompaniments
Classic pairings for bush’s baked beans include grilled meats like burgers or hot dogs. Sides like coleslaw or baked potatoes are also great. You can also serve them with other barbecue favorites, like ribs or chicken.
Modern Serving Ideas
For a modern twist, try pairing your easy baked beans with unique ingredients. Here are some ideas:
Grilled vegetables, like asparagus or bell peppers
Crusty bread or cornbread
A fresh green salad with a tangy vinaigrette
These modern ideas will give your traditional bush’s baked beans a fresh spin.
With these serving suggestions, you can enjoy your homemade bush’s baked beans in new ways. So, get creative and find your favorite way to serve this delicious dish!
Traditional Accompaniments
Modern Serving Ideas
Grilled meats (burgers, hot dogs)
Grilled vegetables (asparagus, bell peppers)
Coleslaw, baked potatoes
Crusty bread, cornbread
Barbecue favorites (ribs, chicken)
Fresh green salad with vinaigrette
Conclusion: Mastering Your Homemade Bush’s Baked Beans
Creating your own version of Bush’s Baked Beans at home is rewarding. By following our guide and trying different options, you can make a delicious homemade version. You can choose from classic flavors or add your own twist, making it unique.
We hope you’ll keep trying new recipes and share your homemade baked beans with others. There’s nothing like enjoying a homemade batch with loved ones. So, get creative with flavors and enjoy making a dish that brings everyone together.
FAQ
What are the key ingredients in Bush’s Baked Beans?
To make homemade Bush’s Baked Beans, you need navy or Great Northern beans. Also, brown sugar, molasses, and mustard are key. Don’t forget Worcestershire sauce and spices like garlic, onion, and chili powder.
How do I prepare the beans from scratch?
Start by soaking the beans overnight. Then, drain and rinse them. Pre-cook the beans before mixing them with the sauce. This makes them tender and perfect.
Can I make a vegetarian version of Bush’s Baked Beans?
Yes, making a vegetarian version is easy. Just skip the bacon or ham and use vegetable broth instead of chicken broth. Adding bell peppers or mushrooms can also enhance flavor and texture.
How can I adjust the spice level of the baked beans?
To change the spice level, tweak the chili powder, cayenne pepper, or hot sauce. Start with a little spice and add more until it’s just right for you.
How long do homemade baked beans last, and how should they be stored?
Homemade baked beans keep well in the fridge for 5 days or in the freezer for 3 months. Cool them down first, then put them in an airtight container or bag. Reheat them until hot and simmering.
What makes aground beef tacos recipe unforgettable? Is it the quality of ingredients, the cooking method, or something else? To make perfect ground beef tacos, you need to think about these things. A great recipe can turn this classic dish into a favorite at home.
With the right mix of flavors and textures, your ground beef tacos will be a hit. Everyone will want more of this delicious dish.
Table of Contents
Introduction to Ground Beef Tacos
A top ground beef tacos recipe starts with quality ingredients and a simple cooking method. By following a few steps and using the right ingredients, you can make a flavorful and authentic dish. Whether you’re experienced or new to cooking, a good recipe can help you make restaurant-quality tacos at home.
Ground beef tacos are loved for their rich flavors and hearty texture. A well-made recipe will quickly become a favorite among your family and friends.
Key Takeaways
Quality ingredients are essential for a great ground beef tacos recipe
A simple cooking method can help bring out the best flavors in your dish
Using the right combination of spices and seasonings can elevate your ground beef tacos recipe
A good ground beef tacos recipe can be customized to suit your tastes and preferences
With the right ingredients and cooking method, you can create a dish that’s both delicious and satisfying
A well-crafted ground beef tacos recipe can become a staple in your household
The History and Evolution of Ground Beef Tacos
Ground beef tacos have a rich history that spans the border of Mexico and the United States. Their evolution is a fascinating story. It shows how traditional Mexican cuisine blended with American tastes.
In traditional Mexican cuisine, tacos are a staple. They consist of a corn tortilla filled with meats, cheeses, and vegetables. The idea of easy ground beef tacos came to the United States from Mexican immigrants. They brought their culinary traditions with them.
Over time, American-style ground beef tacos emerged. They are filled with ground beef, lettuce, tomatoes, and cheese. They are wrapped in a crispy taco shell.
Traditional Mexican Tacos vs. American-Style Ground Beef Tacos
Traditional Mexican tacos use fresh, handmade tortillas. They are filled with meats like carnitas, al pastor, or carne asada. American-style ground beef tacos, on the other hand, use store-bought tortillas. They are filled with seasoned ground beef.
The differences between these tacos show the cultural exchange and adaptation. This happened as Mexican cuisine was introduced to the United States.
How Ground Beef Tacos Became an American Favorite
The popularity of ground beef tacos in the United States is due to their convenience and affordability. As Americans became more interested in international cuisine, the demand for easy ground beef tacos grew. Today, they are a staple in many American restaurants and households.
Their evolution is a testament to the power of cultural exchange and culinary innovation.
Essential Ingredients for Perfect Ground Beef Tacos
To make the best ground beef tacos, you need the right ingredients. The type of ground beef, spices, and toppings are key. They all help make a delicious and authentic taco.
Choose high-quality ground beef that’s lean and fresh. Consider grass-fed or organic beef for a better taste and a sustainable choice.
Some must-have spices and seasonings for best ground beef tacos include:
Cumin
Chili powder
Paprika
Garlic powder
Salt and pepper
How you prepare and cook the ground beef matters too. Make sure to cook it until it’s brown and fully cooked. Then, season it with your favorite spices and toppings.
Ingredient
Quantity
Ground beef
1 pound
Cumin
1 teaspoon
Chili powder
1 teaspoon
With the right ingredients and these tips, you can make the best ground beef tacos. They’re sure to impress anyone.
Kitchen Tools and Equipment You’ll Need
To make delicious simple ground beef tacos, you need the right tools. Having the right items makes cooking easier and faster. Start by getting a large skillet, cutting board, and utensils like spatulas and tongs.
Basic Equipment Requirements
For simple ground beef tacos, you’ll need a few key tools. These include:
A large skillet for browning the ground beef
A cutting board for chopping onions, lettuce, and other toppings
Utensils like spatulas and tongs for handling the food
Optional Tools for Enhanced Preparation
Some optional tools can make preparation better. You might want a food processor for chopping and a grill for smoky flavor. With the right tools, you can make tasty simple ground beef tacos everyone will enjoy.
Storage Containers and Serving Dishes
Don’t forget about storage and serving items. You’ll need these to keep ingredients fresh and serve your tacos. Choose airtight containers and attractive, functional serving dishes.
Selecting and Preparing the Right Ground Beef
Choosing the right ground beef is key for quick ground beef tacos. You need a flavor-packed and safe option. Ground beef comes in lean and regular types. Lean is better for health, with less fat.
To cook the ground beef safely, follow some steps. Store it in a sealed container at 40°F (4°C) or below. Cook it to 160°F (71°C) or higher. A food thermometer helps check the temperature.
Choose a ground beef with a fat content that suits your taste preferences
Handle the ground beef safely to avoid cross-contamination
Cook the ground beef to an internal temperature of at least 160°F (71°C)
By following these tips, you can enjoy delicious and safe quick ground beef tacos. Always keep food safety in mind when handling and cooking ground beef.
The Ultimate Ground Beef Tacos Recipe
To make tasty ground beef tacos, you need a good recipe. The secret is using the right seasonings and cooking methods. Start by seasoning the ground beef with cumin, chili powder, and paprika.
A great recipe should guide you on seasoning, cooking, and assembling the tacos. Here are the key steps:
Meat Seasoning Instructions
Use 1 lb of ground beef and add 1/2 teaspoon of cumin, 1/2 teaspoon of chili powder, and 1/4 teaspoon of paprika.
Mix well and let it sit for a few minutes to allow the flavors to blend.
Cooking Temperature and Time
Cook the ground beef in a large skillet over medium-high heat. Break it up into small pieces as it cooks. Aim for a temperature of 375°F and cook for 5-7 minutes, until it’s fully browned.
Assembly Steps
To assemble the tacos, place cooked ground beef in a taco shell. Add your favorite toppings like shredded lettuce, diced tomatoes, and cheese.
By following this recipe, you’ll make delicious and authentic tacos. They’re perfect for a quick meal or a flavorful dish for your next gathering.
Fresh Toppings and Garnishes
When making homemade ground beef tacos, the toppings and garnishes are key. Fresh, quality ingredients can boost the flavor and texture. This makes the tacos truly memorable. For the best tacos, mix traditional and modern toppings.
A classic choice is lettuce, tomatoes, and cheese. These add a crisp, refreshing contrast to the savory ground beef. But, for something new, try avocado, salsa, or sour cream.
Traditional Toppings
Lettuce
Tomatoes
Cheese
Cilantro
Creative Modern Additions
Avocado
Salsa
Sour cream
Diced onions
By mixing traditional and modern toppings, you can create a unique flavor. Whether you prefer classic or adventurous, the right toppings make a big difference.
Topping
Description
Lettuce
A crisp, refreshing green that adds texture to the tacos
Avocado
A creamy, rich fruit that adds a unique flavor and healthy fats
Salsa
A spicy, tangy sauce that adds a burst of flavor to the tacos
Homemade Taco Sauce and Condiments
For simple ground beef tacos, the right condiments are key. Making your own taco sauce and condiments is simple. It lets you tailor the flavors to your taste. For quick tacos, having various condiments adds that extra flavor.
To start, you’ll need basic ingredients like diced tomatoes, onions, garlic, and jalapenos. These can make salsa, guacamole, and sour cream. Experimenting with different combinations helps find the perfect flavor for your tacos.
Here are tips for making your own taco sauce and condiments:
Use fresh, high-quality ingredients for the best flavor.
Don’t be afraid to try new ingredient combinations.
Adding a squeeze of fresh lime juice can add a citrus burst.
By making your own taco sauce and condiments, you can add a personal touch. Whether you want a spicy kick or a tangy twist, the right condiments elevate your tacos.
Homemade condiments are a great way to add a personal touch to your tacos and make them truly special.
Tips for Achieving the Perfect Texture
To make a great ground beef tacos recipe, focus on the perfect texture. Cook the meat right and choose the right taco shells. A well-cooked dish can greatly improve the meal’s flavor and satisfaction.
Cooking techniques are key to the ground beef’s texture. Overcooking makes it dry and tough, while undercooking makes it soft and unappealing. To get it just right, cook the beef to the recommended internal temperature.
Meat Cooking Techniques
Cook the ground beef in a skillet over medium-high heat, breaking it up into small pieces as it cooks.
Use a thermometer to ensure the internal temperature reaches 160°F (71°C) for optimal food safety and texture.
Avoid overmixing the ground beef, as this can lead to a dense and tough texture.
The type of taco shells also affects the dish’s texture. For an easy ground beef tacos recipe, crunchy taco shells are best. They hold their shape and add a nice crunch.
Shell Preparation Methods
To prepare the taco shells, warm them up in the oven or microwave as the package says. This crisps up the shells and improves their texture. Pair the perfectly cooked ground beef with crunchy taco shells for a dish that will impress everyone.
Making Ground Beef Tacos Ahead of Time
Preparing homemade ground beef tacos in advance can save time and ensure a tasty meal. It’s key to follow storage and reheating tips to keep the flavor and texture right. This way, your tacos will always be delicious.
When you make tacos ahead, store the parts separately. This means the cooked beef, tortillas, and toppings. This makes it easy to put the tacos together when you’re ready to eat.
Storage Guidelines
Store cooked ground beef in an airtight container in the refrigerator for up to 3 days.
Keep tortillas fresh by storing them in a cool, dry place or freezing them for up to 2 months.
Prepare toppings such as diced tomatoes, shredded lettuce, and diced avocado just before serving for optimal freshness.
Reheating Instructions
To reheat cooked ground beef, simply microwave it for 30-60 seconds or heat it in a pan over medium heat until warmed through. Assemble the tacos by placing the reheated ground beef onto a tortilla and adding your desired toppings.
By following these storage and reheating guidelines, you can enjoy delicious homemade ground beef tacos anytime. Whether it’s for a weeknight dinner or a weekend gathering, making tacos ahead of time makes things easier and more efficient.
Taco Component
Storage Method
Shelf Life
Cooked Ground Beef
Airtight container in refrigerator
Up to 3 days
Tortillas
Cool, dry place or freezer
Up to 2 months
Toppings
Prepare just before serving
Best when fresh
Common Mistakes to Avoid
When making simple ground beef tacos, it’s easy to make mistakes. These can ruin the dish. To make perfect quick ground beef tacos, avoid overcooking the meat, using low-quality ingredients, and not preparing taco shells right.
Some common mistakes to avoid include:
Overcooking the ground beef, making it dry and tough
Using low-quality ingredients, such as old spices or stale tortillas
Not preparing the taco shells properly, leading to a soggy or brittle texture
To avoid these mistakes, follow some simple tips. First, cook the ground beef until it’s just browned. Then, season it with fresh spices. Second, use high-quality ingredients like fresh lettuce and diced tomatoes. Finally, prepare taco shells as the package says, or make your own for a crispy texture.
By following these tips and avoiding common mistakes, you can make delicious simple ground beef tacos. They will please even the pickiest eaters. Whether for a weeknight dinner or a weekend gathering, with practice and patience, you’ll get better fast.
Mistake
Tip to Avoid
Overcooking the meat
Cook until just browned, then season with fresh spices
Using low-quality ingredients
Use fresh lettuce, diced tomatoes, and other high-quality ingredients
Not preparing the taco shells properly
Follow package instructions or make your own homemade shells
Healthy Adaptations and Dietary Modifications
Enjoying ground beef tacos can be healthy with the right tweaks. You can make easy ground beef tacos for different tastes and needs. Whether you want low-fat, gluten-free, or keto-friendly options, there are many ways to adapt the recipe.
Using fresh, wholesome ingredients is key for healthy tacos. Choose leaner ground beef or try turkey or chicken for less fat. Use whole-wheat or gluten-free tortillas for those with dietary restrictions.
Low-Fat Options
For less fat, consider leaner ground beef and less cheese. Add more veggies like lettuce, tomatoes, and bell peppers. Use herbs and spices for flavor instead of high-fat sauces.
Gluten-Free Variations
Make gluten-free tacos with gluten-free tortillas or lettuce wraps. Try different gluten-free seasonings and sauces. Use corn tortillas, gluten-free taco shells, or portobello mushroom caps for a low-carb option.
Keto-Friendly Alternatives
Keto tacos can be made with low-carb tortillas or lettuce wraps. Add avocado and sour cream for high fat. Use ground beef and cheese for more protein. These tweaks make keto tacos delicious and diet-friendly.
Conclusion
As we wrap up this guide on making the perfect homemade ground beef tacos, we invite you to become a taco expert. Try different ingredients and methods. The best ground beef tacos are what you like best, so feel free to mix and match.
Ground beef tacos can be anything from traditional Mexican to something entirely new. Their flexibility lets you get creative in the kitchen. Most importantly, enjoy the process and the joy of sharing these tasty meals.
Now that you know more about making tacos, you can impress everyone. Get ready to cook and make delicious tacos. It’s time to start your taco adventure!
FAQ
What are the key ingredients for making the perfect ground beef tacos?
To make great ground beef tacos, you need quality ground beef and taco seasoning. Don’t forget diced onions, minced garlic, and taco shells or tortillas. Toppings like shredded lettuce, diced tomatoes, and cheese can make them even better.
How do I properly cook the ground beef for tacos?
Start by browning the ground beef in a skillet over medium-high heat. Break it into small pieces as it cooks. Drain any extra fat. Add taco seasoning and a bit of water, then simmer until the flavors mix well and the liquid is gone.
What are some creative topping and garnish options for ground beef tacos?
Try adding avocado, diced onions, and sliced jalapeños for a twist. Fresh cilantro, salsa, and crumbled cheese like queso fresco or cotija can also add flavor.
Can I make ground beef tacos ahead of time?
Yes, you can make them ahead. Store the cooked beef in an airtight container in the fridge for 3-4 days. Reheat it and add your favorite toppings for a quick meal.
What are some common mistakes to avoid when making ground beef tacos?
Avoid overcooking the beef and using low-quality meat. Don’t forget to drain the fat and prepare taco shells right. Too many toppings or unbalanced flavors can also ruin the tacos.
Can I make healthier versions of ground beef tacos?
Definitely! Use lean beef and whole-wheat wraps or lettuce instead of taco shells. Add more veggies and choose low-fat cheese or Greek yogurt. Homemade taco seasoning can also cut down on sodium.