The Orange Glow Smoothie is a tasty and refreshing drink that packs a punch of vitamins and flavor. It’s perfect for mornings when you need a quick boost or as a midday pick-me-up. Made with bright oranges, sweet pineapple, and a touch of carrot, this smoothie is both healthy and delicious!
Table of Contents
Why Make This Recipe
You should make this smoothie because it’s quick, easy, and good for you! It uses simple ingredients that you might already have at home. Plus, it’s a great way to enjoy fresh fruits and veggies without spending a lot of time in the kitchen. Whether you’re busy during the week or relaxing on the weekend, this smoothie is a fantastic choice!
How to Make Orange Glow Smoothie
Ingredients:
1 orange, peeled
1/2 cup pineapple chunks
1 small carrot, peeled and chopped
1 banana
1/2 cup water or orange juice
1 tsp chia seeds for garnish
Ice cubes
Directions:
In a blender, add the orange, pineapple, carrot, banana, water, and ice.
Blend everything until smooth.
Pour the smoothie into a glass.
Garnish with chia seeds and a sprig of mint if you like!
How to Serve Orange Glow Smoothie
Serve the Orange Glow Smoothie right after you make it. It tastes best fresh! You can add a fun straw or serve it in a fancy glass for a nice touch. Enjoy it on a sunny morning or as a refreshing snack any time of day.
How to Store Orange Glow Smoothie
If you have leftover smoothie, keep it in an airtight container in the refrigerator. It’s best to drink it within a day for the best taste and freshness. If it thickens, you can add a little water or juice to thin it out again.
Tips to Make Orange Glow Smoothie
Use frozen fruit to make your smoothie colder and thicker.
If you want a sweeter smoothie, add a little honey or maple syrup.
Feel free to add a handful of spinach for some extra nutrients without changing the taste much.
Variation
You can change this recipe by adding different fruits, like mango or berries. You can also use coconut water instead of regular water to give it a tropical twist.
FAQs
Q: Can I make this smoothie ahead of time? A: It’s best to drink it fresh, but you can prepare the ingredients the night before and blend them in the morning.
Q: Is it ok to use a different kind of milk? A: Yes! You can use almond milk, coconut milk, or any milk you like for a different flavor.
Q: Can I omit the carrot? A: Absolutely! The smoothie will still taste delicious without the carrot if you prefer fewer ingredients.
Are you looking for a refreshing drink that is easy to make and tastes delicious? The pineapple mango smoothie is just what you need! This smoothie is packed with tropical flavors and is perfect for any time of the day.
Table of Contents
Why Make This Recipe
This smoothie is not only tasty but also healthy! It’s loaded with vitamins and nutrients from fresh fruits, yogurt, and almond milk. Plus, it’s super quick to make. You can enjoy it for breakfast, as a snack, or even dessert. Your family and friends will love it!
How to Make Pineapple Mango Smoothie
Ingredients:
1 Banana
1 cup Pineapple
1 cup Mango
1/4 cup Yogurt
1 cup Almond Milk
Ice cubes
Directions:
In a blender, combine the banana, pineapple, mango, yogurt, and almond milk.
Blend until smooth.
Add ice cubes and blend again until desired consistency is reached.
Pour into a glass and serve immediately.
How to Serve Pineapple Mango Smoothie
Serve your pineapple mango smoothie in a tall glass. You can add a slice of pineapple or mango on the rim for a nice touch. Enjoy it with a straw for that tropical feel!
How to Store Pineapple Mango Smoothie
If you have leftovers, you can store your smoothie in an airtight container in the fridge. It’s best to drink it within a day for the best flavor and freshness. Just give it a good shake or stir before enjoying again.
Tips to Make Pineapple Mango Smoothie
For a creamier smoothie, use frozen fruits instead of fresh ones.
You can add a little honey oragave syrup if you like it sweeter.
Feel free to add some spinach or kale for a healthy boost without changing the taste!
Variation
Try swapping the almond milk for coconut milk for a richer flavor. You can also add chia seeds for extra nutrition!
FAQs
Can I use canned pineapple? Yes, you can use canned pineapple. Just make sure to drain it well before blending.
Is this smoothie vegan? Yes, this smoothie is vegan as long as you use plant-based yogurt.
Can I make this smoothie ahead of time? It’s best to drink it fresh. But if you need to make it ahead, store it in the fridge and give it a good shake before serving.
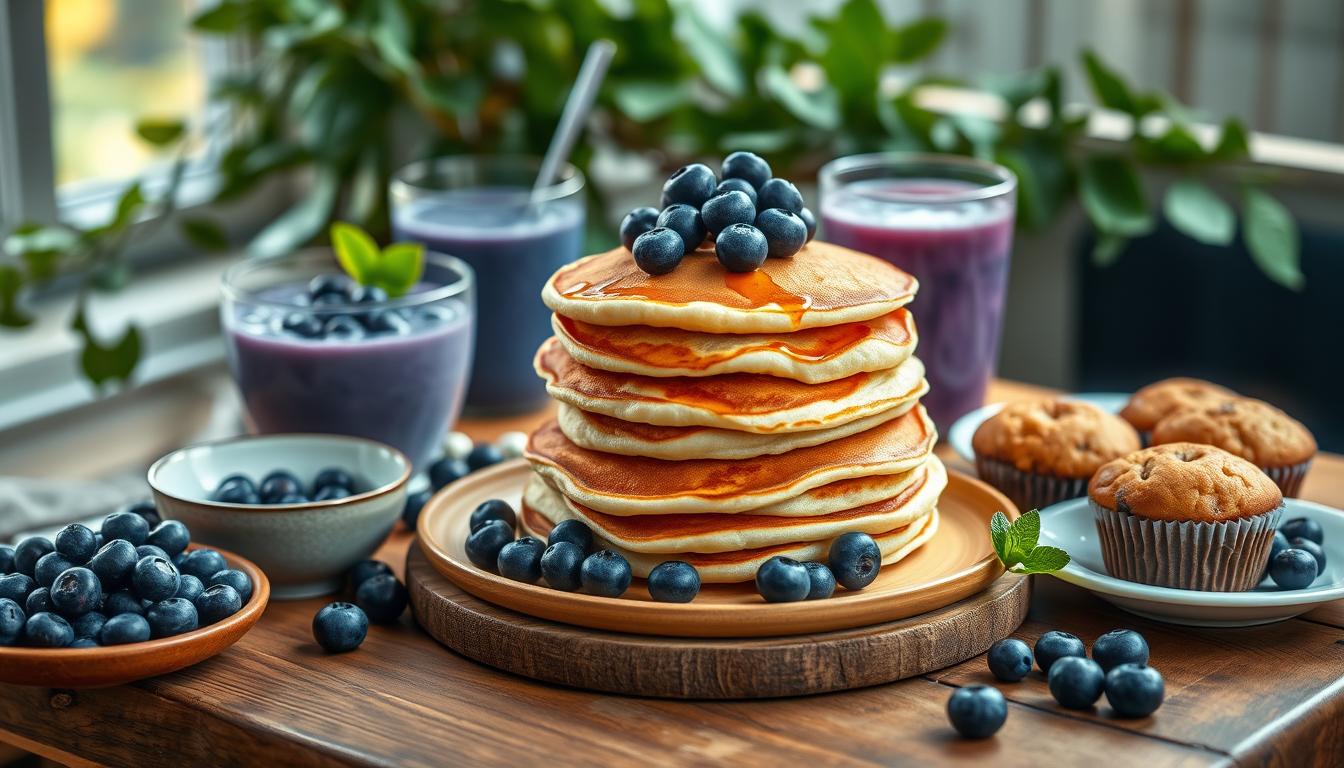
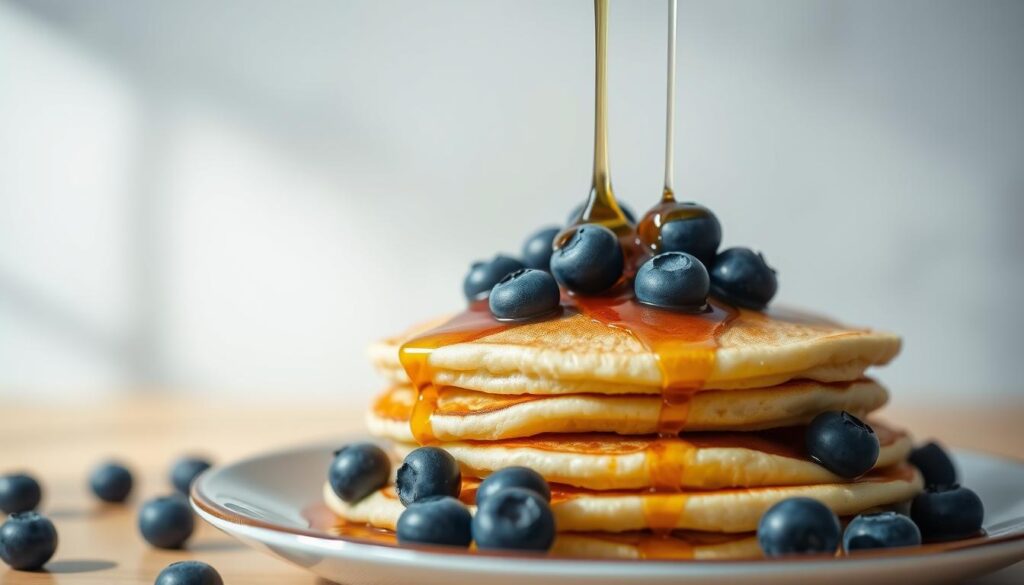
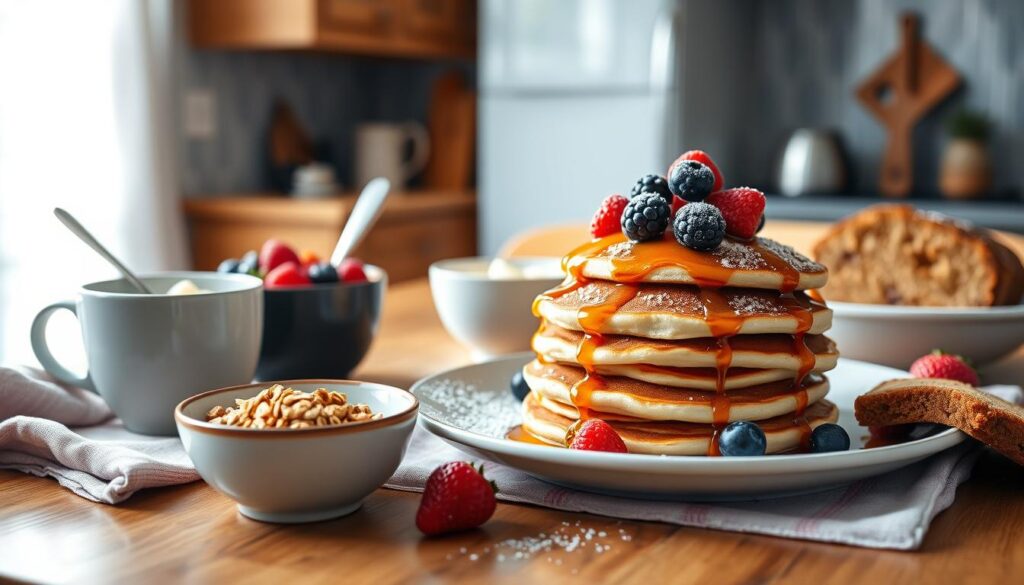
Starting your day with a nutritious breakfast is key. Adding blueberry breakfast recipes to your morning can greatly improve your health. Blueberries are full of antioxidants, fiber, and vitamins. They make a great addition to your breakfast.
Table of Contents
There are many blueberry breakfast recipes to choose from. You can find something that you love, from classic pancakes to overnight oats. Adding blueberries to your breakfast boosts your energy and helps you have a productive day.
Key Takeaways
Blueberry breakfast recipes are a great way to start your day with a nutritious meal
Incorporating blueberries into your breakfast can provide a boost of antioxidants and fiber
Healthy blueberry recipes can be easy to make and delicious
Blueberries can help increase energy levels and support a productive day
Exploring various blueberry breakfast recipes can help you find a dish that suits your taste preferences
Why Blueberries Are the Perfect Breakfast Ingredient
Blueberries are a great choice for breakfast. They are packed with nutrients like antioxidants, fiber, and vitamins. Adding them to pancakes, waffles, or muffins makes for delicious homemade treats.
Blueberries are full of antioxidants. These help protect your cells from damage and inflammation. This can lower the risk of heart disease and cancer. They also have fiber, which helps with digestion and keeps you full until lunch.
Nutritional Benefits of Morning Blueberries
Blueberries are also rich in vitamins C and potassium. They are low in calories and high in water, making them nutritious and filling. Adding blueberries to your breakfast can greatly improve your health and wellbeing.
Energy-Boosting Properties
Blueberries can also give you a boost of energy. Their mix of natural sugars, fiber, and antioxidants provides a lasting energy boost. They are perfect for starting your day feeling energized and focused.
Essential Tips for Selecting and Storing Fresh Blueberries
Creating a tasty fresh blueberry recipe inspiration starts with quality blueberries. To get the best taste and texture, learn how to pick and store them right. Look for plump, firm blueberries with a deep purple color. Soft, mushy, or grayish blueberries are old and not good.
To keep blueberries fresh, store them in a cool, dry spot. Don’t wash them until you’re ready to use them. This keeps them fresh and flavorful, perfect for your breakfast dishes.
Check the packaging: Make sure the container is clean and dry, and the blueberries are not packed too tightly.
Store in the refrigerator: If you don’t plan to use the blueberries immediately, store them in the refrigerator to keep them fresh for a longer period.
Freeze for later: If you want to keep blueberries for a longer period, consider freezing them. This will help preserve their flavor and nutritional value.
By following these tips, your fresh blueberries will stay fresh and tasty. This gives you the best fresh blueberry recipe inspiration for your breakfast dishes.
Classic Blueberry Breakfast Recipes You Need to Try
Starting your day with a delicious blueberry breakfast can boost your energy. It sets a positive tone for the day. Blueberry breakfasts are not only tasty but also full of nutrients and antioxidants. They support your health and well-being.
There are many blueberry breakfast dishes to choose from. Some favorites include:
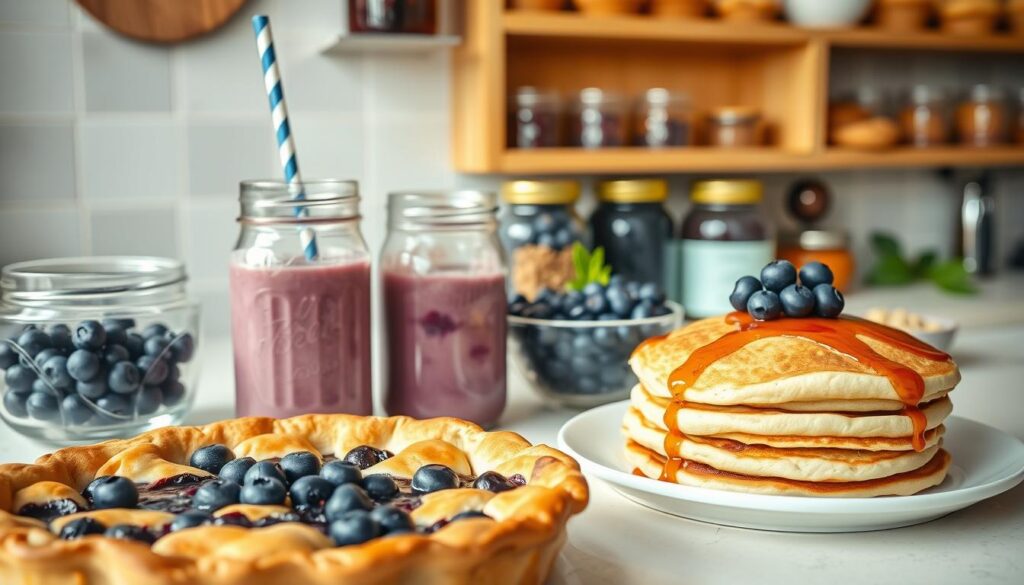
Traditional blueberry pancakes, made with fresh blueberries and a hint of sweetness
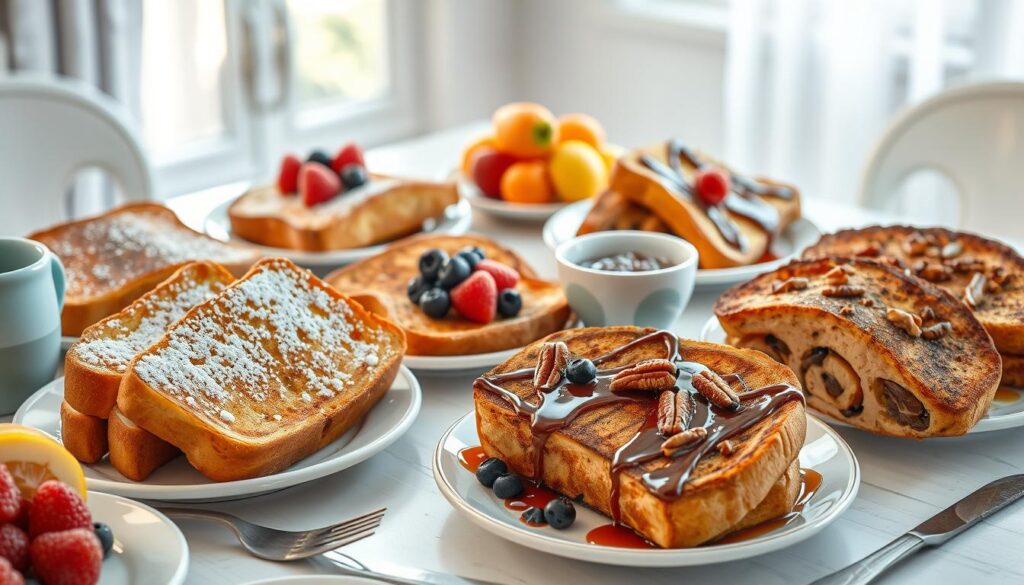
Blueberry French toast, topped with a dollop of whipped cream and a sprinkle of sugar
Homemade blueberry muffins, perfect for a quick and easy breakfast on-the-go
These recipes are not only delicious but also simple to make. They require minimal ingredients. Adding fresh blueberries to your breakfast adds flavor and nutrition.
So, why not try one of these classic blueberry breakfast recipes? They offer fresh flavor and nutritional benefits. They’re perfect for a quick meal or a more elaborate dish.
Quick and Easy Blueberry Breakfast Ideas
Starting your day with a tasty and healthy breakfast is key. Easy blueberry breakfast ideas make it simple. You can whip up healthy blueberry recipes in minutes, even when you’re in a rush. Try blueberry smoothie bowls or overnight oats for a quick start.
Popular ideas include blueberry muffins, pancakes, and waffles. You can also toss fresh or frozen blueberries into your breakfast favorites like yogurt, oatmeal, or scrambled eggs. These recipes are not only yummy but also full of nutrients and antioxidants.
Here are some tips to make your blueberry breakfasts even better:
Use fresh or frozen blueberries instead of dried or processed ones
Choose whole grain options for your breakfast dishes, such as whole wheat muffins or oatmeal
Add nuts or seeds, such as almonds or chia seeds, for extra crunch and nutrition
With these easy blueberry breakfast ideas, you can kick off your day with a nutritious and tasty meal. Try adding healthy blueberry recipes to your breakfast routine. Enjoy the amazing benefits of this fantastic fruit.
Healthy Blueberry Breakfast Smoothie Combinations
Starting your day with a nutritious breakfast is key. A delicious and healthy blueberry breakfast smoothie is a great choice. These smoothies are full of antioxidants, vitamins, and minerals. They keep you energized all morning.
You can try many healthy blueberry recipes. For example, mix blueberries with spinach, banana, and almond milk for a green smoothie. This green blueberry protein smoothie is both tasty and nutritious.
Blueberry breakfast recipes offer endless possibilities. You can mix different ingredients to make unique and tasty smoothies. Try blending blueberries with yogurt, honey, and milk for a blueberry yogurt breakfast shake. This smoothie is not only yummy but also gives you protein and calcium for strong bones.
Here are some other healthy blueberry breakfast smoothie combinations to try:
Antioxidant-rich berry blast: Combine blueberries with raspberries and strawberries for a smoothie full of antioxidants.
Blueberry banana boost: Blend blueberries with banana, spinach, and almond milk for a smoothie rich in potassium and vitamins.
Blueberry protein punch: Mix blueberries with protein powder, Greek yogurt, and milk for a smoothie great for post-workout recovery.
The secret to a delicious and healthy blueberry breakfast smoothie is to experiment. Find the ingredients that work best for you. With these healthy blueberry recipes, you’ll start your day with a nutritious and tasty breakfast. This will keep you energized and focused all morning.
Make-Ahead Blueberry Breakfast Options
Busy mornings can be tough. But, having some homemade blueberry recipes ready can save the day. Try making blueberry muffin tin frittatas or blueberry breakfast burritos ahead of time. They’re simple to make and ensure a healthy, tasty start to your day.
Here are some make-ahead blueberry breakfast ideas:
Blueberry muffin tin frittatas: Mix eggs, milk, and blueberries, then pour into muffin tins. Bake until they’re set.
Blueberry breakfast burritos: Scramble eggs, add blueberries and cheese, and wrap in tortillas.
Blueberry overnight oats: Combine oats, milk, and blueberries, then chill overnight.
These delicious blueberry breakfast dishes are not only easy but also full of nutrients. Blueberries are rich in antioxidants. When paired with other healthy ingredients, they create a balanced breakfast. Adding homemade blueberry recipes to your morning routine boosts your day with a nutritious and tasty meal.
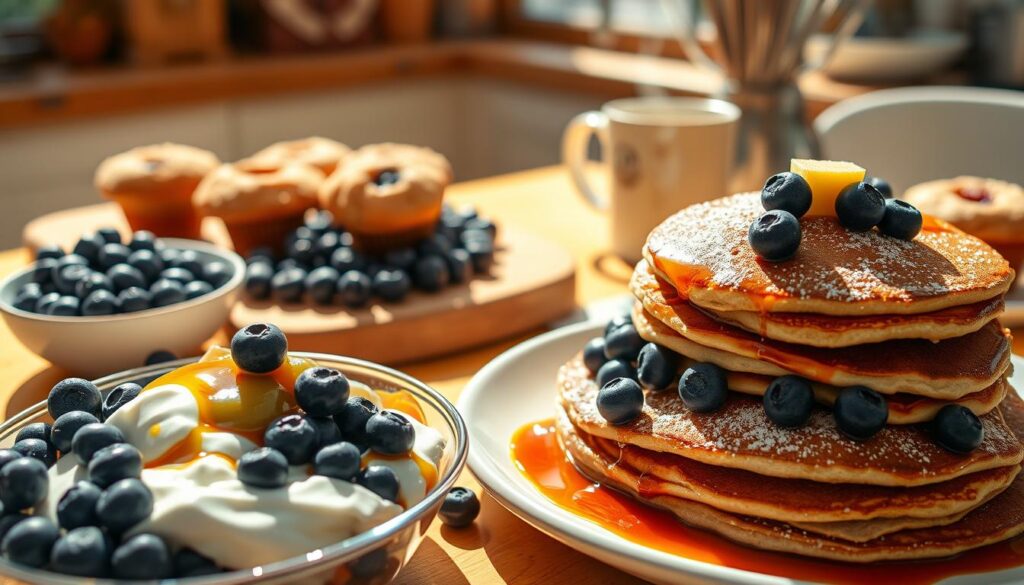
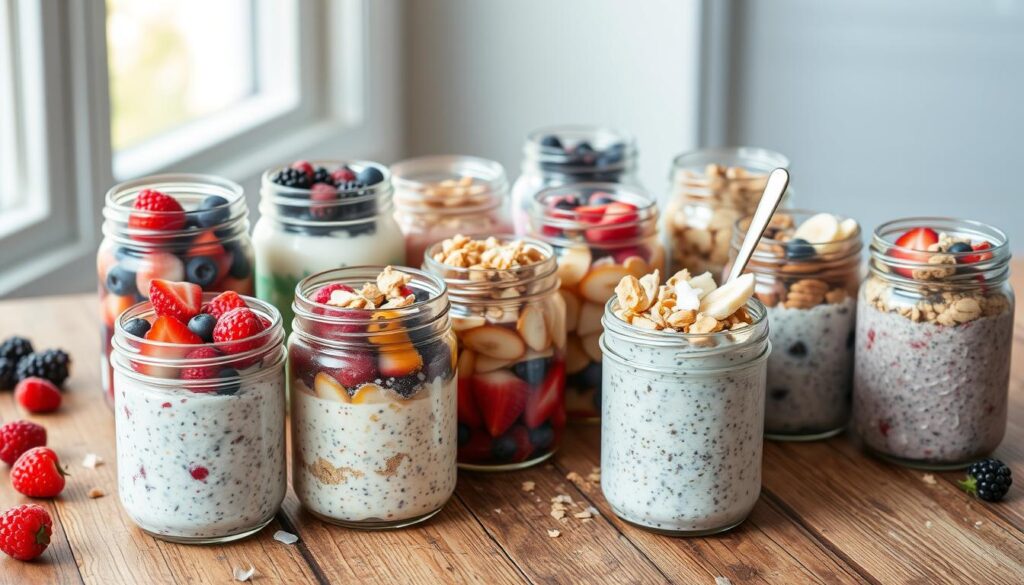
Incorporating Blueberries into Your Breakfast Bowls
Adding blueberries to your breakfast bowls is a fantastic way to start your day. They’re not only nutritious but also add a burst of flavor. Here are some blueberry breakfast recipes to try in your morning routine.
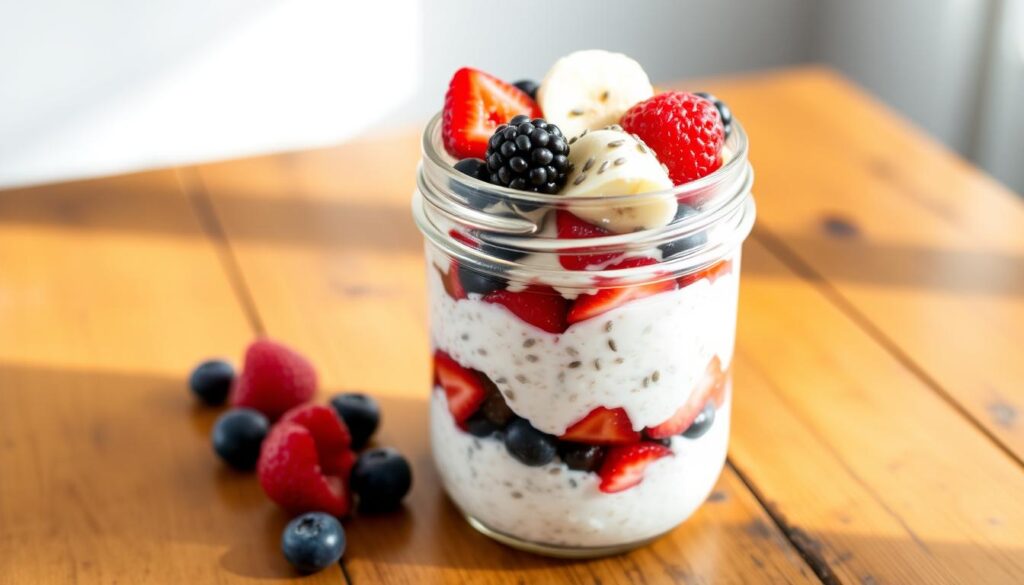
Overnight Oats with Blueberries
Overnight oats are a favorite breakfast choice. Blueberries make them even better. Just mix oats, milk, and blueberries in a jar. Then, refrigerate it overnight.
Blueberry Chia Seed Pudding
Chia seed pudding is another healthy option. Mix chia seeds with almond milk and chill it overnight. Top it with fresh blueberries and honey for a tasty breakfast.
Greek Yogurt Parfait Ideas
Greek yogurt parfaits are perfect for blueberries. Layer yogurt, blueberries, and granola for a delicious breakfast. You can also add honey or nuts for extra flavor.
Here are some tips for the perfect breakfast bowl:
Use fresh and high-quality ingredients
Experiment with different combinations of ingredients
Add a source of protein, such as nuts or seeds, to keep you full until lunchtime
Creative Ways to Elevate Your Blueberry Breakfast Recipes
To make your blueberry breakfast dishes even better, try adding spices and nuts. A little cinnamon or some walnuts can give your dishes a special flavor and texture. You can also use different milks and yogurts, like almond milk or Greek yogurt, for a creamy base.
Other ideas include mixing blueberries with bananas or strawberries. Adding a drizzle of honey or maple syrup can also sweeten things up. Using whole wheat or oat flour can add a nutty taste to your recipes.
Add a sprinkle of cinnamon or nutmeg to your blueberry pancakes or waffles
Mix in some chopped nuts or seeds, such as walnuts or chia seeds, into your blueberry muffin batter
Use fresh blueberries in a fruit salad with other fruits, such as grapes or kiwi
Try using different types of milk, such as soy milk or coconut milk, in your blueberry smoothie recipes
By trying out these ideas, you can make a variety of tasty and healthy blueberry breakfast dishes. Whether you like sweet or savory, there are many ways to make your blueberry breakfasts special. They can become a favorite part of your morning routine.
Seasonal Variations for Your Blueberry Breakfast Dishes
Exploring blueberry breakfast recipes can be exciting. Each season brings new ingredients and flavors. This lets you make unique and tasty dishes. Whether you want something light or warm, the seasons help guide your cooking.
In summer, add fresh blueberries to pancakes or waffles for a sweet start. Winter brings warm dishes like blueberry oatmeal or muffins for a cozy morning. All year, try new ingredients and flavors to show blueberries’ versatility in breakfast.
Summer: Add fresh blueberries to your yogurt or oatmeal for a burst of flavor and nutrition
Winter: Use frozen blueberries to make a warm and comforting blueberry compote to top your pancakes or waffles
Year-round: Experiment with different spices and flavor combinations, such as cinnamon or vanilla, to create unique blueberry breakfast recipes
By using seasonal changes and fresh ideas, you can enjoy many blueberry breakfasts all year. This makes your mornings delicious and healthy.
Common Mistakes to Avoid When Cooking with Blueberries
When making healthy blueberry recipes, it’s key to steer clear of common mistakes. One big error is overwashing the blueberries. This can make them lose their sweetness and texture. To fix this, just rinse them gently with cold water and dry them with a paper towel before adding them to your blueberry breakfast recipes.
Another mistake is using the wrong sugar. White sugar can make things too sweet, while brown sugar adds a caramel flavor. Try using natural sweeteners like honey or maple syrup for a touch of sweetness in your healthy blueberry recipes.
Not using fresh blueberries: Fresh ones are crucial for the best taste and texture in your blueberry breakfast recipes.
Overcooking the blueberries: They can get mushy and lose flavor if cooked too long. Cook them briefly to keep their texture and taste.
Not storing blueberries properly: Keep them in a cool, dry place to make them last longer.
By avoiding these mistakes, you can make tasty and healthy blueberry recipes for your blueberry breakfast recipes. Try out different ingredients and cooking methods to find your favorite blueberry dishes.
Conclusion: Making the Most of Your Morning Blueberries
Adding blueberry breakfast recipes to your morning can be tasty and healthy. You can make everything from pancakes and French toast to smoothies and overnight oats. Blueberries are full of antioxidants, making them perfect for a variety of delicious blueberry breakfast dishes.
Blueberries can give you energy, boost your immune system, or just add sweetness to your day. This article has lots of ideas for using blueberries in your breakfast. Try mixing different flavors and textures to find your favorite.
To really enjoy blueberries, make them a part of your daily breakfast. Try new recipes and enjoy the fresh taste they bring to your mornings. It’s a great way to start your day off right.
FAQ
What are the nutritional benefits of incorporating blueberries into my breakfast?
Blueberries are full of antioxidants, fiber, and vitamins. They boost your morning meal’s nutrition. They’re rich in vitamin C, vitamin K, and manganese. Plus, they have anthocyanins that protect cells and fight inflammation.
How can I select and store fresh blueberries for the best quality?
Choose plump, firm blueberries with a deep purple color. Avoid soft or grayish berries. Store them in a cool, dry place. Wash them just before using to keep them fresh and flavorful.
What are some classic blueberry breakfast recipes I should try?
Try blueberry pancakes, French toast, and muffins for a classic start. These recipes are simple and pack a blueberry punch to begin your day.
What are some quick and easy blueberry breakfast ideas?
For quick mornings, go for blueberry smoothie bowls, overnight oats, or blueberry toasts. These are fast to make and still offer blueberry’s health benefits.
How can I incorporate blueberries into my breakfast bowls?
Enjoy blueberries in overnight oats, chia seed pudding, or Greek yogurt parfaits. These are tasty and healthy ways to start your day.
What are some common mistakes to avoid when cooking with blueberries?
Avoid overwashing blueberries to prevent sogginess. Use the right sugar to keep flavors and textures right. Don’t overcook blueberries to avoid them becoming too soft.
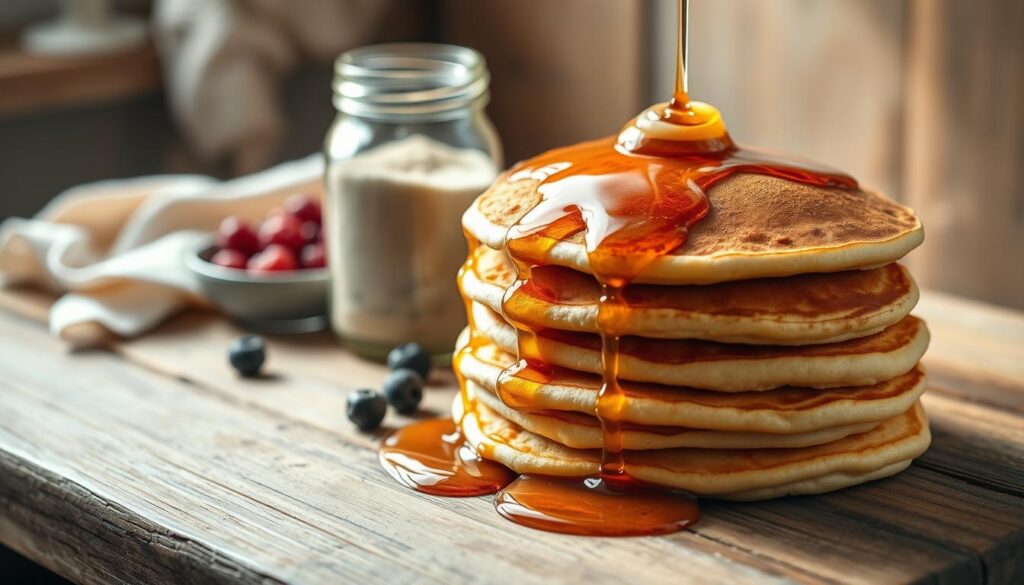
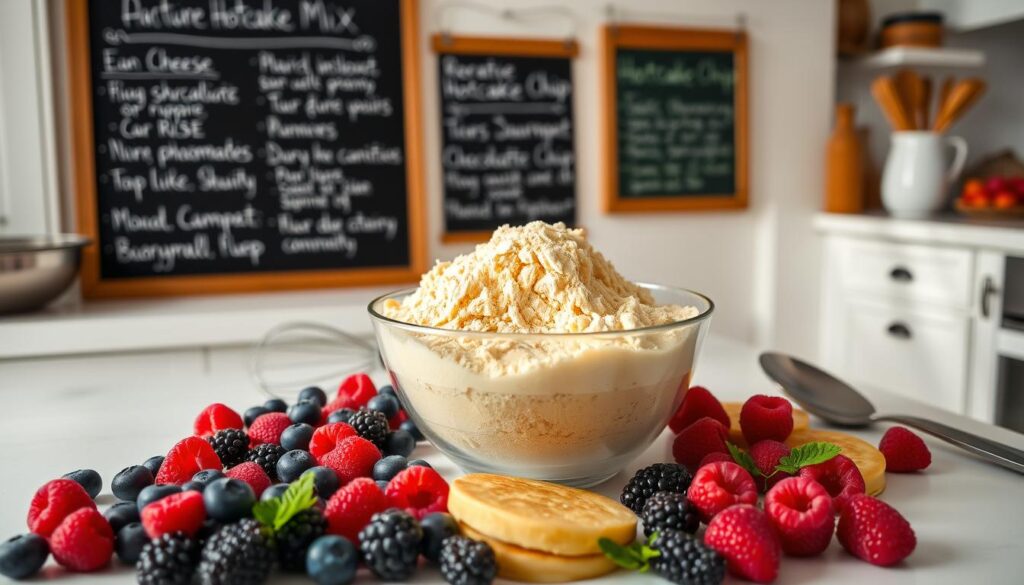
Start your day with a stack offluffy pancakes, made from a simple hotcake mix. This recipe is a game-changer for breakfast, letting you choose your ingredients and flavors. You’ll enjoy making delicious, fluffy pancakes for a quick breakfast.
Table of Contents
Using a hotcake mix makes mornings easier. With just a few ingredients, you can have a tasty breakfast ready fast. It’s perfect for a quick breakfast or a fun weekend brunch.
Key Takeaways
Make fluffy pancakes with a simple hotcake mix recipe
Control the ingredients and customize the flavor to your taste
Perfect for easy breakfast ideas and quick morning meals
Great for weekend brunch or special occasions
Customize with your favorite toppings or mix-ins
Easy to make and fun to eat
Understanding the Basics of Homemade Hotcake Mix
Making delicious homemade hotcakes starts with knowing the basics. You can make your own pancake mix from scratch. This lets you pick the ingredients and make the mix just right for you. Your homemade hotcakes will be light and fluffy, just how you like them.
One great thing about making your own mix is choosing the ingredients. You can pick the flour, sugar, and leavening agents. This is super helpful if you have special dietary needs, like gluten-free or low-sugar. You can make a mix that fits your taste and needs.
Benefits of Making Your Own Mix
Control over ingredients
Customization of recipe
Ability to cater to dietary restrictions
Essential Ingredients Overview
The basic ingredients for homemade hotcake mix are flour, sugar, and leavening agents. You can also add eggs, milk, and flavorings for a special touch. Making your mix from scratch lets you try different ingredients to find your favorite.
Storage and Shelf Life
Keep your homemade hotcake mix in an airtight container to keep it fresh. It can last for months, which is great for busy families. By following these steps, you can make your own mix and enjoy fluffy pancakes whenever you want.
Ingredient
Quantity
Flour
2 cups
Sugar
1 cup
Leavening agents
2 teaspoons
Kitchen Tools and Equipment Needed
To make delicious pancakes, you’ll need the right kitchen tools and equipment. Having the right tools is key to making great pancakes. You’ll need a large mixing bowl, a whisk, and a non-stick pan to cook your pancakes.
Here’s a list of the essential tools and equipment you’ll need:
Mixing bowl
Whisk
Non-stick pan
Measuring cups and spoons
Electric mixer (optional)
Using the right tools helps make light and fluffy pancakes. The quality of your tools and equipment also matters. For example, a non-stick pan is crucial for cooking pancakes. It prevents them from sticking and makes flipping easier.
When making breakfast recipes like pancakes, having the right tools is important. With the right tools, you can make pancakes that taste great and look good. So, make sure you have all the necessary tools and equipment before you start making your pancakes.
Having the right kitchen tools and equipment lets you make delicious pancakes. Whether you’re making pancakes for yourself or a crowd, the right tools make a big difference. They ensure your pancakes are of high quality.
Tool/Equipment
Description
Mixing Bowl
A large bowl used for mixing ingredients
Whisk
A kitchen tool used for mixing and blending ingredients
Non-stick Pan
A pan coated with a non-stick material to prevent food from sticking
Perfect Hotcake Mix Recipe for Fluffy Results
To make a tasty hotcake mix, you need the right ingredients in the right amounts. A good mix should have flour, sugar, and leavening agents. It’s a great choice for easy breakfast ideas.
Here’s a list of dry ingredients you’ll need:
2 cups all-purpose flour
2 tablespoons sugar
2 teaspoons baking powder
1/4 teaspoon salt
Dry Ingredients List
You can also add optional ingredients for extra flavor. Some ideas include:
Chopped nuts or chocolate chips
Dried fruit, such as cranberries or blueberries
A sprinkle of cinnamon or nutmeg
Optional Add-ins
To mix the batter, combine the dry ingredients in a bowl. Whisk until well combined. Add optional ingredients and stir until they’re evenly distributed. This recipe makes delicious and fluffy hotcakes for a quick breakfast.
Mixing Instructions
Follow this hotcake mix recipe for a tasty and easy breakfast. It’s perfect for any day. Whether you’re looking for a simple recipe or easy breakfast ideas, start with this one.
Ingredient
Quantity
Flour
2 cups
Sugar
2 tablespoons
Baking powder
2 teaspoons
Salt
1/4 teaspoon
Turning Your Mix Into Perfect Pancakes
To make fluffy pancakes, use the right amount of batter and cook at the correct temperature. When making homemade hotcakes, avoid overmixing the batter. This is key for a light and airy texture. As you prepare your breakfast recipes, ensure the pan temperature is just right.
Here are some tips to help you turn your mix into perfect pancakes:
Use a non-stick pan or griddle to prevent the pancakes from sticking and to make them easier to flip.
Adjust the heat as needed to maintain a consistent temperature.
Don’t overcrowd the pan – cook the pancakes one or two at a time, depending on their size.
As you cook your fluffy pancakes, keep an eye on the time and the heat. With a little practice, you’ll be making perfect homemade hotcakes every time. Your breakfast recipes will be a hit with family and friends.
By following these simple tips and using your favorite breakfast recipes, you’ll enjoy delicious homemade hotcakes in no time. So go ahead, get creative with your fluffy pancakes and make breakfast a meal to look forward to!
Mastering the Cooking Technique
To make delicious pancakes, you need to know how to cook them right. This means getting the pan temperature just right, flipping them correctly, and avoiding common mistakes. By doing this, you can make tasty and beautiful breakfasts.
Getting the pan temperature right is key for golden-brown pancakes. Use a thermometer to check the temperature. Also, grease the pan with a bit of oil or butter to stop pancakes from sticking.
Proper Pan Temperature
A medium heat is best for pancakes. If the pan is too hot, pancakes will burn before they’re fully cooked. If it’s too cold, they’ll cook too slowly and might be dense.
Flipping Tips
Flipping pancakes can be tricky at first. But with a bit of practice, you’ll get better. Use a spatula to loosen the pancake, then flip it quickly. Flip when bubbles appear and the edges start to dry.
Common Cooking Mistakes
Some common mistakes to avoid include overmixing the batter, using too much oil or butter, and cooking too long. By avoiding these, you can make pancakes that everyone will love. With the right mix and a bit of practice, you’ll be a pancake pro in no time.
Cooking Mistake
Effect on Pancakes
Overmixing the batter
Dense and tough pancakes
Using too much oil or butter
Greasy and soggy pancakes
Cooking for too long
Burned and dry pancakes
Creative Variations for Your Hotcake Mix
Now that you have a basic hotcake mix recipe, it’s time to get creative. Try adding fresh or dried fruits, like blueberries or bananas, for a sweet twist. This adds a fruity flavor to the classic hotcake.
Adding nuts or chocolate chips can give your hotcakes a crunchy texture and extra flavor. You can also use different milks, such as almond or soy milk, for a non-dairy version. The possibilities are endless, and it’s up to you to find the perfect mix.
Blueberry hotcakes with fresh blueberries and a hint of lemon zest
Banana hotcakes with sliced bananas and a drizzle of honey
Chocolate chip hotcakes with dark chocolate chips and a sprinkle of cinnamon
These are just a few ideas for creative hotcake variations. Don’t be afraid to try new things and make your own unique flavors. This way, your breakfast recipes will always be exciting and delicious.
Storage and Make-Ahead Tips
To keep your homemade hotcakes fresh, it’s key to store them right. Store your pancake mix in an airtight container. This keeps it fresh and ready for easy breakfasts.
Freezing your hotcakes is a great way to enjoy them later. Here are some tips:
Store your hotcake mix in an airtight container to keep it fresh.
Freeze your hotcakes for up to 2 months for later use.
Reheat your frozen hotcakes in the microwave or toaster for a quick and easy breakfast.
By following these tips, you can enjoy your homemade hotcakes whenever. They’ll stay fresh and delicious. Perfect for a quick breakfast or a weekend brunch.
Remember, the secret to fresh hotcakes is proper storage and freezing. With these tips, enjoy your favorite breakfast anytime, always delicious and fresh.
Troubleshooting Common Issues
When making fluffy pancakes, you might run into some common problems. These can mess up the texture and taste of your breakfast. It’s key to find out what’s causing the issue and fix it.
Start by checking your ingredients and tools. Make sure you’re using fresh stuff and the right tools for mixing and cooking. If your pancakes are dense or tough, try changing the dry to wet ingredient ratio. Or add a leavening agent to help them rise.
Texture Problems
Some common texture issues include:
Dense or tough pancakes: This can be caused by overmixing the batter or using too much flour.
Soggy or undercooked pancakes: This can be caused by not cooking the pancakes for long enough or using too much liquid in the batter.
Cooking Challenges
Cooking can also be a challenge. Some common problems are:
Burning or overcooking the pancakes: This can be caused by the pan being too hot or not adjusting the heat properly.
Undercooking the pancakes: This can be caused by not cooking the pancakes for long enough or not using the right type of pan.
By following these tips, you can make delicious pancakes. Always use fresh ingredients and the right tools for the best results.
Common Issue
Solution
Dense or tough pancakes
Adjust the ratio of dry to wet ingredients or add a leavening agent
Soggy or undercooked pancakes
Cook the pancakes for a longer time or use less liquid in the batter
Burning or overcooking the pancakes
Adjust the heat or use a thermometer to ensure the right temperature
Serving Suggestions and Toppings
When serving your hotcakes from a tasty hotcake mix recipe, you have endless options. You can go classic with butter and syrup or try fresh fruit, whipped cream, or chocolate chips. The goal is to mix and match toppings to make your hotcakes special.
For easy breakfast ideas, top your hotcakes with yogurt and granola, honey and banana, or peanut butter and bacon. You can also use almond or soy milk for a different flavor. The most important thing is to have fun and be creative.
Fresh fruit, such as strawberries or blueberries
Whipped cream or whipped coconut cream
Chocolate chips or chocolate shavings
Nuts, such as walnuts or pecans
Caramel sauce or honey
Remember, making your own hotcake mix recipe lets you customize it. So, don’t be shy to try new toppings and serving ideas. This way, you can create a tasty hotcake mix recipe that’s uniquely yours.
Conclusion: Mastering Your Homemade Hotcake Adventures
Creating your own homemade hotcake mix is a fun journey. You get to choose the flavors and textures you love. By trying different recipes, you can make fluffy, tasty pancakes whenever you want.
Success comes from measuring ingredients right, getting the batter just right, and mastering cooking. With practice, you’ll impress everyone with your homemade hotcakes.
Don’t be shy to try new things and have fun. Mix up flavors, try different toppings, and find your favorite pancake mix. The fun of making homemade hotcakes is unmatched.
FAQ
What are the benefits of making your own hotcake mix?
Making your own hotcake mix lets you control the ingredients. This way, you can make it just how you like it. You also avoid additives and preservatives found in store-bought mixes.
What are the essential ingredients needed for a homemade hotcake mix?
For a basic homemade hotcake mix, you need flour, baking powder, sugar, and salt. Sometimes, you might add milk powder or other dry ingredients. These ingredients help make your pancakes fluffy and delicious.
How long can a homemade hotcake mix be stored?
You can store homemade hotcake mix in an airtight container for 2-3 months. If you want to keep it longer, freeze it for up to 6 months.
What kitchen tools and equipment are needed to make hotcakes?
To make hotcakes, you’ll need a mixing bowl, whisk, ladle or measuring cup, and a non-stick pan or griddle. A spatula is also important for flipping the pancakes.
How do I turn my homemade hotcake mix into perfect pancakes?
To make perfect pancakes, follow the mixing instructions carefully. Use the right amount of batter for each pancake. Cook them at the right temperature for the best results.
What common mistakes should I avoid when cooking hotcakes?
Avoid overmixing the batter and using a pan that’s too hot or too cool. Also, make sure pancakes cook through before flipping them.
How can I add different flavors to my hotcake mix?
To add flavors, try adding blueberries, bananas, chocolate chips, or nuts to your mix. Experiment with different combinations to find your favorite.
How should I store and reheat my leftover hotcakes?
Store leftover hotcakes in an airtight container in the fridge for up to 3 days. To reheat, use the microwave, toaster oven, or a skillet over low heat until warm.
What should I do if my hotcakes turn out too dense or tough?
If your hotcakes are too dense or tough, adjust your mixing technique or the liquid amount. Too little liquid or overmixing can make them tough.
What toppings and serving suggestions work best with homemade hotcakes?
Classic toppings like butter, syrup, and powdered sugar are great. But, you can also try fresh fruit, whipped cream, nuts, or even bacon or cheese for a savory twist.
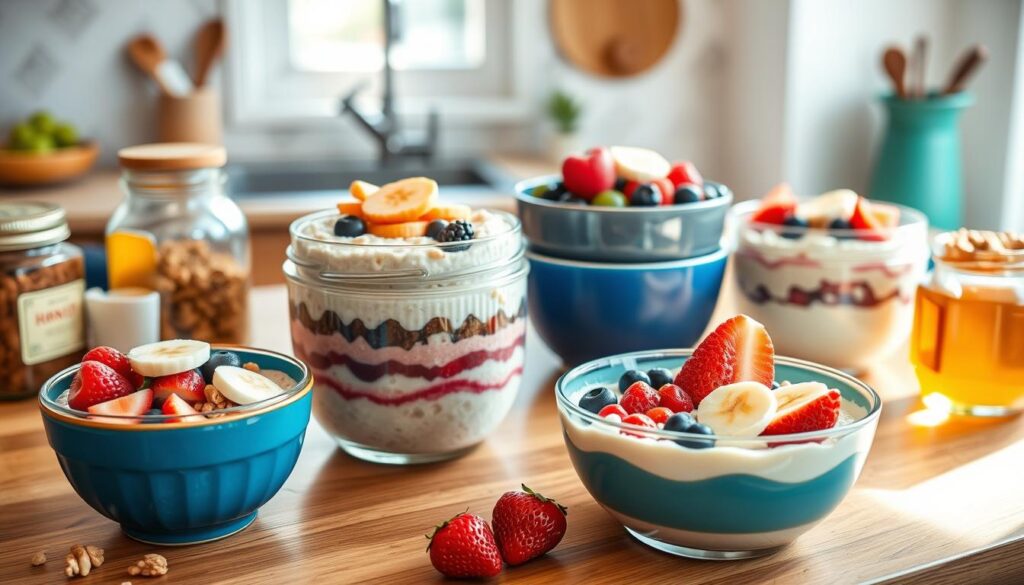
What makes a perfect breakfast? Is it quick to make, or full of nutrients? Overnight oats offer both. They mix rolled oats, milk, and your favorite ingredients in a jar. This makes a tasty, healthy meal ready for morning.
Table of Contents
Starting your day with overnight oats gives you energy and satisfaction. But what are overnight oats, and how can you make them a daily part? We’ll dive into the world of overnight oats and guide you to begin.
Key Takeaways
Overnight oats are a convenient and healthy breakfast option
They can be made with a variety of ingredients, including rolled oats, milk, and fruit
Overnight oats are easy to prepare and can be ready to go in the morning
This healthy recipe is packed with nutrients and can provide a boost of energy
Overnight oats are a great way to start your day and can be customized to suit your tastes
What Are Overnight Oats?
Overnight oats are a quick breakfast favorite for many. They are made by soaking oats in milk or another liquid overnight. This makes them soft and ready to eat in the morning. This no-cook oats method has gained popularity thanks to social media and the desire for healthy, easy meals.
The history of overnight oats is not well-known, but it’s thought to have started in Europe. Oats were a common food there. The idea of soaking oats in liquid overnight for a quick breakfast has been around for centuries. But the modern version, with its many flavors and toppings, is a more recent trend.
The Basic Concept
To make overnight oats, you mix rolled oats, milk, and flavorings or toppings in a jar. Then, you refrigerate it overnight. In the morning, the oats are soft and ready to eat. You can top them with fresh fruit, nuts, or other favorites.
History and Origins
The exact start of overnight oats is unclear, but it’s believed to come from traditional European porridge. Soaking oats in liquid overnight for a quick breakfast has been a long-standing tradition. Recently, social media and food bloggers have made it more popular.
Why They’ve Become Popular
Overnight oats are loved for their convenience, health benefits, and flexibility. They’re a quick breakfast that can be made ahead of time, perfect for busy mornings. They’re also nutritious, high in fiber, and can be customized with various toppings. This makes them a hit for people with different dietary needs.
These are just a few tasty ways to enjoy overnight oats. Their ease, health benefits, and adaptability have made them a favorite no-cook oats choice for many.
Essential Ingredients for Perfect Overnight Oats
To make delicious oats, you need a few key ingredients. These are rolled oats, milk or a milk substitute, and a sweetener or flavor. Overnight oats are great because you can add many ingredients to make them your own.
Some common ingredients in overnight oats include:
Fruits such as berries, bananas, or mangoes
Nuts like almonds, walnuts, or pecans
Seeds like chia, flax, or hemp
Spices such as cinnamon, vanilla, or nutmeg
Overnight oats are perfect for breakfast. They’re easy to make, healthy, and can fit your diet. By mixing your favorite ingredients with oats, you get a nutritious breakfast that lasts all morning.
To start, mix your ingredients in a jar or container and chill it overnight. In the morning, you’ll have a tasty breakfast ready. With a bit of creativity, you can make many different breakfasts using overnight oats.
Ingredient
Quantity
Optional
Rolled Oats
1/2 cup
No
Milk or Milk Alternative
1/2 cup
No
Fruit
1/2 cup
Yes
Nuts or Seeds
1 tablespoon
Yes
The Health Benefits of Starting Your Day with Overnight Oats
Starting your day with overnight oats can greatly improve your health. These oats are a fantastic breakfast choice. They give you energy and help with digestion. The fiber in oats keeps your bowel movements regular and prevents constipation.
Overnight oats are also packed with nutrients. They have protein, healthy fats, and complex carbs. This makes them a great way to start your day with a healthy meal. Some key benefits include:
Improved digestive health due to the high fiber content
Support for healthy blood sugar levels
Aid in weight management by keeping you fuller for longer
Adding overnight oats to your breakfast can boost your energy. There are many tasty and easy recipes to try.
Nutrient
Amount per serving
Fiber
4-6 grams
Protein
10-15 grams
Healthy fats
10-15 grams
Overall, overnight oats are a nutritious and tasty breakfast option. They offer many health benefits. By making them a daily part of your routine, you can improve your health and enjoy a delicious meal.
Step-by-Step Guide to Making Overnight Oats
Making overnight oats is easy and quick. It’s a great way to start your day with a healthy easy breakfast. Just mix your oats, milk, and any flavorings or sweeteners in a jar or container.
Here’s how to do it:
Combine oats, milk, and flavorings in a jar or container
Mix well to ensure all ingredients are fully incorporated
Cover the jar or container and refrigerate overnight or for at least 4 hours
In the morning, your quick breakfast will be ready to eat
By following these steps, you can have a tasty and healthy easy breakfast for busy mornings. Plus, you can add your favorite ingredients. This makes it a quick breakfast that you’ll love.
With this guide, you can make your own overnight oats. Enjoy a healthy and convenient easy breakfast option every day.
Ingredient
Quantity
Rolling Oats
1/2 cup
Milk
1 cup
Flavorings (optional)
1 tablespoon
Best Container Options and Storage Tips
Choosing the right container is key when making no-cook oats. Mason jars are a favorite because they’re easy to use and look good. But, any container with a lid works well for storing oats.
Storing oats in the fridge is important to keep them fresh and safe. Here are some tips for storing overnight oats:
Use a container with a tight-fitting lid to prevent contamination and spoilage.
Keep the container in the refrigerator at a temperature of 40°F (4°C) or below.
Consume the oats within 5 days of preparation.
Container Options
Other good containers for overnight oats include glass or plastic containers with lids. Pyrex or Tupperware are great options.
Storage Methods
To keep your oats fresh, store them in the fridge at a steady temperature. Freezing them for up to 2 months is also an option.
Shelf Life
Overnight oats can last up to 5 days in the fridge if stored right. Always check for any signs of spoilage before eating, like a bad smell or slimy texture.
Container Type
Shelf Life
Storage Method
Mason Jar
5 days
Refrigerator
Glass Container
5 days
Refrigerator
Plastic Container
5 days
Refrigerator
Top Flavor Combinations and Mix-ins
Overnight oats are a great way to start your day. They let you try out many flavors and mix-ins. This makes it easy to find a healthy recipe that you’ll love.
Some favorite flavors are vanilla and cinnamon, peanut butter and banana, and pumpkin spice. You can also add fruits, nuts, or spices to make your oats even better. Try adding sliced bananas, almonds, or cinnamon for extra taste and health benefits.
Here are some more ideas for flavor combinations and mix-ins:
Berry bliss: mix in some fresh or frozen berries, such as blueberries or strawberries, for a sweet and antioxidant-rich breakfast
Tropical twist: add some diced mango or pineapple to give your oats a tropical flavor
Nutty delight: mix in some chopped nuts, such as walnuts or pecans, for a crunchy texture and a boost of healthy fats
Remember, the key to a tasty and healthy recipe is to keep trying new things. With overnight oats, you can explore endless breakfast ideas every day.
Common Mistakes to Avoid When Preparing Overnight Oats
Making overnight oats for a quick breakfast requires avoiding common mistakes. The wrong ratio of oats to liquid can make them too dry or soggy. It’s key to balance the ingredients for the perfect texture.
Temperature matters too. Cold ingredients can slow down soaking. Old oats or poor mixing can also cause texture problems.
Ingredient Ratios
Start with the right ingredient ratios to avoid mistakes. Use 1/2 cup of oats with 1/2 cup of liquid like milk or yogurt. Adjust this as you like, but it’s a good starting point.
Temperature Considerations
Temperature is crucial for overnight oats. Cold ingredients slow soaking, leading to uncreamy oats. Use room temperature ingredients for the best results.
Texture Issues
Texture problems are common in overnight oats. Old oats or poor mixing can make them too dense or watery. Use fresh oats and mix well to avoid this.
By following these tips, you can make a delicious, quick breakfast. It’s perfect for any day of the week.
Seasonal Variations for Year-Round Enjoyment
Delicious oats are perfect for any time of the year. You can make them exciting by adding seasonal ingredients. For example, in fall, pumpkin puree or cinnamon can add a cozy flavor.
In winter, cranberries or orange zest bring a burst of citrus. Spring and summer are great for adding fresh berries like strawberries or raspberries. These changes keep your breakfasts interesting and delicious all year.
Apples or pears in the fall
Cranberries or cherries in the winter
Bananas or mangoes in the spring
Peaches or pineapples in the summer
These add natural sweetness and essential vitamins and minerals. By using seasonal ingredients, you can enjoy healthy and tasty breakfasts all year.
With a bit of creativity, overnight oats can be a fun and healthy breakfast any time of the year. Try these seasonal variations and start your day with a delicious bowl of oats.
Season
Ingredients
Flavor Combinations
Fall
Pumpkin puree, cinnamon, apples
Pumpkin spice, apple cinnamon
Winter
Cranberries, orange zest, cherries
Cranberry orange, cherry vanilla
Spring
Fresh berries, bananas, mangoes
Strawberry banana, mango peach
Summer
Peaches, pineapples, coconut flakes
Peach coconut, pineapple upside-down cake
Making Overnight Oats for Special Dietary Needs
Overnight oats can be made to fit many dietary needs. This makes them a great choice for those with special requirements. It’s easy to make changes to suit different needs, making them a flexible breakfast option.
For those with gluten intolerance, using gluten-free oats is a simple fix. This change lets them enjoy oats without worrying about gluten reactions. Vegans can also make their oats cruelty-free by using plant-based milks and avoiding honey.
To lower sugar, try using natural sweeteners like stevia or monk fruit. You can also use less sweetener. These tweaks make oats healthier and better for those watching their sugar intake. They ensure a tasty, easy breakfast that fits your dietary needs.
Gluten-Free Options
Use gluten-free oats as a direct substitute in any overnight oats recipe.
Explore different types of gluten-free milks to find the one that works best for you.
Vegan Adaptations
Choose plant-based milk alternatives like almond, soy, or coconut milk.
Avoid using honey; instead, opt for maple syrup or other vegan-friendly sweeteners.
Low-Sugar Alternatives
Use natural sweeteners like stevia or monk fruit to reduce sugar content.
Limit the amount of sweetener used in the recipe to minimize sugar intake.
By making these changes, you can make a healthy breakfast that fits your needs. Whether you need gluten-free, vegan, or low-sugar options, overnight oats can be adapted. This makes them a favorite for many, as they’re easy to customize for any diet.
Time-Saving Meal Prep Strategies with Overnight Oats
Overnight oats are a fantastic way to get a quick breakfast in the morning. You can make several jars at once. This means you have a healthy breakfast for every day of the week. It’s a great choice for meal prep, saving you time during the week.
To make meal prep even easier, scale up your recipe and prep ingredients ahead of time. Use containers that are easy to carry, like mason jars or ones with lids. This makes it simple to take your oats on the go.
Here are some tips for meal prepping with overnight oats:
Prepare a large batch of oats and divide it among multiple containers
Add different toppings or flavorings to each container to keep things interesting
Store the containers in the refrigerator and grab one on your way out the door in the morning
By using no-cook oats in your meal prep, you save time and have a healthy breakfast ready. A bit of planning and prep work means you can enjoy a tasty breakfast every day.
Conclusion
Overnight oats have become a great breakfast choice for many. They are easy to make and offer lots of health benefits. This breakfast is perfect for those looking for a quick and healthy start to their day.
With overnight oats, you can try new flavors and ingredients. You can add fresh fruits, nuts, or even spices. This makes your breakfast exciting and tailored to your taste.
As we’ve seen, overnight oats are not just tasty but also good for you. They can help you feel energized and ready for the day. Adding them to your morning routine can make a big difference in your health and happiness.
FAQ
What are overnight oats?
Overnight oats are a simple breakfast. They involve soaking rolled oats in milk or another liquid overnight. This makes them soft and ready to eat in the morning.
What are the essential ingredients for making overnight oats?
To make overnight oats, you need rolled oats, milk, and a sweetener or flavoring. You can also add fruits, nuts, seeds, and spices to make it your own.
What are the health benefits of eating overnight oats?
Overnight oats are very nutritious. They are high in fiber, which is good for your digestive health and blood sugar. They also help you feel full longer, which can aid in weight management.
What is the best way to store overnight oats?
Store overnight oats in an airtight container, like a mason jar, in the fridge. This way, they can last up to 5 days.
What are some popular flavor combinations for overnight oats?
Popular flavors include vanilla and cinnamon, peanut butter and banana, and pumpkin spice. You can also mix fruits and nuts for different tastes.
How can I adapt overnight oats for special dietary needs?
For gluten-free oats, use gluten-free oats. For vegan options, use plant-based milks and avoid honey. For less sugar, try stevia or monk fruit.
What are some time-saving meal prep strategies with overnight oats?
Overnight oats are great for meal prep. You can make many jars at once. This way, you have a healthy breakfast ready for each day of the week.
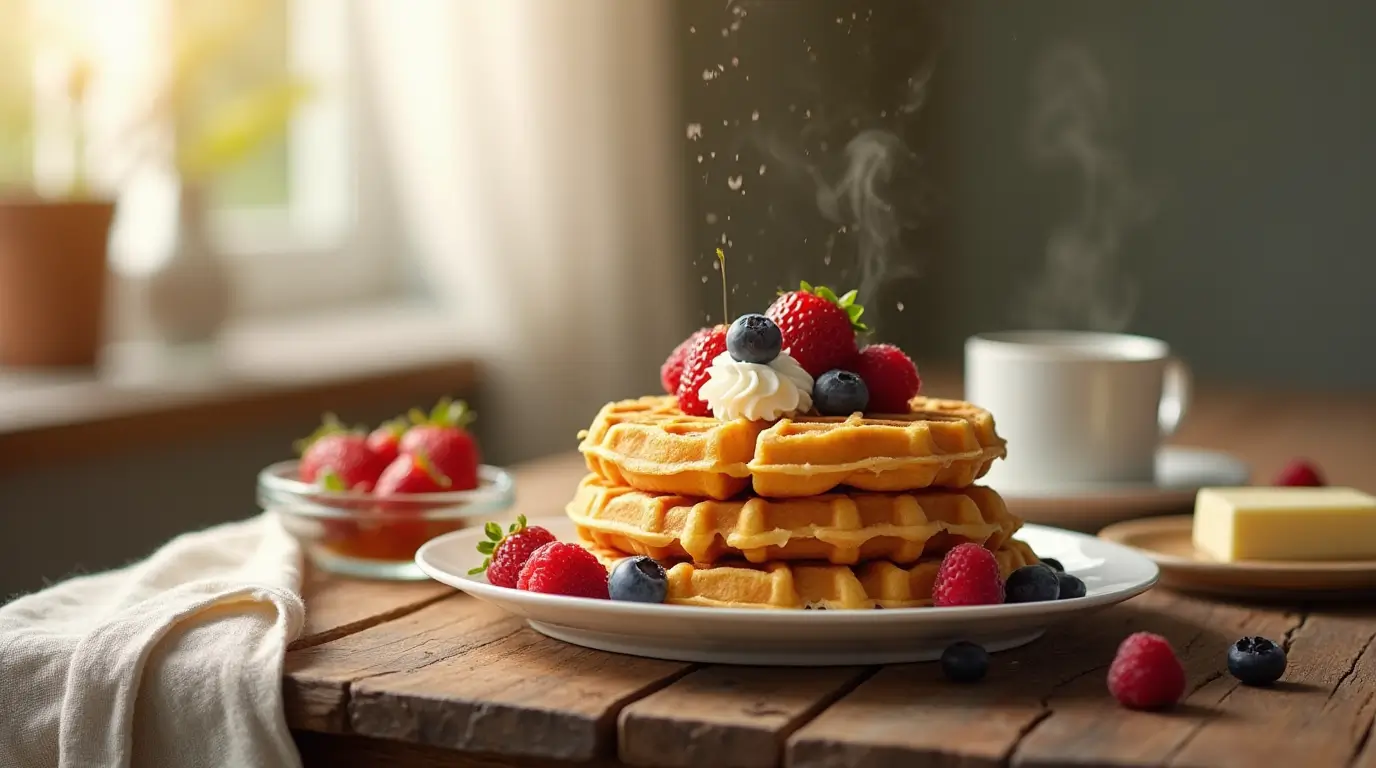
What makes a great waffle recipe? How can you make the fluffiest, most delicious homemade waffles in your kitchen? A good waffle recipe is key for a perfect breakfast. With the right ingredients and equipment, you can impress your family and friends with easy waffles.
Making homemade waffles has many benefits. You can customize the recipe to your taste. With the best waffle recipe, you can try different flavors and textures.
Key Takeaways
Using the right ingredients is key for a great waffle recipe
A good waffle iron makes a big difference in your homemade waffles
An easy waffle recipe can be tailored to your taste
Making homemade waffles is a fun and rewarding experience
The best waffle recipe lets you try many delicious flavors and textures
Don’t worry if your first batch of homemade waffles isn’t perfect
The History of Waffles: From Medieval Times to Modern Breakfast
Waffles have a long history, starting in medieval times. The idea of breakfast waffles we enjoy today is newer. But cooking batter between two hot irons has been around for ages. The first waffle irons were simple, made of iron, but later got more complex with fancy designs.
The change in waffle irons helped shape the waffle recipe. As irons became common, people tried new ingredients and cooking ways. This led to different waffles, like the Belgian and American styles. Homemade waffles became a family tradition, with recipes passed down through generations.
Origin of the Belgian Waffle
The Belgian waffle comes from Belgium and is known for its light texture. It’s made with yeast and cooked in a deep grid iron. Today, it’s a favorite breakfast dish worldwide, often topped with whipped cream, fruit, and syrup.
Evolution of Waffle Irons
Waffle irons have greatly evolved. Now, they’re made with non-stick materials and have cool features. You can find irons with adjustable heat, timers, and even built-in thermometers. These help cook waffles evenly and prevent sticking.
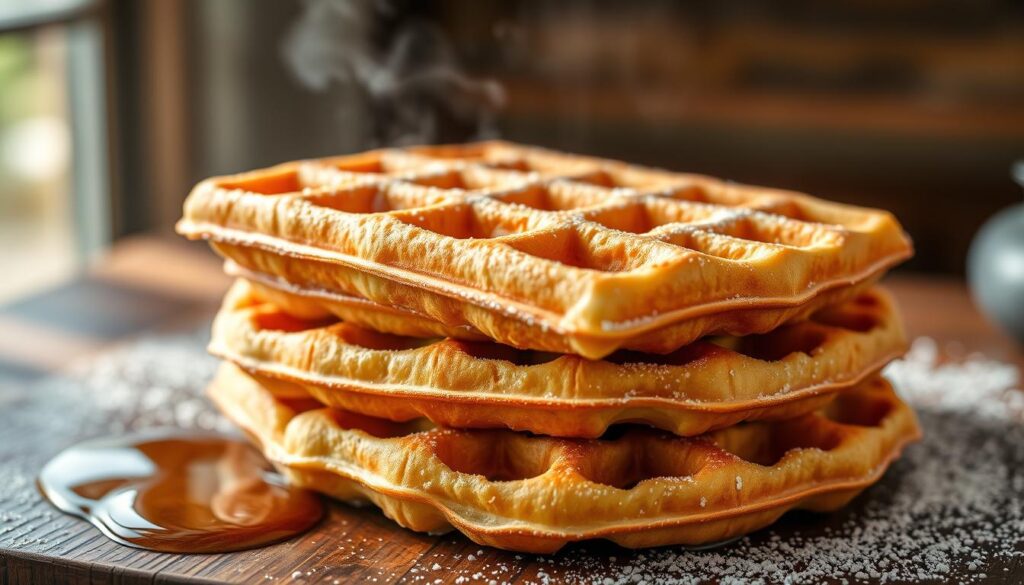
Essential Equipment for Perfect Waffles
To make perfect crispy waffles, you need the right tools. A good waffle iron is key. It helps you get the perfect golden-brown color and texture. Think about the waffle recipe you want and how brown you like them.
Here are some key factors to consider when selecting a waffle iron:
Non-stick surface for easy waffle release
Adjustable heat control for perfect browning
Durable construction for long-lasting use
You’ll also need a mixing bowl and a whisk for your easy waffle recipe. A digital thermometer helps make sure your waffle iron is at the right temperature.
With the right equipment, you’re on your way to making delicious, crispy waffles. They’ll impress your family and friends. Always follow the waffle iron’s instructions and clean it often to keep making perfect waffles.
Equipment
Description
Waffle Iron
Non-stick surface, adjustable heat control, durable construction
Mixing Bowl
Stainless steel or glass, easy to clean and mix
Whisk
Stainless steel or silicone, easy to mix and blend
Understanding Waffle Batter Ingredients
To make delicious homemade waffles, knowing the ingredients is key. A good recipe balances dry and wet ingredients. You can also add optional items for a unique taste.
The type of flour used affects your waffles’ texture. A mix of all-purpose flour and cornstarch makes them light and airy. Sugar and salt add flavor.
Dry Ingredients Guide
2 cups all-purpose flour
2 tablespoons cornstarch
1 tablespoon sugar
1/2 teaspoon salt
Wet Ingredients Selection
Wet ingredients like milk, eggs, and butter add moisture and richness. For a classic recipe, use 1 cup of milk, 2 large eggs, and 2 tablespoons of melted butter.
Optional Add-ins and Flavoring
For a unique flavor, try adding vanilla extract, cinnamon, or nuts. You can also use almond or soy milk for a non-dairy option.
The Classic Waffle Recipe You Need to Try
To make a delicious classic waffle recipe, you’ll need a few key ingredients. You’ll need all-purpose flour, sugar, baking powder, salt, milk, eggs, and melted butter. The secret to a best waffle recipe is balancing wet and dry ingredients perfectly.
A simple easy waffle recipe should be easy to follow and need little equipment. You’ll need a waffle iron, a large bowl, and a whisk. First, mix the dry ingredients. Then, add the wet ingredients and stir until the batter is slightly lumpy.
Here’s a basic classic waffle recipe to start with:
2 cups all-purpose flour
4 teaspoons sugar
2 teaspoons baking powder
1/4 teaspoon salt
2 large eggs
1 cup milk
4 tablespoons melted butter
Preheat your waffle iron and grease it with butter or cooking spray. Pour about 1/4 cup of batter onto the iron and spread it out. Cook for 3-5 minutes, until the waffles are golden and crispy.
With this easy waffle recipe, you’ll make delicious waffles quickly. Just remember to use the right ingredients and don’t overmix the batter. Happy cooking!
Ingredient
Quantity
All-purpose flour
2 cups
Sugar
4 teaspoons
Baking powder
2 teaspoons
Salt
1/4 teaspoon
Large eggs
2
Milk
1 cup
Melted butter
4 tablespoons
Mastering Waffle Batter Consistency
To make the perfect fluffy waffles, mastering the batter consistency is key. A classic waffle recipe needs a balance of ingredients for a light texture. Knowing the signs of perfect batter and avoiding mixing mistakes are important.
A smooth, thick batter without lumps is ideal. It should spread evenly on the waffle iron and turn golden brown. Using the right flour and adjusting the recipe is critical. For example, coarser flour might need more liquid.
Use a digital thermometer to ensure the waffle iron is at the right temperature.
Don’t overmix the batter, as this can lead to tough and dense waffles.
Let the batter rest for a few minutes to allow the flour to absorb the liquid ingredients.
By following these tips and using a classic waffle recipe, you’ll make delicious, fluffy waffles. They’ll impress your family and friends.
Ingredient
Quantity
Importance
Flour
2 cups
High
Sugar
1 cup
Medium
Eggs
2
High
Remember, practice makes perfect. Don’t get discouraged if your first batch doesn’t turn out right. Keep trying different ingredients and techniques until you find your perfect waffle recipe.
Step-by-Step Waffle Making Technique
To make delicious homemade waffles, follow this easy waffle recipe and technique. First, preheat your waffle iron as the manufacturer suggests. While it heats up, mix your waffle batter using a simple recipe.
When the iron is hot, pour about 1/4 cup of batter onto its center. This amount works for most standard waffle irons. Close the iron and cook for 3-5 minutes, until the waffle is golden and crispy.
Use the right amount of batter to avoid overflowing the iron.
Adjust the cooking time based on the thickness of your waffles and the heat of your iron.
Don’t open the iron too often, as this can cause the waffles to cook unevenly.
By following this easy waffle recipe and technique, you can create delicious homemade waffles. They’re perfect for breakfast, brunch, or dinner. Try different waffle recipes and toppings to find your favorite.
Waffle Recipe
Cooking Time
Temperature
Classic Waffle Recipe
3-5 minutes
375°F
Belgian Waffle Recipe
5-7 minutes
400°F
Achieving the Perfect Golden-Brown Color
To get the perfect golden-brown color on your crispy waffles, you need to control the waffle iron’s temperature. Also, time the cooking right. A good waffle recipe will give you guidelines. But, you must adjust these for your waffle iron and waffle type.
For an easy waffle recipe, here are some tips:
Preheat the waffle iron to the recommended temperature.
Use a small amount of oil to brush the waffle iron, ensuring the waffles don’t stick.
Cook the waffles for the recommended time, or until they’re golden brown and crispy.
By following these tips and using the right waffle recipe, you’ll get the perfect golden-brown color on your crispy waffles. Always adjust the recipe and cooking time for your waffle iron and waffle type.
Waffle Iron Temperature
Cooking Time
Result
Medium-high heat
3-5 minutes
Golden brown and crispy
Medium heat
5-7 minutes
Light brown and cooked through
Creative Waffle Variations and Toppings
Homemade waffles offer endless possibilities. With a basic recipe, you can make sweet and savory waffles. For breakfast, add fresh fruits like strawberries or blueberries to the batter.
Customize your waffle recipe for unique flavors. Sweet options include:
Whipped cream and chocolate chips
Caramelized bananas and honey
Powdered sugar and cinnamon
For savory waffles, add cheese, herbs, or spices. Try these combinations:
Bacon and cheddar cheese
Spinach and feta cheese
Jalapeno peppers and cheddar cheese
Be creative with your waffles. Whether you like sweet or savory, there’s a recipe for you. Experiment and find your favorite!
Topping
Description
Fresh Fruits
Add fresh fruits like strawberries or blueberries to the batter for added flavor and nutrition.
Whipped Cream and Chocolate Chips
A classic sweet combination that’s perfect for breakfast waffles.
Bacon and Cheddar Cheese
A savory combination that’s great for a breakfast or brunch dish.
Storage and Reheating Methods
To keep your crispy waffles fresh, store them in an airtight container. This keeps their texture and prevents sogginess. For reheating, use a toaster or oven to get that golden-brown look. For an easy waffle recipe, reheat in the toaster for a few minutes or in the oven at 350°F for 5-7 minutes.
Here are some tips for storing and reheating waffle recipe creations:
Store waffles in an airtight container to maintain freshness
Reheat waffles in a toaster or oven to achieve the perfect golden-brown color
Adjust reheating time based on the type of waffle and desired crispiness
Freezing is a great option for enjoying crispy waffles later. Place waffles in a freezer-safe bag or container. Store in the freezer for up to 2 months. When ready, toast or bake until crispy.
By following these tips, you can enjoy your favorite waffle recipe creations anytime. Whether it’s a classic easy waffle recipe or something new, these methods ensure perfect crispy waffles every time.
Storage Method
Reheating Method
Result
Airtight container
Toaster or oven
Fresh and crispy waffles
Freezer-safe bag or container
Toaster or oven
Crispy waffles after reheating
Troubleshooting Common Waffle Problems
Making breakfast waffles can sometimes go wrong. To get light and fluffy waffles, you need to solve these problems. A great waffle recipe is key, but even with the best ingredients, issues can arise.
Sticky waffles, texture problems, and uneven cooking are common issues. Knowing the causes and how to prevent them is important. For example, the right waffle iron and heat can prevent sticky waffles. Also, the batter’s consistency is key for texture.
Fixing Sticky Waffles
Check the waffle iron’s heat and adjust as needed
Use a non-stick waffle iron or spray with cooking spray
Don’t overmix the waffle batter
Addressing Texture Issues
For perfect waffle texture, use the right ingredients and a good recipe. Fresh eggs and milk are essential. Avoid overmixing the batter. These tips will help you make tasty homemade waffles.
Common Issue
Cause
Solution
Sticky waffles
Incorrect heat or batter consistency
Adjust heat and batter consistency
Texture issues
Overmixing or incorrect ingredients
Use fresh ingredients and avoid overmixing
By solving common waffle problems and using a good recipe, you can make delicious breakfast waffles. Always use fresh ingredients and follow the right techniques. This way, your homemade waffles will be light and fluffy.
Expert Tips for Restaurant-Quality Waffles
To make waffles like restaurants, you need the best recipe and tools. A classic recipe includes flour, sugar, and eggs. But, the secret to a great waffle is in how you make it. Temperature control is key for the right texture and crispiness.
Here are some tips for making restaurant-quality waffles:
Use a high-quality waffle iron that can achieve the right temperature.
Experiment with different types of flour, such as whole wheat or oat flour, to create a unique flavor.
Don’t overmix the batter, as this can result in a dense waffle.
A great waffle recipe is essential for a top-notch waffle. By following these tips and using the best ingredients, you can make a waffle that’s as good as those in restaurants. Whether you’re making a classic waffle or trying something new, the most important thing is to have fun and try different flavors and techniques.
With practice and patience, you can become a waffle expert. You’ll make delicious, restaurant-quality waffles that will wow your friends and family. So, go ahead and try it out. Don’t be afraid to experiment with new ingredients and techniques to create your own unique waffle recipe.
Waffle Recipe
Ingredients
Instructions
Classic Waffle
Flour, sugar, eggs, milk
Mix ingredients, cook in waffle iron
Belgian Waffle
Flour, sugar, eggs, yeast
Mix ingredients, let rise, cook in waffle iron
Conclusion: Making Waffle Magic at Home
Making delicious homemade waffles is an art form. It’s something anyone can learn, whether you’re a pro in the kitchen or just starting out. This guide has given you the tools to make waffle recipe perfection right in your kitchen.
Success with easy waffle recipe comes from knowing the science behind the batter. It also means trying out different ingredients and getting better at making waffles. With a bit of patience and practice, you’ll be making fluffy, golden waffles that everyone will love.
Let your creativity run wild and make waffle magic at home. Enjoy making your waffles your own with your favorite toppings and flavors. Share your creations online and inspire others to try making waffles too. The world of waffles is full of possibilities, and you’re ready to explore them.
FAQ
What makes the best waffle recipe?
The best waffle recipe makes waffles that are fluffy inside and crispy outside. It needs the right mix of dry and wet ingredients. Also, using the right technique and tools is key.
How do I choose the right waffle iron?
Look at the size, shape, and temperature control of the waffle iron. A nonstick surface makes cleaning up easier.
What are the key ingredients in a classic waffle recipe?
Classic waffles need flour, sugar, baking powder, salt, eggs, milk, and melted butter or oil. The right mix of these ingredients is important for the perfect waffle.
How do I achieve the perfect waffle batter consistency?
To get the right batter, don’t overmix. Use ingredients at the right temperature. Adjust the wet and dry ingredients as needed. The batter should be thick but pourable.
What’s the best way to store and reheat leftover waffles?
Cool leftover waffles completely. Then, store them in an airtight container or plastic bag. Reheat them in a toaster or oven to keep them crispy.
How can I customize my waffles with different toppings and flavors?
You can top waffles with fruit, whipped cream, chocolate chips, or even chicken and syrup. Try different spices and extracts for unique flavors.
What are some common waffle problems and how can I fix them?
Waffles can stick, be soggy, or not brown evenly. Fix these by adjusting the batter, cooking temperature, and technique.
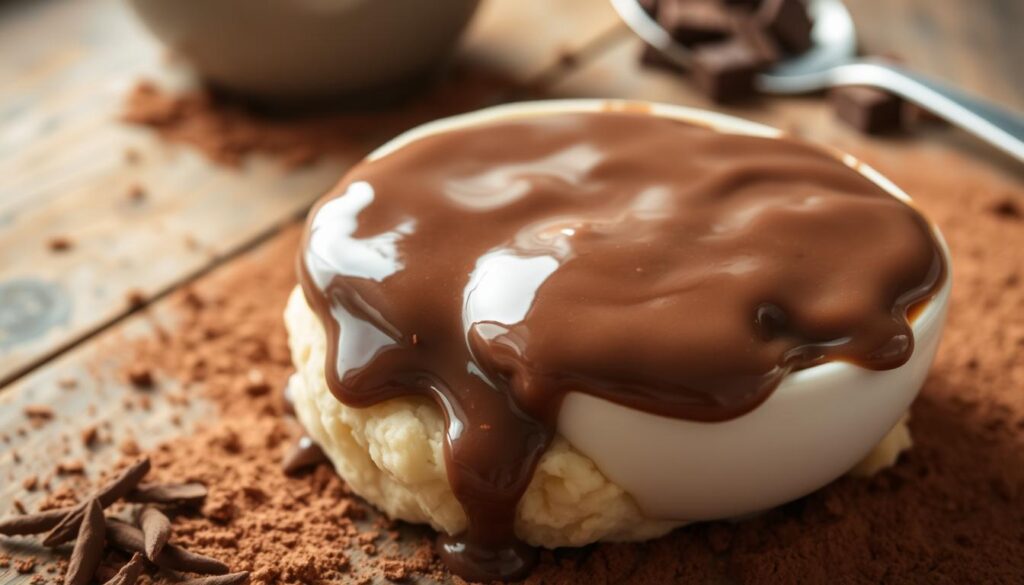
What makes a chocolate gravy recipe unforgettable? Is it the rich, velvety texture or the deep flavor that goes well with breakfast treats? For many, the perfect chocolate gravy recipe is a key part of Southern cuisine. It makes biscuits, pancakes, and more even better. In this article, we’ll explore what makes homemade chocolate gravy special.
Table of Contents
We’ll cover everything from essential ingredients to kitchen tools. Whether you’re a pro in the kitchen or just starting out, our guide is here to help. Our easy chocolate gravy recipe is all about simplicity and flavor. It’s sure to become a hit in your home. So, what makes a delicious chocolate gravy recipe stand out?
Key Takeaways
Understanding the basics of a chocolate gravy recipe is crucial for achieving the perfect flavor and texture
Homemade chocolate gravy can be made with just a few simple ingredients
An easy chocolate gravy recipe is perfect for breakfast or brunch
The right kitchen tools and equipment can make all the difference in creating a smooth and creamy gravy
Experimenting with different flavors and ingredients can help you create a unique chocolate gravy recipe
A delicious chocolate gravy recipe is a great way to add some excitement to your morning routine
What is Chocolate Gravy?
Chocolate gravy is a sweet, rich condiment loved in the United States, especially in the south. It’s made with chocolate, milk, and flour, giving it a smooth, creamy feel. It’s great over biscuits, pancakes, or waffles, making breakfast or brunch even better.
The idea of southern chocolate gravy started in the early 1900s. It was a way to use leftover chocolate, which was rare and expensive back then. Now, chocolate milk gravy is a key part of southern cooking, with families sharing their secret recipes for years.
In recent years, best chocolate gravy has become popular all over the United States. Restaurants and cafes now offer their own versions. Whether you want a classic chocolate milk gravy or something new, it’s a hit with foodies and chocolate fans.
Here are some ways to enjoy chocolate gravy:
Serving it over biscuits or pancakes
Using it as a topping for waffles or ice cream
Mixing it with other ingredients to create a unique dessert sauce
In summary, chocolate gravy is a tasty, versatile condiment that’s perfect for satisfying sweet cravings. Whether you’re a fan of southern chocolate gravy or just want to try something new, it’s definitely worth trying.
Essential Ingredients for the Perfect Chocolate Gravy
To make a tasty cocoa gravy recipe, you need a few key ingredients. High-quality cocoa powder is crucial for its rich, chocolatey taste. You’ll also need milk, flour, and sugar to get the right flavor and consistency.
For the best traditional chocolate gravy recipe, use top-notch chocolate. Dark or semi-sweet chocolate adds a deep, creamy flavor. A pinch of salt and a dash of vanilla extract can also boost the taste, adding depth to your cocoa gravy recipe.
Here are the essential ingredients you’ll need:
1 cup high-quality cocoa powder
2 cups milk
2 tablespoons flour
1 tablespoon sugar
1/4 teaspoon salt
1/2 teaspoon vanilla extract
2 ounces high-quality chocolate (dark or semi-sweet)
By using these ingredients and following a simple classic chocolate gravy recipe, you can make a delicious, rich chocolate gravy. It’s perfect for biscuits, pancakes, or waffles. Choose the best ingredients for your traditional chocolate gravy recipe to get the best flavor and texture.
Ingredient
Quantity
Cocoa powder
1 cup
Milk
2 cups
Flour
2 tablespoons
Sugar
1 tablespoon
Salt
1/4 teaspoon
Vanilla extract
1/2 teaspoon
High-quality chocolate
2 ounces
Kitchen Tools and Equipment Needed
To make delicious homemade chocolate gravy, you’ll need some basic kitchen tools. The right tools can greatly improve the quality of your easy chocolate gravy.
A medium saucepan is key for heating the mixture. A whisk is needed for smooth blending. And, a measuring cup is essential for accurate ingredient amounts.
Basic Requirements
Medium saucepan
Whisk
Measuring cup
Optional Tools for Better Results
Optional tools can help you get even better results. A thermometer is great for precise temperature control. And, a blender can make your gravy extra smooth.
Investing in these tools will help you make a rich and delicious easy chocolate gravy. It will take your breakfast or dessert dishes to the next level.
Tool
Purpose
Medium saucepan
Heating the mixture
Whisk
Smooth blending
Measuring cup
Accurate ingredient proportions
Classic Chocolate Gravy Recipe Step by Step
To make a tasty southern chocolate gravy, start by melting 1 cup of chocolate in a saucepan over low heat. Then, whisk in 2 tablespoons of flour to make a smooth paste. Next, add 1 cup of milk slowly, whisking all the time to avoid lumps.
Don’t forget to add 1 tablespoon of sugar. Keep whisking until the mix thickens up nicely.
Here’s a step-by-step guide to making the perfect chocolate gravy recipe:
Add the sugar and continue whisking until the mixture thickens
While cooking the chocolate gravy recipe, stir constantly to avoid burning. If you want it thicker, add a bit more flour or cook it longer. For a thinner gravy, add a bit more milk.
Once the southern chocolate gravy is just right, take it off the heat. Let it cool a bit. Serve it over biscuits, pancakes, or waffles for a sweet treat. This classic chocolate gravy recipe makes a rich, creamy sauce perfect for any time.
Ingredient
Quantity
Chocolate
1 cup
Flour
2 tablespoons
Milk
1 cup
Sugar
1 tablespoon
Tips for Achieving the Perfect Consistency
To make the best chocolate gravy, getting the right consistency is key. It might take some effort, but with the right tips, you can achieve a smooth, creamy gravy. This is great for biscuits or pancakes.
One common issue is the gravy being too thick or too thin. To fix this, whisk constantly while it cooks. This ensures the chocolate and milk mix well. Adjusting the heat helps prevent the gravy from boiling over or sticking to the pan.
Common Texture Problems
Texture issues like lumps, separation, or being too thick can happen. To solve these, whisk the gravy harder or add a bit more milk to thin it.
Troubleshooting Solutions
Don’t worry about texture problems in your chocolate gravy. For a thick gravy, add more milk or cream. If it’s too thin, cook it a bit longer to thicken it.
Expert Techniques
For an even better chocolate gravy, try tempering the chocolate or using top-notch cocoa powder. You can also add a pinch of salt or a teaspoon of vanilla extract for extra flavor.
By using these tips, you can make a delicious, creamy chocolate gravy. It’s perfect for biscuits, pancakes, or even ice cream. With practice, you’ll soon be a pro at making chocolate milk gravy.
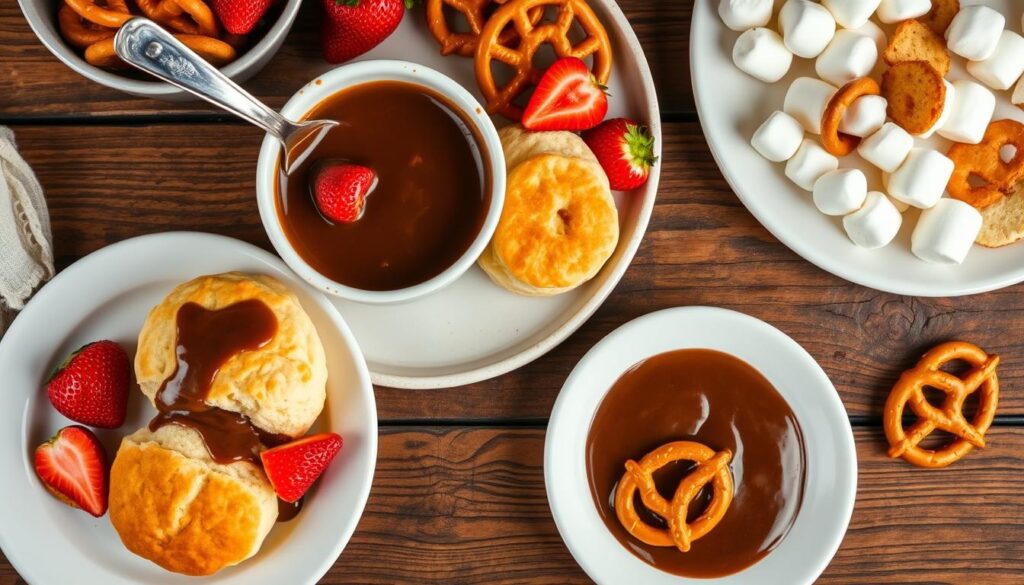
Best Pairings and Serving Suggestions
There are many ways to serve classic chocolate gravy. It’s great over breakfast treats or desserts. Try it over biscuits, pancakes, or waffles for a traditional breakfast.
Here are some ideas for using classic chocolate gravy:
Serve over biscuits, pancakes, or waffles for a delicious breakfast treat
Use as a topping for ice cream or yogurt for a sweet dessert
Pair with fresh fruit, such as strawberries or bananas, for a lighter option
Try using traditional chocolate gravy recipe as a dip for nuts or pretzels
Classic chocolate gravy is always a winner. Its rich, chocolatey taste makes any meal better. So, get creative and find your favorite way to enjoy traditional chocolate gravy recipe!
Variations of Traditional Chocolate Gravy
Want to try something new? There are many ways to change up traditional chocolate gravy. These tweaks can make the classic recipe your own, fitting your taste and dietary needs. Making homemade chocolate gravy is simple, and a few tweaks can lead to exciting flavors.
For a deeper taste, try a dark chocolate version. Use dark cocoa powder or dark chocolate chips. It’s great for those who love a bold chocolate flavor in their easy chocolate gravy. If you’re looking for something dairy-free, use almond or soy milk. This makes the gravy perfect for those with dietary restrictions.
Dark Chocolate Version: uses dark cocoa powder or dark chocolate chips
Dairy-Free Alternatives: uses non-dairy milk such as almond or soy milk
Spiced Chocolate Gravy: adds a pinch of cinnamon or cayenne pepper to give the gravy a spicy kick
These changes can turn chocolate gravy into a variety of desserts. Enjoy it over pancakes or waffles, or as a topping for ice cream or fruit.
Variation
Ingredients
Taste
Dark Chocolate Version
Dark cocoa powder or dark chocolate chips
Deeper, richer flavor
Dairy-Free Alternatives
Non-dairy milk such as almond or soy milk
Suitable for those with dietary restrictions
Spiced Chocolate Gravy
Pinch of cinnamon or cayenne pepper
Spicy kick
Storage and Reheating Guidelines
After making your tasty chocolate gravy, it’s key to store it right. This keeps it fresh and flavorful. Use airtight containers in the fridge or freezer to store your southern chocolate gravy.
Proper Storage Methods
For up to 3 days, keep your chocolate gravy in the fridge. Use a clean, airtight container to avoid contamination. For longer storage, freeze it for up to 2 months. Use a freezer-safe container to prevent ice and separation.
Reheating Instructions
To reheat, use the stovetop or microwave. On the stovetop, heat it over low, whisking constantly. In the microwave, heat in 10-second bursts, stirring between each. Always reheat to 165°F (74°C) for safety.
By following these tips, your homemade chocolate gravy will last longer. Enjoy it with breakfast, brunch, or as a dessert topping. It will stay fresh and delicious.
Storage Method
Storage Time
Reheating Method
Refrigerator
Up to 3 days
Stovetop or Microwave
Freezer
Up to 2 months
Stovetop or Microwave
Common Mistakes to Avoid
When making the best chocolate gravy, it’s key to know common mistakes. Overcooking the gravy can make it thick and unappetizing. To avoid this, constant stirring is crucial, especially with chocolate milk gravy. Also, using low-quality ingredients can ruin the flavor and quality of the gravy.
To avoid these mistakes, pay close attention and practice. Here are some tips for perfect chocolate gravy:
Use high-quality cocoa powder or chocolate for the best flavor
Whisk the gravy constantly to prevent lumps and overcooking
Don’t overheat the gravy, as this can cause it to break or become too thick
By following these tips and being careful, you can make a delicious, creamy chocolate gravy. It’s great over biscuits or pancakes. Whether you stick to a traditional recipe or try a chocolate milk gravy, success comes from paying attention and practicing.
“The secret to making the best chocolate gravy is to use high-quality ingredients and to whisk constantly. With a little practice, you’ll be making delicious, creamy gravy like a pro!”
Mistake
Solution
Overcooking the gravy
Constant stirring and monitoring the heat
Using low-quality ingredients
Choosing high-quality cocoa powder or chocolate
Not whisking the gravy enough
Whisking constantly to prevent lumps and overcooking
Health Considerations and Dietary Adaptations
Enjoying classic chocolate gravy needs careful thought about nutrition and diet. Traditional recipes can be high in calories and fat. This is a problem for those with certain dietary needs. To make a healthier version, knowing the nutritional content and making changes is key.
The nutritional facts of chocolate gravy depend on the recipe. A typical serving has 100 to 200 calories, with lots of fat and sugar. For a healthier option, try using dark chocolate or dairy-free milk. These can lower calories and fat.
Nutritional Information
A typical serving of classic chocolate gravy contains:
Calories: 150-200 per serving
Fat: 10-15g per serving
Sugar: 20-25g per serving
Dietary Modifications
To make a healthier version of chocolate gravy, consider these changes:
Use dark chocolate with at least 70% cocoa content
Replace traditional milk with dairy-free alternatives, such as almond or soy milk
Reduce the amount of sugar used in the recipe
Understanding nutrition and making dietary changes can help enjoy healthier chocolate gravy. Whether sticking to a traditional recipe or making adjustments, knowing the nutritional facts is crucial. This way, you can make informed choices about your diet.
Ingredient
Traditional Amount
Healthier Alternative
Chocolate
1 cup milk chocolate
1/2 cup dark chocolate
Milk
1 cup whole milk
1 cup dairy-free milk
Sugar
2 tablespoons
1 tablespoon
The History Behind Southern Chocolate Gravy
Southern chocolate gravy has a rich history that spans over a century. It started in the early 20th century and is now a staple in southern cuisine. To make homemade chocolate gravy, you need to know its cultural significance and how it evolved.
The history of southern chocolate gravy is tied to the traditional cuisine of the southern United States. It’s often served with breakfast foods like biscuits, pancakes, and waffles. Making easy chocolate gravy is simple, needing just a few ingredients: cocoa powder, sugar, and milk.
Here are some key facts about southern chocolate gravy:
It originated in the southern United States in the early 20th century.
It is often served with breakfast foods such as biscuits and pancakes.
The traditional recipe includes cocoa powder, sugar, and milk.
To truly appreciate southern chocolate gravy, you must understand its history and evolution. By making homemade chocolate gravy and serving it with traditional southern breakfast foods, you can enjoy its rich flavors and traditions. Whether for a special occasion or a weekday breakfast, this treat is sure to delight.
Ingredient
Quantity
Cocoa powder
2 tablespoons
Sugar
1 tablespoon
Milk
1 cup
Conclusion: Mastering Your Chocolate Gravy Recipe
Making the perfect chocolate gravy recipe is an art. It needs quality ingredients, the right technique, and patience. This article has given you the knowledge to make a delicious southern chocolate gravy that will wow your guests.
Whether you’re experienced or new to cooking, you can make the best chocolate gravy. Dive into the world of this beloved southern treat. Try new things and let your creativity shine. With each try, you’ll get better and better at making chocolate gravy.
Keep enjoying the cooking journey, celebrate your wins, and learn from mistakes. The fun of cooking is in the making, not just the end result. Enjoy the process, and you’ll become a true chocolate gravy expert.
FAQ
What is chocolate gravy?
Chocolate gravy is a tasty gravy from the southern United States. It’s made with chocolate, milk, and flour. It’s great over biscuits, pancakes, or waffles.
What are the origins and history of chocolate gravy?
The exact start of chocolate gravy is a mystery. But, it’s thought to have started as a way to use leftover chocolate. Now, it’s a key part of southern meals, enjoyed at breakfast or brunch.
What are the essential ingredients for making chocolate gravy?
To make chocolate gravy, you need good cocoa powder, milk, flour, and sugar. A bit of salt and vanilla can also enhance the taste.
What kitchen tools and equipment are needed to make chocolate gravy?
You’ll need a medium saucepan, a whisk, and a measuring cup for chocolate gravy. Optional tools like a double boiler or blender can help too.
How do you make the classic chocolate gravy recipe step-by-step?
Start by melting the chocolate. Then, whisk in flour and add milk and sugar slowly. Cooking it right is key for the perfect texture.
How do you achieve the perfect consistency for chocolate gravy?
Getting the right consistency is important. You can fix common issues by whisking well and cooking it to the right temperature.
What are the best pairings and serving suggestions for chocolate gravy?
Chocolate gravy goes well with biscuits, pancakes, waffles, and even ice cream or yogurt. It also pairs nicely with fruit and nuts.
What are some variations of traditional chocolate gravy?
You can try dark chocolate, dairy-free, or spiced chocolate gravy. These options let you tailor the flavor to your liking.
How do you properly store and reheat chocolate gravy?
Keep chocolate gravy refrigerated or frozen to store it. Reheat it on the stovetop or in the microwave carefully to keep it smooth and flavorful.
What are some common mistakes to avoid when making chocolate gravy?
Avoid overcooking, using bad ingredients, and not whisking enough. These mistakes can ruin your gravy. Follow these tips for success.
What are the health considerations and dietary adaptations for chocolate gravy?
Chocolate gravy is tasty but not always healthy. Knowing the nutritional facts and making healthy swaps can help you enjoy it guilt-free.
What is the history behind southern chocolate gravy?
Southern chocolate gravy has a rich history from the early 20th century. It’s a beloved part of southern cuisine, passed down through generations.
Nourishing Breakfast, What makes a great athlete? Is it the hard training or a smart nutrition plan? A good breakfast is key for athletes, giving them the energy to excel in training and competitions. Healthy breakfasts are vital for athletes to boost their performance. The right mix of sports nutrition helps athletes reach their goals.
Table of Contents
Athletes need a diet full of nutrients to meet their physical needs. A great breakfast can significantly improve an athlete’s performance. By adding healthy breakfasts to their diet, athletes can enhance their nutrition and sports plans. But what makes a breakfast perfect for athletes, and how does it affect their training and competitions?
Key Takeaways
Healthy breakfast recipes for athletes are essential for optimal performance
Athletic nutrition plans should include a balance of nutrients
Sports nutrition plays a critical role in an athlete’s training and competition
A well-planned breakfast can provide the necessary energy for athletes
Incorporating healthy recipes into an athlete’s diet can improve overall performance
Athletes should focus on nutrient-dense foods to support their physical demands
Why Athletes Need a Power-Packed Breakfast
A nutritious breakfast is key for athletes to start their day right. Knowing sports nutrition science helps them make better food choices. These choices boost their performance and help them recover faster.
The Science Behind Athletic Nutrition
While we sleep, our bodies fix and heal. Eating a balanced breakfast fills up our energy tanks. It also gives us the fuel we need for our training.
Key Nutrients for Morning Energy
Complex Carbohydrates: Give us energy that lasts.
Lean Proteins: Help fix and grow our muscles.
Healthy Fats: Help make hormones and store energy.
Impact on Training Performance
Benefit
Description
Improved Endurance
Steady energy levels help us last longer in workouts.
Increased Strength
Good nutrition helps our muscles work better and stronger.
Enhanced Mental Focus
Healthy meals improve our focus and decision-making.
Nourishing Breakfast Recipes for Athletes
A balanced breakfast is key for athletes to start their day right. It gives them the energy and nutrients they need. Here are some healthy options to boost your athletic performance.
Quick High-Protein Options
Egg White Frittatas: Full of protein and low in fat, great for muscle repair.
Greek Yogurt Parfaits: With fruits and nuts, they offer protein and healthy fats.
Protein Pancakes: Made with protein powder and oats, they give a filling start.
Complex Carbohydrate-Rich Meals
Overnight Oats: Easy to make and full of fiber for lasting energy.
Whole Grain Toast with Nut Butter and Banana: Offers complex carbs, healthy fats, and potassium.
Quinoa Breakfast Bowls: A versatile base with protein and essential minerals.
Smoothie Bowl Variations
Berry Blast Bowl: Mixed berries, spinach, and protein powder for a refreshing start.
Tropical Green Bowl: Mango, pineapple, kale, and Greek yogurt for a nutrient-dense option.
Chocolate Peanut Butter Bowl: Cocoa, banana, peanut butter, and almond milk for a tasty treat.
Adding these high-protein breakfast recipes, complex carb breakfast ideas, and athlete smoothie bowls to your morning can boost your energy. It also supports your training effectively.
Timing Your Pre-Workout Breakfast
Getting your pre-workout meal timing right is key for top performance. A balanced breakfast before exercise gives your body the energy it needs to do its best.
Eat a big meal 2-3 hours before you start training for lasting energy.
Go for smaller, easy-to-digest snacks 30 minutes to an hour before.
Choose foods high in complex carbs and moderate protein.
Knowing how digestion and athletic performance work helps plan your meals. The right pre-workout meal timing lets your body use nutrients well during exercise.
Meal Size
Timing Before Exercise
Recommended Foods
Large Meal
2-3 Hours
Oatmeal with fruits, eggs with whole-grain toast
Small Snack
30-60 Minutes
Banana, yogurt, a handful of nuts
Post-Training Recovery Breakfast Ideas
After a tough workout, your body needs post-workout recovery meals to fix and grow muscle. Eating the right foods helps your body recover faster and get ready for the next workout.
Protein-Rich Recovery Meals
Protein is key in your recovery breakfast. Try salmon and avocado toast for a tasty and healthy choice. A tofu scramble with veggies is a great plant-based option. A high-protein smoothie is quick and filling.
Nutrient Replenishment Strategies
Replenishing nutrients after exercise means balancing electrolytes, restoring glycogen, and getting enough micronutrients. Eat foods high in potassium, magnesium, and calcium to help muscles and recovery.
Quick-Fix Options Under 15 Minutes
For those with tight schedules, quick athlete breakfasts are perfect. Grab-and-go overnight oats and protein bars are great. Quick smoothie recipes make a nutritious meal in minutes.
Meal
Protein (g)
Carbohydrates (g)
Preparation Time
Salmon and Avocado Toast
25
30
10 mins
Tofu Scramble
20
15
15 mins
High-Protein Smoothie
30
40
5 mins
Overnight Oats
10
50
5 mins (prep the night before)
Protein Bar
15
25
Instant
Meal Prep Strategies for Athletic Success
Effective meal planning for athletes is key to staying energized and performing well. Set aside a day each week for planning your breakfast. This saves time and ensures you have healthy meals ready to start your day.
Try batch cooking breakfast by making big batches of important ingredients. Cook oatmeal, hard-boiled eggs, or sautéed veggies in advance. These can be mixed and matched to create different meals all week. It keeps your diet exciting and balanced.
Plan a diverse menu to avoid monotony.
Store meals in airtight containers to maintain freshness.
Incorporate different flavors and textures for variety.
Use time-saving meal prep to tackle busy mornings or travel days. Make quick meals like smoothie packs, overnight oats, or protein bars. These are perfect for when you’re in a rush but still want a healthy breakfast.
By using these meal prep tips, athletes can keep up a healthy breakfast habit. This boosts their performance and overall health.
Conclusion: Fueling Your Athletic Journey with Proper Nutrition
A well-planned breakfast is key for athletes. It boosts performance and health.
Starting with balanced nutrition gives your body the fuel it needs. High-protein foods, complex carbs, and vitamins keep energy up during workouts.
Meal prepping makes mornings easier. It helps you stay on track with healthy meals. This is vital for long-term success in sports.
Recovery is as important as training. A post-workout breakfast with protein and nutrients helps heal faster. Quick, healthy choices are best for refueling.
Focus on a nutritious breakfast to improve your sports performance and recovery. Try different recipes and strategies to find what suits you best.
See breakfast as a crucial part of your training. Good nutrition is a powerful ally for reaching your athletic goals and living a healthy, active life.
FAQ
Why is a healthy breakfast important for athletes?
A healthy breakfast gives athletes the nutrients and energy they need. It helps with muscle recovery and boosts endurance. It also improves focus during training and competitions.
What are some high-protein breakfast options for athletes?
High-protein breakfasts include egg white frittatas and Greek yogurt parfaits. Protein pancakes and tofu scrambles are also good. These meals help repair and grow muscles, giving athletes the energy they need for tough workouts.
How should athletes time their pre-workout breakfast?
Athletes should eat a big meal with carbs and proteins 2-3 hours before working out. For a quick meal, a small, easy-to-digest option can be eaten 30 minutes to an hour before.
What key nutrients should be included in an athlete’s breakfast?
Breakfasts for athletes should have complex carbs for energy, lean proteins for muscle repair, and healthy fats for health. Vitamins and minerals are also important for the body’s functions needed for performance.
What are some meal prep strategies for maintaining a nutritious breakfast routine?
Meal prep strategies include making breakfasts like overnight oats or quinoa bowls in advance. Preparing ingredients ahead of time and storing meals properly helps. Planning breakfasts for the week saves time and keeps the routine consistent.
Can you suggest quick post-training recovery breakfast ideas?
Quick recovery breakfasts include salmon and avocado toast, high-protein smoothies, and overnight oats. These meals provide the proteins and carbs needed to replenish muscle glycogen and aid in recovery.
How does meal timing affect athletic performance?
Proper meal timing gives athletes the energy they need for training and helps with recovery. Eating the right foods at the right time can boost endurance, strength, and mental focus during workouts and competitions.
Are you tired of the same old boring breakfast routine? Imagine waking up to the aroma of freshly baked pastries, fluffy pancakes, or decadent French toast. These easy sweet breakfast recipes make it all possible. Whether you’re in a hurry or have more time, we’ve got you covered with quick, homemade sweet treats to start your day off right.
Learn time-saving tips and essential ingredients to streamline your breakfast preparation
Explore delicious and creative variations on classic French toast, pancakes, and more
Find healthy and indulgent sweet breakfast options to suit your taste preferences
Get inspiration for special occasion and make-ahead sweet breakfast dishes
Starting your day with a nourishing and satisfying meal is key. But breakfast can be both healthy and delicious. In this article, we’ll show you a treasure trove of easy sweet breakfast recipes. They’ll have you jumping out of bed, ready to enjoy the flavors of the day.
So, what’s the secret to a truly remarkable sweet breakfast? Are there quick and hassle-free ways to enjoy homemade morning treats without spending hours in the kitchen? Dive in and discover the answers to these questions and more. We’ll explore a variety of easy sweet breakfast options that will delight your taste buds and energize your day.
Sweet Breakfast Recipes That Take Less Than 20 Minutes
Mornings can be busy, but you don’t have to give up tasty breakfasts. Find quick and easy recipes that are ready in under 20 minutes. This way, you can start your day with a delicious meal without stress.
Quick Assembly Tips for Busy Mornings
Choose no-bake or one-bowl recipes to save time and dishes.
Use blenders, toasters, and microwaves to cook faster.
Prepare parts ahead, like slicing fruits or mixing dry ingredients, to speed up your morning.
Essential Ingredients to Keep on Hand
Keep these staples in your pantry and fridge for quick sweet breakfasts:
Pantry Items
Refrigerator/Freezer Items
Oats, granola, whole-grain cereal
Greek yogurt, milk, eggs
Nut butters, honey, maple syrup
Fresh or frozen fruit, shredded cheese
Cinnamon, vanilla extract, cocoa powder
Butter, cream cheese
Time-Saving Preparation Methods
Make smoothies or yogurt parfaits ahead and keep them in the fridge for a quick breakfast.
Batch-cook oatmeal or overnight oats to reheat and customize all week.
Prepare streusel toppings, pancake batter, or French toast mix early and store for fast morning prep.
With these tips, ingredients, and methods, you can enjoy tasty sweet breakfasts even on the busiest mornings.
Decadent French Toast Variations for Every Taste
Take your breakfast to the next level with our French toast recipes. From classic to gourmet, we have a wide range of sweet bread dishes. They are sure to excite your taste buds.
Begin with a classic – traditional French toast. It’s made with thick-cut brioche or challah bread, dipped in a custard-like egg mix, and grilled until golden. Add warm maple syrup and powdered sugar for a comforting start.
For something more indulgent, try our French toast casserole. It layers bread, custard, cinnamon, and fruit, then bakes until puffed. Top it with whipped cream and chopped nuts for a delightful treat.
Looking for something new? Check out our gourmet French toast ideas. Try brioche with bourbon-infused maple syrup or a savory version with bacon and hollandaise sauce. These recipes turn French toast into a luxurious breakfast.
Our collection of French toast recipes caters to all tastes. Whether you like classic or modern, our sweet bread dishes will make your breakfast gourmet. Start your day with a delicious treat.
Homemade Pancakes with Sweet Toppings
Start your day with a stack of fluffy, homemade pancakes. Learn how to make a classic buttermilk pancake base. Then, find out about sweet toppings to make your breakfast special. Also, discover make-ahead pancake mix options for busy mornings.
Classic Buttermilk Pancake Base
Making perfect pancakes is simpler than you think. Start with a classic buttermilk batter. Mix flour, baking powder, baking soda, sugar, and salt. Add buttermilk, eggs, and melted butter or oil until smooth.
Let the batter rest for a few minutes. This step helps the pancakes turn out great.
Save time with a homemade pancake mix. Mix dry ingredients like flour, baking powder, and sugar in a container. Store it in an airtight container.
When ready to cook, mix the dry ingredients with wet ones like buttermilk and eggs. This way, you can have fresh pancakes any day.
Irresistible Breakfast Pastries and Muffins
Start your day with sweet homemade pastries and muffins. Enjoy flaky croissants or fruity muffins. This section has tasty recipes for sweet breakfast treats.
Try homemade pastries for a special morning. Make flaky croissants or buttery danishes with your favorite fillings. Or, make quick and fluffy breakfast muffins with fresh fruit or spices.
Find something for every taste in this section. Try different sweet baked goods that are easy to make ahead. Enjoy these treats and start your day with a smile.
Healthy Sweet Breakfast Bowls and Parfaits
Start your day with a nutritious breakfast bowl or parfait. These meals mix fresh fruits, creamy yogurt, and crunchy granola. They’re a tasty and energizing way to begin your day.
Yogurt and Granola Combinations
Yogurt parfaits are a great choice for a healthy breakfast. Mix your favorite yogurt with granola and fresh berries or fruit. Try different yogurt flavors to find your favorite.
Fresh Fruit Selection Guide
Berries: Blueberries, raspberries, blackberries, and strawberries add a burst of sweetness and antioxidants.
Tropical Fruits: Mango, pineapple, and kiwi lend a tropical twist to your breakfast bowls.
Stone Fruits: Peaches, nectarines, and apricots offer a delightful seasonal flavor.
Citrus: Oranges, grapefruit, and clementines provide a refreshing tartness.
Nutritious Sweet Toppings
Add wholesome sweet toppings to your breakfast bowls and parfaits. Try honey, maple syrup, or nut butter for flavor and nutrients. Add slivered almonds, toasted coconut flakes, or cinnamon for crunch.
Topping
Nutritional Benefits
Honey
Natural sweetener with antioxidants and antimicrobial properties
Almond Butter
Rich in healthy fats, protein, and fiber
Chia Seeds
High in omega-3s, protein, and fiber
Cinnamon
Antioxidant-rich spice with anti-inflammatory benefits
Enjoy the mix of creamy yogurt, crunchy granola, and fresh fruits. It’s a healthy breakfast that will keep you going all morning.
No-Bake Sweet Breakfast Ideas
Start your day with a sweet treat. These no-cook breakfasts are perfect for hot summer mornings or when you’re in a rush. They offer a refreshing change from traditional cooked breakfasts.
Try chilled breakfasts like overnight oats, yogurt parfaits, and chia puddings. They’re easy to make and full of nutrients. With ingredients like fresh fruit, nuts, and dairy, they’ll keep you energized all morning.
For a quick breakfast, try creamy overnight oats with berries, bananas, and honey. Or, make a colorful parfait with Greek yogurt, granola, and fruit. For a protein boost, make chia pudding the night before and top it with fruit in the morning.
These sweet breakfasts are not only tasty but also flexible. You can adjust them to your liking. Keep them ready for busy mornings, hot days, or whenever you need a quick, healthy start.
Make-Ahead Sweet Breakfast Casseroles
Mornings can be busy, but with some prep, you can enjoy tasty breakfast casseroles. Learn how to prepare them overnight and store them for busy days or weekend brunches.
Overnight Preparation Tips
Assembling your breakfast casserole the night before makes mornings easier. Here are some tips for a smooth overnight prep:
Fully assemble the casserole, including any fillings or toppings, in a baking dish. Cover tightly with foil or plastic wrap and refrigerate.
For custard-based casseroles, whisk together the egg mixture in a separate bowl and pour it over the other ingredients just before baking.
Avoid adding any crunchy toppings or streusel until just before baking, as they can become soggy if left overnight.
Storage and Reheating Guidelines
Proper storage and reheating ensure your casserole tastes great every time. Follow these guidelines:
Refrigerate the assembled, unbaked casserole for up to 2 days before baking.
Bake the casserole according to the recipe instructions, adding a few extra minutes if it’s been chilled.
Leftovers can be stored in the refrigerator for 3-4 days or frozen for up to 3 months.
To reheat, simply cover and bake in a 350°F oven until heated through, or microwave individual portions until steaming hot.
With these tips, making sweet breakfast casseroles is easy. Enjoy the convenience of overnight breakfast recipes and meal prep ideas to start your day off right.
Kid-Friendly Sweet Morning Treats
Start your little ones’ day off right with these delightful and nutritious sweet breakfast recipes. They are designed to appeal to children’s taste buds while still providing valuable vitamins and minerals. These kid-friendly morning treats are sure to make the whole family smile.
Fruity Yogurt Parfaits
Layer colorful sliced fruit, such as strawberries, blueberries, and bananas, with creamy yogurt and a sprinkle of granola. This makes for a balanced and satisfying breakfast. Kids will love the fun layers and variety of flavors in every bite.
Chocolate Chip Pancake Bites
Transform classic pancakes into bite-sized morsels by folding in chocolate chips. Serve these delectable pancake bites with a side of fresh fruit. This breakfast is sure to delight even the pickiest eaters.
Cinnamon Sugar French Toast Sticks
Cut French toast into easy-to-hold strips and toss them in a mixture of cinnamon and sugar. This makes for a sweet and crunchy breakfast treat. Dipping the French toast sticks in maple syrup or fruit compote adds an extra layer of flavor that kids will love.
Baked Oatmeal Cups
Bake individual portions of oatmeal in a muffin tin, adding mix-ins like fresh or dried fruit, nuts, and a touch of honey or maple syrup. These portable and customizable oatmeal cups make a nutritious and satisfying breakfast on the go.
By incorporating these kid-friendly sweet breakfast recipes into your family’s routine, you can ensure that everyone starts the day off on a delicious and wholesome note.
Special Occasion Sweet Breakfast Recipes
Make your mornings special with these sweet breakfast recipes. They’re perfect for holidays and birthdays. These dishes will make your celebrations unforgettable.
Holiday Breakfast Ideas
Begin your holiday season with these delicious breakfast recipes. Enjoy a French toast bake on Christmas or pumpkin spice pancakes on Thanksgiving. These ideas will fill your guests with holiday cheer.
Eggnog French Toast Casserole
Gingerbread Pancakes with Maple Cream Syrup
Cranberry Orange Breakfast Muffins
Peppermint Mocha Overnight Oats
Celebration Morning Menus
For birthdays or bridal showers, these menus will impress. Serve decadent pastries, fruity bowls, and pancake stacks. These dishes will make your celebration unforgettable.
Menu Item
Recipe
Lemon Blueberry Crepes
Thin crepes filled with a tangy lemon cream cheese and fresh blueberries.
Strawberry Cheesecake French Toast Bake
Thick slices of challah bread baked with a creamy cheesecake filling and fresh strawberries.
Raspberry Almond Breakfast Tarts
Buttery tart shells filled with a sweet raspberry jam and topped with a crumbly almond streusel.
Conclusion
In this article, we’ve looked at many sweet breakfast ideas. From quick meals to fancy French toast and homemade pancakes, we’ve got it all. This guide is full of sweet breakfast inspiration, morning meal ideas, and a big breakfast recipe roundup. It’s all here to make your mornings delicious.
There are recipes for healthy bowls and parfaits, and also for rich pastries and muffins. These recipes fit many tastes and diets. They’re easy to make, so you can enjoy a tasty start to your day.
Try out these morning meal ideas and see what you like. Find your favorite recipes and make them your own. Add something special to a classic or try a new twist. Enjoy the fun of sweet breakfast and make your mornings special.
FAQ
What are some quick and easy sweet breakfast recipes?
Our article has many sweet breakfast recipes ready in under 20 minutes. You’ll find quick tips, pantry essentials, and time-saving tricks.
Can you share some decadent French toast variations?
Yes! We dive into creative French toast recipes. From classic to unique flavors, we aim to make your breakfast special.
How can I make homemade pancakes with sweet toppings?
We show you how to make perfect buttermilk pancakes. Then, we share sweet topping ideas and make-ahead pancake mix tips.
What are some irresistible breakfast pastries and muffins I can make at home?
Our article has recipes for tasty homemade pastries and muffins. Enjoy flaky croissants and fruity muffins.
Can you recommend healthy sweet breakfast bowls and parfaits?
Certainly! We have healthy breakfast bowl and parfait recipes. Try yogurt and granola, fresh fruit, and wholesome toppings.
What are some no-bake sweet breakfast ideas?
Check out our no-bake sweet breakfast options. They’re perfect for hot days or when you’re in a rush.
How can I prepare make-ahead sweet breakfast casseroles?
Learn how to prep sweet breakfast casseroles overnight. We share storage tips and reheating advice for stress-free mornings.
Do you have any kid-friendly sweet morning treat recipes?
Yes, we have sweet breakfast recipes kids will love. They’re nutritious and fun, making mornings better for everyone.
What kind of special occasion sweet breakfast recipes can I find?
Find impressive sweet breakfast recipes for holidays and special days. From Christmas to birthdays, we’ve got you covered.
Imagine waking up to the enticing aroma of a freshly prepared curry. It’s bursting with aromatic spices and packed with nourishing ingredients. What if you could enjoy this flavorful delight without spending hours in the kitchen? Introducing a quick and healthy breakfast curry recipe that can be ready in just 15 minutes!
This protein-packed morning curry is not only a delightful way to start the day. It’s also a nutritious and convenient meal option. Infused with a blend of fragrant spices, fresh vegetables, and your choice of protein, this dish promises to energize and sustain you throughout the morning. Say goodbye to boring breakfast routines and hello to a vibrant, flavor-packed meal that will have you looking forward to your mornings.
Table of Contents
Key Takeaways
Prepare a healthy and flavorful breakfast curry in just 15 minutes
Enjoy a protein-packed meal that will energize you for the day ahead
Explore a unique and versatile breakfast option beyond the traditional
Discover the convenience of a quick and nutritious morning curry
Indulge in the aromatic blend of spices and fresh ingredients
But what exactly makes this breakfast curry so special? And how can you incorporate it into your daily routine? Dive into the following sections to uncover the secrets to this delightful and nourishing morning meal.
Why Start Your Day with a Breakfast Curry
Starting your day with a breakfast curry can change your health and productivity. This tasty dish gives you an energy boost and lots of morning nutrition benefits.
Nutritional Benefits of Morning Curry
Breakfast curries are full of vitamins, minerals, and antioxidants. Spices like turmeric, cumin, and coriander have anti-inflammatory properties. They also have protein from chickpeas or lean meats, keeping you full and happy in the morning.
Energy-Boosting Properties
Breakfast curries have complex carbs, healthy fats, and slow-releasing proteins. They give you energy all morning. This mix keeps your blood sugar stable, avoiding the energy crash after a carb-heavy breakfast.
Time-Saving Advantages
In today’s fast world, a quick breakfast is key. A curry-based meal can be ready in 15 minutes. It’s a great choice for busy mornings, letting you start your day right without losing time.
Looking to improve your morning routine? Try a delicious breakfast curry. It’s good for your taste buds and energy levels.
Essential Ingredients for Quick Morning Curry
Making a tasty breakfast curry is easy and quick. You just need the right curry ingredients. These include fragrant spices and healthy vegetables. Together, they make a delicious breakfast staple.
The base of a great curry is aromatic spices. You’ll need ground cumin, turmeric, coriander, and ginger. These spices add flavor and color. Onions and garlic are also key, giving a savory taste that goes well with the spices.
Ground cumin
Turmeric
Coriander
Ginger
Onions
Garlic
Adding fresh veggies like tomatoes, spinach, and bell peppers boosts nutrition and texture. These breakfast staples add color and important nutrients. They help start your day off right.
Tomatoes
Spinach
Bell peppers
If you want more protein, add chickpeas, lentils, or lean turkey. These quick recipe components make the curry more filling and healthy. They help you make a balanced breakfast curry fast.
Kitchen Tools You’ll Need
Making a tasty breakfast curry is easy with the right tools. You don’t need a lot of kitchen essentials. Just a few key items can help you make a delicious dish fast. Let’s look at the basic tools and some optional gadgets that can make your morning curry prep quicker.
Basic Equipment Requirements
To make a quick breakfast curry, you’ll need a few basic tools:
A sturdy saucepan or skillet for sautéing and simmering the ingredients
A sharp knife for chopping fresh herbs, vegetables, and spices
A cutting board to provide a stable surface for your knife work
Measuring cups and spoons to ensure accurate seasoning
A wooden spoon or spatula for stirring and scraping the pan
Optional Time-Saving Gadgets
While the basic tools work well, some gadgets can make things even faster:
A high-powered blender or food processor for quickly pureeing spices and herbs into a fragrant curry paste
An electric pressure cooker that can drastically reduce the simmering time for your breakfast curry
A rice cooker to prepare perfectly fluffy basmati rice, a classic accompaniment to the morning curry
With these kitchen essentials and optional cooking tools, you’re ready to make a tasty and time-saving breakfast curry at home.
Healthy Breakfast Curry Recipe Step-by-Step Guide
Ready to make a tasty and healthy breakfast curry in 15 minutes? Follow these simple steps. You’ll get a flavorful meal to start your day.
Gather your ingredients: diced onions, minced garlic, curry powder, canned diced tomatoes, coconut milk, baby spinach, and your favorite protein (like chicken, shrimp, or tofu).
Heat a large skillet or wok over medium heat. Add a tablespoon of oil and sauté the onions until they’re translucent, about 3-4 minutes.
Stir in the garlic and curry powder. Cook for another minute, until it smells great.
Pour in the canned diced tomatoes and coconut milk. Let it simmer for 5-7 minutes, so the flavors mix well.
Add your chosen protein and baby spinach. Cook for 3-4 minutes, until the protein is done and the spinach is soft.
Season with salt and pepper to taste.
Serve your healthy breakfast curry right away. Garnish with fresh cilantro or a squeeze of lime juice, if you like.
With these easy curry recipe instructions and cooking steps, you can make a nutritious and easy preparation breakfast curry. It will keep you energized and happy all morning.
Protein Options for Your Morning Curry
Protein is key for a balanced breakfast, and morning curry can be a great source. You can choose from vegetarian, non-vegetarian, or plant-based options. Each offers delicious and nutritious choices.
Vegetarian Choices
For a meat-free curry, try tofu or legumes. Firm tofu diced in the curry adds texture and plant-based protein. Chickpeas, lentils, or kidney beans also add protein, fiber, and carbs for energy.
Non-Vegetarian Alternatives
Animal-based proteins can also make your curry better. Eggs or lean meats like chicken or turkey add savory flavor and protein.
Plant-Based Substitutions
Plant-based options like tempeh or seitan are great for protein. Tempeh has a firm texture and nutty taste. Seitan, made from wheat gluten, feels like meat.
Protein Source
Nutritional Profile
Flavor and Texture
Tofu
High in plant-based protein, low in fat
Soft, smooth, and takes on the flavors of the curry
Legumes (chickpeas, lentils, kidney beans)
High in protein, fiber, and complex carbohydrates
Hearty, earthy, and add a satisfying texture
Eggs
High in protein and other essential nutrients
Creamy, rich, and complement the spices
Lean Meats (chicken, turkey)
High in protein, low in fat
Savory, tender, and provide a substantial mouthfeel
Tempeh
High in plant-based protein, fiber, and probiotics
Firm, nutty, and absorbs the flavors of the curry
Seitan
High in protein, low in fat
Chewy, meaty, and can mimic the texture of animal-based proteins
Adding different proteins to your curry makes it more nutritious and flavorful. Try various combinations to find your favorite.
Spice Blend and Seasoning Tips
Making the perfect spice blend is crucial for a great breakfast curry. The spices and seasonings you pick greatly affect the taste and smell of your dish. Here are some tips to make a spice blend that will excite your taste buds and kickstart your day.
Unlock the Power of Traditional Curry Spices
Curry powders mix spices like cumin, coriander, turmeric, and chili peppers. Each spice adds something special:
Cumin: It has an earthy, nutty taste and is full of antioxidants.
Coriander: It adds a citrusy flavor and fights inflammation.
Turmeric: It gives the curry a bright yellow color and is packed with health benefits.
Chili Peppers: They add heat and flavor, plus a vitamin C boost.
Using these spices, you’ll make a breakfast curry that’s not just tasty but also healthy.
Balance Flavors and Adjust Heat Levels
Finding the right balance in your spice blend is key. Start with a basic curry powder, then tweak the spice ratios to your liking. For a milder curry, use less chili peppers. For more heat, add more. The best spice blend is what you like, so experiment until you find it.
Mastering spice blending opens up a world of flavors. It lets you create a breakfast curry that’s hard to resist. Let your creativity shine in every bite.
Make-Ahead and Storage Instructions
Preparing parts of your breakfast curry ahead of time can save you a lot of time in the morning. Smart meal prep strategies make it easy to create a healthy and tasty meal quickly.
Meal Prep Strategies
Precook the rice or quinoa a day or two before. Just reheat it when you’re ready to make your curry. You can also chop veggies ahead of time and store them in the fridge for quick use. Plus, mix your spice blend ahead and keep it in an airtight container.
Proper Storage Methods
After making your breakfast curry, it’s important to store it right to keep it fresh and safe. Put leftovers in an airtight container and refrigerate for 3-4 days. For longer storage, freeze it for 2-3 months.
Reheating Guidelines
When reheating your leftover breakfast curry, make sure it’s hot all the way through. The best way is to reheat it on the stovetop over medium heat, stirring often. Don’t microwave it, as it can heat unevenly and lose texture.
Storage Method
Shelf Life
Refrigerator
3-4 days
Freezer
2-3 months
By using these make-ahead and storage tips, you can enjoy a nutritious breakfast curry any day. You won’t have to give up on taste or quality.
Customization and Dietary Modifications
This healthy breakfast curry recipe is very versatile. You can make it fit your dietary needs or personal taste. Let’s look at how you can change the recipe to make it your own.
Accommodating Dietary Restrictions
For those who need gluten-free or low-carb options, try cauliflower rice or zucchini noodles instead of basmati rice. If you’re allergic to nuts, skip the cashews or use sunflower seeds or roasted chickpeas. Vegans and vegetarians can use tofu, tempeh, or roasted veggies instead of eggs or chicken.
Spice and Flavor Adjustments
Customize the spice blend to your liking. For a milder taste, use less chili powder or cayenne pepper. Add red pepper flakes or sriracha for more heat. Try fresh cilantro or mint to add a fresh aroma.
Dietary Restriction
Modification
Gluten-Free
Use cauliflower rice or zucchini noodles instead of basmati rice
Low-Carb
Substitute basmati rice with cauliflower rice or zucchini noodles
Nut Allergy
Omit the cashews or replace with sunflower seeds or roasted chickpeas
Vegan/Vegetarian
Use tofu, tempeh, or a medley of roasted vegetables instead of eggs or chicken
Looking to meet dietary needs or just want to try something new? The options are endless. Get creative and make a dish that’s good for you and tastes great.
Serving Suggestions and Accompaniments
When serving your delicious breakfast curry, think about pairing it with different sides. This will make your meal complete and enjoyable. Try both classic and modern options to make your morning curry special.
Traditional Sides
Naan, a soft Indian flatbread, and basmati rice are perfect with breakfast curry. These traditional sides offer a nice contrast to the curry’s bold flavors. They make for a comforting and classic meal.
Modern Pairings
For something new, pair your curry with modern sides. Avocado toast is a great choice, with its creamy texture and nutty taste. Or, try a smoothie bowl with fruits and greens. It balances the curry’s spices and gives you energy for the day.
Traditional Curry Sides
Modern Breakfast Pairings
Naan
Avocado Toast
Basmati Rice
Smoothie Bowls
Raita (Yogurt Sauce)
Whole Grain Muffins
Chutney
Roasted Vegetable Medley
By trying both traditional and modern sides, you can make a breakfast curry that’s tasty and looks good. Experiment with different pairings to find the best match for your morning curry.
Common Recipe Mistakes to Avoid
Mastering the perfect breakfast curry is a rewarding challenge. It’s key to avoid common recipe pitfalls. Knowing the most frequent cooking errors helps you troubleshoot and achieve curry perfection easily.
Overspicing is a common mistake. While bold flavors are good, too much spice can overwhelm the dish. Start with small amounts of spices and add more to taste.
Another mistake is undercooking the curry. This can make it watery and unfinished. To fix this, follow the recipe’s cooking time and watch the consistency closely, adjusting the heat as needed.
Avoid overspicing the curry
Ensure the curry is simmered for the full recommended time
Adjust the heat as needed to maintain the desired consistency
Texture issues, like graininess, can also happen. This might be due to poor blending or not letting spices mix well. For a smooth texture, blend the curry base well before simmering.
Common Cooking Error
Troubleshooting Tip
Overspicing
Start with smaller quantities of spices and gradually increase to taste
Undercooking
Simmer the curry for the full recommended time and adjust heat as needed
Texture issues
Use a high-powered blender or immersion blender to purée the curry base
Avoiding these common mistakes and following the recipe will help you make perfect breakfast curry. With practice and these tips, you can improve your curry-making skills. Enjoy a delicious, flavorful start to your day.
Conclusion
This healthy breakfast curry recipe is quick and nutritious. It’s a great way to start your day with a protein-packed, energy-boosting meal. It only takes 15 minutes to make.
We’ve given you all the details you need to make a delicious curry. You can choose between a vegetarian or non-vegetarian option. This recipe is flexible to fit your dietary needs.
Try this healthy breakfast curry and mix up the spices and proteins. Find your favorite quick curry mix. Enjoy a tasty and healthy start to your day with this recipe.
FAQ
What are the main nutritional benefits of starting the day with a breakfast curry?
Breakfast curries are full of vitamins, minerals, and antioxidants. They give you energy that lasts and help keep you healthy. The spices and veggies add a nutritious start to your day.
How does a curry breakfast differ from traditional breakfast options in terms of energy-boosting properties?
Curries have carbs, protein, and fats that give energy slowly. This keeps you full longer and stops the midmorning crash. Unlike sugary or carb-heavy breakfasts, curries are a better choice.
What are the time-saving advantages of preparing a breakfast curry?
This quick 15-minute recipe lets you make a healthy meal fast. It’s perfect for busy mornings. The simple ingredients and quick prep make it a great choice for weekdays.
What are the essential ingredients needed to make a quick breakfast curry?
You’ll need spices like cumin, coriander, and turmeric. Add fresh veggies like onions, tomatoes, and spinach. You can also add eggs, tofu, or lean meats for extra protein.
What basic kitchen equipment is required to prepare the breakfast curry?
You’ll need a saucepan or skillet, a sharp knife, and a cutting board. Basic cooking tools are also a must. Using gadgets like a food processor can make prep even quicker.
How can I customize the breakfast curry recipe to suit my dietary needs or preferences?
You can make the recipe fit your diet by using plant-based proteins for veggie or vegan options. For low-carb, try cauliflower rice or zucchini noodles instead of grains.
What are some common mistakes to avoid when making the breakfast curry?
Avoid over-spicing, undercooking veggies, or not balancing flavors. Watch cooking times, adjust seasoning, and make sure all ingredients are cooked well. This will help you avoid mistakes and get a tasty curry.